

Working with sequin fabric can be intimidating, but you don't need to feel intimidated by its sparkly yet tricky nature. Whether you're creating a stunning evening gown or adding glamorous accents to home décor, the key lies in your initial approach to cutting this delicate material. With the right tools and techniques at your disposal, you'll prevent loose sequins, fraying edges, and uneven cuts that could compromise your project's professional finish. Let's explore the essential methods that will transform your sequin-cutting challenges into confident craftsmanship.
Key Takeaways
- Place sequin fabric face down and use sharp scissors or a fresh rotary blade to cut through one layer at a time.
- Remove individual sequins from seam allowances using a seam ripper to reduce bulk and ensure clean edges.
- Apply clear fabric stabilizer along raw edges immediately after cutting to prevent sequins from falling off.
- Cut between sequin rows when possible for cleaner results and fewer loose pieces.
- Use fabric weights to hold material steady while cutting, and mark measurements on the fabric's wrong side.
Preparing to Cut Sequin Fabric
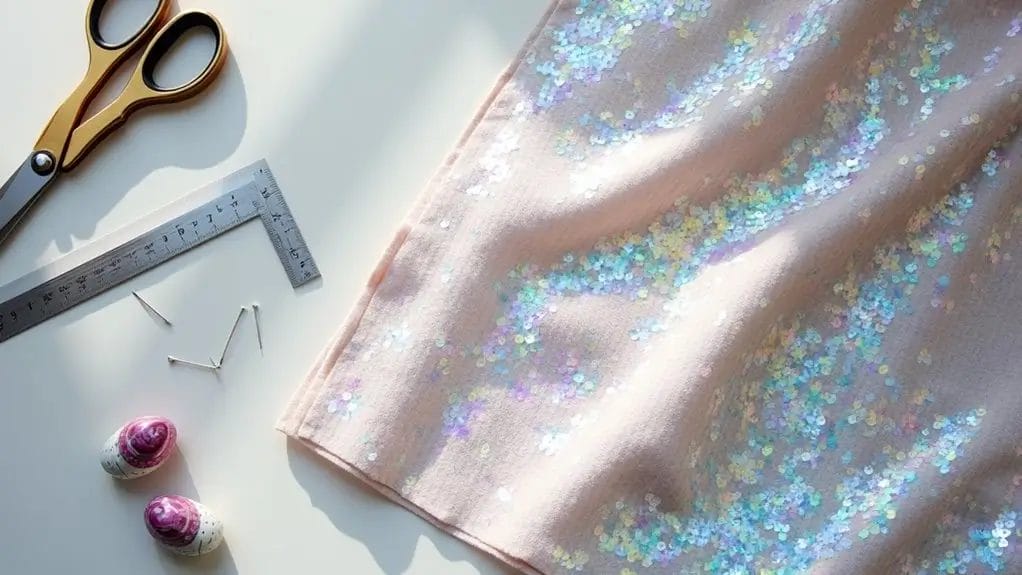
Before cutting your sequin fabric, you'll need essential tools including sharp scissors or a rotary cutter, fabric weights, and a reliable marking tool to guarantee precise measurements.
You'll want to carefully measure and mark your fabric while keeping the sequins facing downward vertically, using fabric weights to prevent shifting during the marking process.
Based on your project's requirements, determine whether you'll cut through sequin rows or between them, as this choice affects both your cutting method and the final appearance of your garment.
Necessary Tools
Success with sequin fabric starts with assembling the right tools for the job.
When you're ready to cut sequins, you'll need specialized tools to guarantee clean, precise cuts while keeping the sequins intact and properly aligned.
- Sharp fabric scissors or a rotary cutter with a fresh blade to slice through layers without snagging
- Sturdy fabric weights to keep your sequined material from shifting while cutting
- A clear marking tool that shows up on your fabric's backing
- A seam ripper for removing individual sequins in seam allowances
These necessary tools will help you achieve professional results when working with sequined fabrics.
Measuring and Marking the Fabric
With your tools ready, accurate measuring and marking will guarantee precise cuts in your sequin fabric.
Lay your fabric flat on a clean surface with sequins facing up, and use fabric weights to secure it. You'll want to mark your cutting lines on the fabric's reverse side to avoid damaging the sequins.
When measuring, account for seam allowances and carefully mark your dimensions using chalk or washable fabric markers. If you're working with a pattern, place it on the wrong side of the fabric and transfer your markings.
Double-check all measurements before proceeding to cut, as sequin fabric doesn't allow for easy corrections.
Choosing the Right Cutting Method
Selecting the right cutting method for sequin fabric makes the difference between clean edges and damaged materials. Before you begin cutting, mark seam allowance clearly and prepare a clean workspace to catch fabric scraps.
For intricate patterns, consider removing individual sequins along the cutting line to achieve precise results.
Cutting Techniques for Sequin Fabric
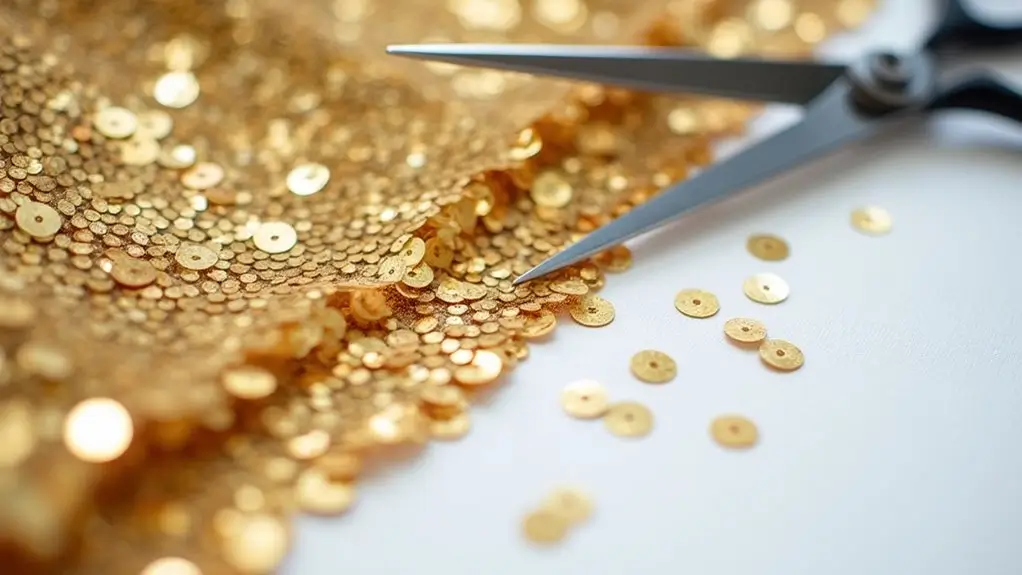
When cutting sequin fabric, you'll need to work one layer at a time using sharp scissors or a rotary cutter while keeping the sequins facing downward to prevent shifting.
You can achieve clean edges by placing fabric weights to secure the material and cutting precisely along marked lines, being careful not to snag or damage individual sequins.
For heavier sequined fabrics, you'll want to cut between sequin rows where possible, or carefully remove individual sequins along the cutting line using small scissors before making your final cut.
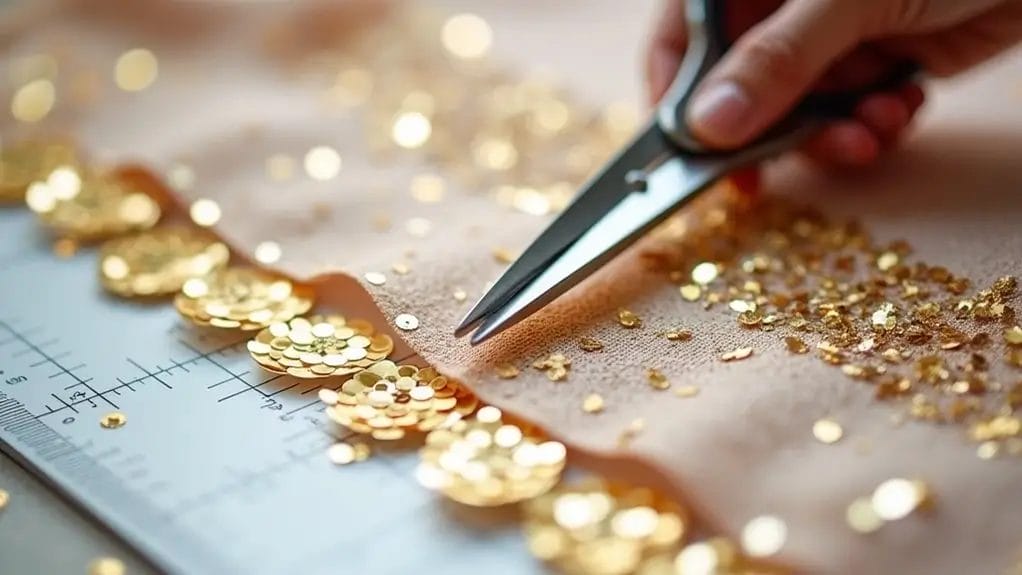
How to Cut Without Damaging Sequins
Cutting sequin fabric requires precise techniques to preserve both the fabric's integrity and the sequins' sparkle. When selecting sequin fabric for fashion design, it's essential to consider the color and pattern since these elements can significantly affect the overall aesthetic of a garment. Moreover, working with this type of fabric requires careful planning to ensure that the finished product reflects the designer's vision while maintaining the desired level of shine and movement. Ultimately, the right choice of sequin fabric can elevate a collection, making it stand out on the runway or at a special event.
You'll need sharp scissors or a rotary cutter, along with fabric weights to keep your material stable while working.
- Lay your fabric flat with sequins facing downward to cut through cleanly without snagging.
- Remove individual sequins along your cut line using small scissors before making the main cut.
- Position fabric weights every few inches along the edge to prevent shifting.
- Cut slowly through one layer at a time, ensuring your blade doesn't catch or pull on remaining sequins.
Best Practices for Clean Edges
Clean edges make the difference between professional-looking sequin garments and amateur results. When cutting sequined fabric, place weights to secure the material and mark your cutting lines clearly with fabric chalk.
Always cut through one layer at a time using sharp scissors or a rotary cutter. For the cleanest edge, remove individual sequins along the cutting line before making your cut.
If you're working with dense sequin placement, create a sequin-free border by carefully snipping away sequins that fall on your marked edge. This prevents bulk and guarantees your seams will lay flat when sewn.
Tips for Cutting Different Fabric Weights
Different weights of sequined fabric require specific cutting approaches to achieve ideal results.
When working with varying fabric weights, you'll need to adjust your cutting technique and tools accordingly to maintain clean edges and proper seam allowance.
- For lightweight sequined fabrics, use sharp scissors and minimal pressure while cutting, letting fabric weights hold the material steady.
- For medium-weight fabrics, employ a rotary cutter with firm, steady pressure and cut one layer at a time.
- For heavyweight sequined materials, mark your lines clearly and cut between sequin rows.
- For dense sequin placement, remove individual sequins along cutting lines before proceeding.
Securing Sequins During Sewing
You'll need to secure loose sequins by applying a thin layer of clear fabric stabilizer along raw edges before starting your seams.
To prevent shifting and maintain structure, fuse lightweight interfacing to areas requiring extra support, particularly around necklines and armholes.
For a professional finish that stops sequin loss, finish all raw edges with a tight zigzag stitch while incorporating a strip of seam binding or twill tape underneath.
Techniques to Make Sequins Stay Put
Securing sequins properly during the sewing process prevents unwanted shedding and maintains the garment's professional appearance.
Before you begin sewing your sequin fabric, follow these essential techniques to guarantee your sequins stay firmly in place:
- Apply a thin layer of clear nail polish along cut edges to seal loose sequins and prevent them from falling off.
- Stitch a reinforcement line 1/8 inch from the raw edge using a size 70 needle.
- Press seams open carefully with a pressing cloth to protect sequins from heat damage.
- Finish edges with a zigzag stitch, spacing stitches closely together to secure remaining sequins.
These methods will help create a professional, long-lasting garment that retains its sparkle.
Using Stabilizers and Interfacings
While proper stitching helps keep sequins in place, stabilizers and interfacings play an essential role in reinforcing your sequined fabric.
You'll need to select a lightweight fusible stabilizer that won't add bulk but will provide enough support to prevent stretching and distortion. Apply the stabilizer to areas where you'll be creating seams or need extra reinforcement.
For delicate sequined fabrics, use tear-away stabilizers along seam lines to prevent the fabric from tunneling under your presser foot. If you're working with stretchy sequined material, consider using a knit interfacing to maintain the fabric's natural flexibility while adding structure.
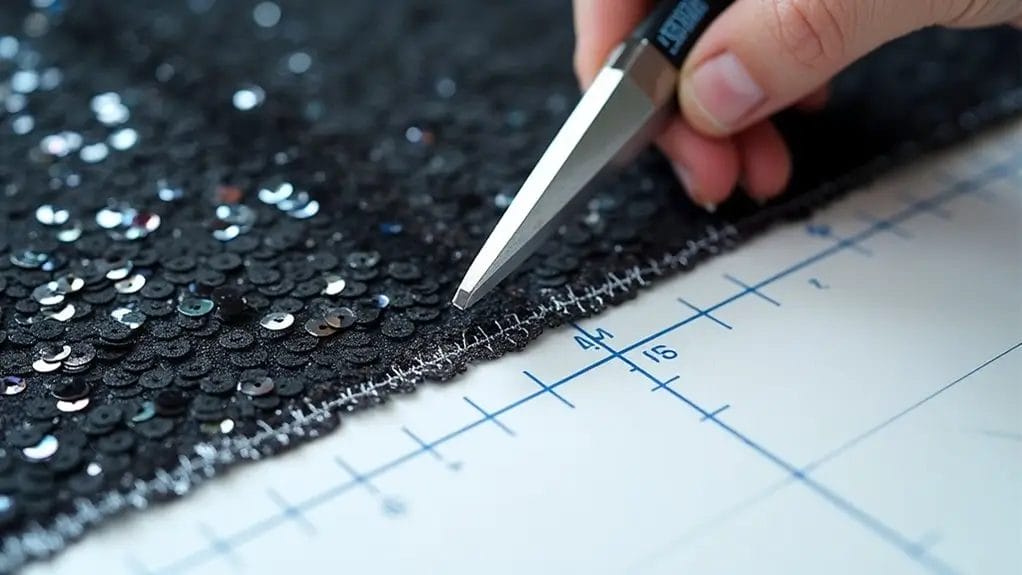
Finishing Edges to Prevent Fraying
Since sequined fabric tends to fray easily at the edges, proper finishing techniques are essential for both durability and professional results.
To secure your sequined edges effectively, you'll need to combine careful cutting and precise finishing methods.
- Remove sequins from your seam allowance using sharp scissors, then finish the raw edge with a zigzag stitch set at 2.5mm width.
- Apply a strip of lightweight fusible interfacing along the edge before stitching.
- Stitch between sequin rows using a size 70 needle, maintaining a consistent 2.5mm stitch length for secure edges.
Final Touches for Sequin Projects
When pressing your sequin fabric, you'll need to work from the wrong side using a pressing cloth and low heat to protect the sequins from melting.
For ideal display of your finished sequin project, store it flat or on a padded hanger to prevent the sequins from catching on other garments and maintain the fabric's pristine appearance.
Pressing Sequin Fabric
For successful pressing of sequin fabric, you'll need to take special precautions to protect both the sequins and your iron. Before pressing, remove any loose sequins and place your fabric sequin-side down on a plush towel.
- Set your iron to the lowest heat setting suitable for your fabric's base material.
- Place a pressing cloth between the iron and fabric's wrong side.
- Press gently without sliding the iron, using light pressure in an up-and-down motion.
- Allow the fabric to cool completely before moving it to prevent sequin warping.
Never press directly on sequins, as they can melt, scorch, or stick to your iron, ruining both the garment and your tool.
Finishing Techniques for a Professional Look
To achieve a truly professional finish on your sequin project, mastering the final touches can make the difference between a homemade look and designer-quality results.
Begin by removing sequins from your hemline to reduce bulk and guarantee comfort. Apply a zigzag stitch along cut edges rather than using a serger, which could damage the sequins.
When sewing your final seams, consider adding a quality lining like silk to prevent scratchiness against the skin. For extra stability in body-hugging designs, opt for a ponte knit lining.
Remember to treat your finished piece as dry-clean only to maintain its pristine appearance.
Displaying Your Finished Sequin Work
After completing your sequin project, proper display and storage techniques will protect your hard work and showcase its brilliance. Your sewing masterpiece deserves careful handling to maintain its comfort and sparkle.
- Display garments on padded hangers to prevent stretching and maintain shape, using tissue paper between folds.
- Store projects flat in acid-free boxes when not in use, avoiding direct sunlight that can fade sequins.
- Create breathing room between garments to prevent sequins from snagging neighboring items.
Consider using clear garment bags for extra protection while allowing your sequined creation to remain visible.
Frequently Asked Questions
Can I Use a Serger on Sequined Fabric Edges?
You shouldn't use a serger on sequined fabric as it can damage both the sequins and your machine. Instead, finish your edges with a zigzag stitch using a size 70 needle and long stitch length.
How Do I Remove Individual Damaged Sequins Without Affecting Others?
You'll need small scissors to carefully snip the individual threads holding the damaged sequin in place. Once cut, gently pull the sequin free and remove any remaining thread bits with tweezers.
What's the Best Way to Store Leftover Sequin Fabric?
Store your sequin fabric flat, wrapped in acid-free tissue paper, in a cool, dry place. Don't fold it as this can damage sequins. If you must roll it, keep sequins facing inward and use a cardboard tube.
Can Sequin Fabric Be Ironed Directly?
You shouldn't iron sequin fabric directly as it'll melt the sequins. Instead, press from the wrong side using low heat, a pressing cloth, and no steam. Always test on a small area first.
How Long Do Sequins Typically Last Before Falling Off?
If you've sewn your sequins properly, they'll last several years with proper care. However, you'll notice some natural shedding over time, especially in high-friction areas. Regular dry cleaning helps maintain sequin attachment.
Conclusion
When you've completed your sequin fabric cutting, double-check all edges for loose sequins and reinforce any weak spots with a clear stabilizer. Don't forget to clean your work area thoroughly, as stray sequins can damage other fabrics or get caught in future projects. Store your finished pieces flat, avoiding folding whenever possible, and use tissue paper between layers to prevent snags and maintain the sequins' integrity.
0 comments