

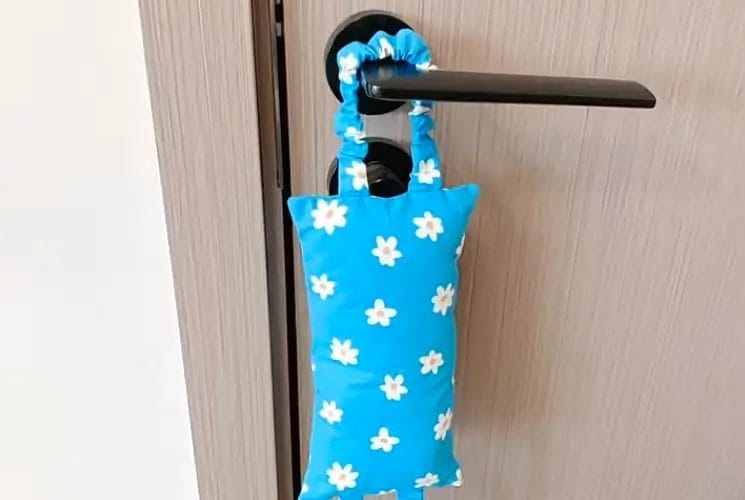
Creating a fabric door stop is a fantastic way to add a touch of personality to your space while serving a practical purpose. Whether you need to keep a door open or prevent it from slamming shut, a DIY door stop can be both functional and decorative. Now, I’ll guide you through the steps to make your own adorable fabric door stop. This project is simple and perfect for beginners, requiring minimal materials and sewing skills. Let’s get started!
Key Takeaways
- Ensure all materials are ready before starting the project to streamline the process.
- Use a consistent seam allowance and backstitch at the beginning and end for durability.
- Secure the elastic bands carefully to ensure they are well-anchored for functionality.
- Use the hidden stitch method for a professional-looking finish and to keep stuffing secure.
Materials Needed
Before we dive into the project, gather the following materials:
-
Fabric: Choose sturdy fabric for the exterior, such as cotton or canvas. You will need:
- 2 pieces measuring 20x12cm for the main body.
- 2 pieces measuring 27x6cm for the handles.
- Elastic bands: Two pieces measuring 18cm to create the handle.
- Filling: You can use beans or rice to add weight, or opt for polyester stuffing for a lighter option.
- Sewing machine or needle and thread: For sewing the door stop together.
- Scissors: To cut the fabric.
- Pins: To hold the fabric pieces together while sewing.
- Fabric marker: For marking cutting lines (optional).
How to Sew a Fabric Door Stop: Step-by-Step Instructions
Creating your own fabric door stop involves a series of straightforward yet essential steps that guide you from gathering materials to completing a functional and decorative item.
Step 1: Create the Handles
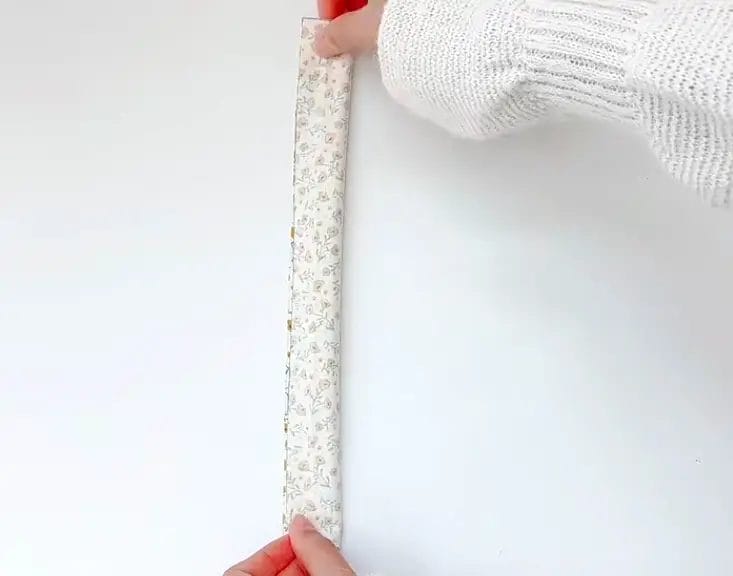
Begin by preparing the handles for your door stop.
Take one piece of the 27x6cm fabric and fold it in half lengthwise, so the right sides are together. This will create a long strip.
Use your sewing machine to sew along the long edge with a seam allowance of 0.5cm. Be sure to backstitch at the beginning and end for durability.
After sewing, gently turn the fabric right side out. You can use a pencil or a chopstick to help push out the corners. This creates a neat handle for your door stop.
Follow the same process to create the second handle using the other 27x6cm piece of fabric.
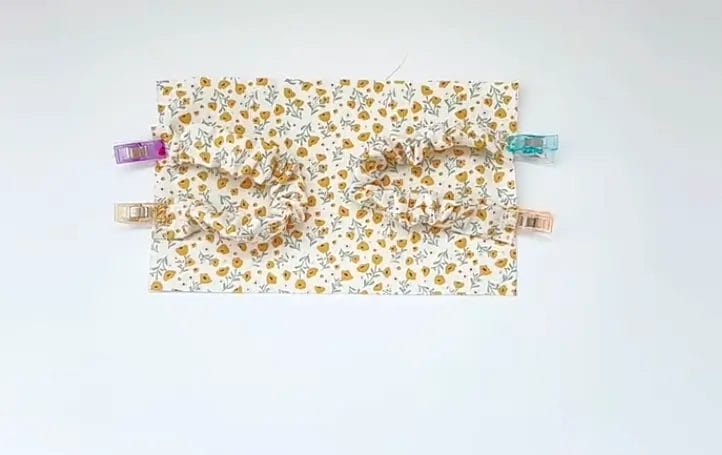
Step 2: Attach the Elastic Band

Next, take one of the elastic bands and thread it through the fabric you just prepared.
Clip both ends of the elastic band to the unsewn ends of the fabric to keep them secure.
Once in place, sew the ends of the elastic band to the fabric, ensuring they are tightly anchored. Repeat this process for the second handle.
Step 3: Assemble the Door Stop
Now you can assemble your door stop. Lay one piece of the 20x12 cm fabric right side up on your work surface.
Align the ends of the handles with the edges of this fabric piece and secure them with clips.
Next, place the second piece of 20x12 cm fabric on top, ensuring that the right sides are facing each other.
Step 4: Sew the Edges
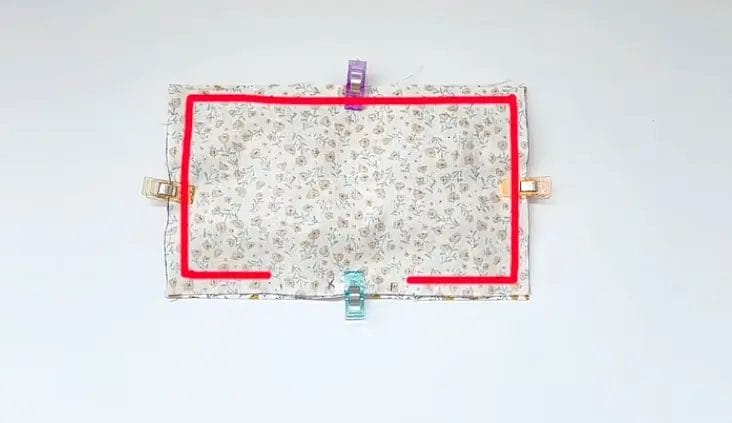
With the fabric pieces secured, it’s time to sew the two fabric pieces together.
Using your sewing machine, sew around the edges of the fabric, leaving an opening on one side for turning and filling. Make sure to maintain a consistent seam allowance throughout.
Before moving on, double-check that you’ve sewn securely around the edges and that you’ve left enough space at the opening for turning.
Step 5: Turn and Fill
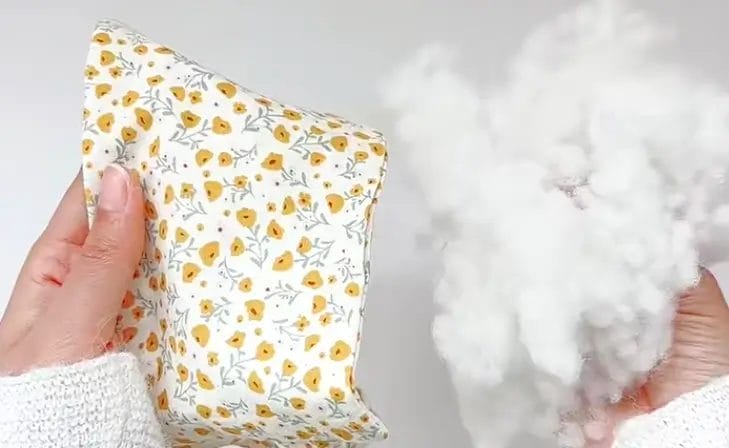
Now it’s time to turn your door stop right side out and add weight.
Reach through the opening and gently turn the fabric right side out. Use a pencil or chopstick to push out the corners for a crisp finish.
Decide how heavy you want your door stop to be. If you prefer a heavier doorstop, fill it with beans or rice. If you want it to be lighter, use polyester stuffing. Fill it until it reaches the desired firmness, distributing the weight evenly.
Step 6: Close the Opening
Once the door stop is filled, it’s time to finish it off.
Use a slip stitch or the hidden stitch method to sew the opening closed. This will secure the filling inside and give your door stop a neat finish.
Ensure that the seams are well-sewn and that the filling is properly distributed. Your door stop should now be in its final shape.
Conclusion
You have successfully created your own fabric door stop! This cute accessory not only adds a decorative touch to your room but also serves a practical purpose by keeping your doors open or shut. Feel free to experiment with different fabrics, colors, and patterns to match your home decor or personal style. Making a door stop can also be a great gift idea for friends and family who might like a handmade touch in their homes.
FAQ
Can I use different fabric types for this project?
Yes, feel free to choose any fabric that suits your style, but make sure it is durable enough for a door stop.
What can I use to fill the door stop?
Cotton is a great option, but you can also use rice, beans, or other stuffing materials for added weight.
How do I ensure my seams are straight?
Use a ruler or measuring tape to guide your sewing, and consider using pins to hold the fabric in place while sewing.
Can I make this door stop larger or smaller?
Absolutely! Just adjust the dimensions of the fabric pieces while maintaining the proportions for the handles and elastic bands.
0 comments