

Square scrunchies are a trendy and stylish alternative to traditional round scrunchies. Their unique shape adds an elegant touch to your hairstyle, making them a popular accessory for casual and formal looks alike. Best of all, making your own square scrunchie is easy and fun, allowing you to customize fabric choices, lace trims, and elastic sizes to create personalized hair accessories. I will guide you step-by-step through the process of making a beautiful square scrunchie. Whether you are a beginner or have some sewing experience, this project is perfect for adding a handmade touch to your accessory collection.
Key Takeaways
- Fabric Choice Matters: Light to medium-weight cottons or blends work best for structure and comfort.
- Lace Trim Adds Elegance: Sewing lace around edges gives a delicate and stylish finish.
- Accurate Marking Ensures Precision: Using a circular template and marking diagonals helps sew perfect curves.
- Corner Sewing Technique: Properly pivoting at corners creates neat lace mitering.
- Elastic Insertion: Leaving an opening for elastic threading makes assembling easier.
- Customization: Experiment with different fabrics, trims, and elastic colors for unique looks.
Materials Needed
- 2 pieces of fabric, each 30 cm x 30 cm
- 145 cm of lace trim
- 18 cm elastic band
- Circular paper template with a diameter of 10 cm
- Sewing machine
- Pins or sewing clips
- Fabric chalk or pen
- Scissors
- Iron
How to Make Square Scrunchies: DIY Tutorial
Step 1: Prepare the Fabric
Start by cutting two square fabric pieces measuring 30 cm by 30 cm each. Make sure the fabric is ironed flat before beginning your work.
Step 2: Mark Circles on One Fabric Piece

Take one piece of fabric and place it wrong side up (back side facing you). Using fabric chalk or pen, draw two diagonal lines from corner to corner to find the center point of the square.
Place your 10 cm diameter circular paper template so that its center aligns exactly with the intersection of these diagonal lines. Trace around the circle's edge onto the fabric to mark a perfect circle.
Step 3: Sew Lace Trim Around Square Edges
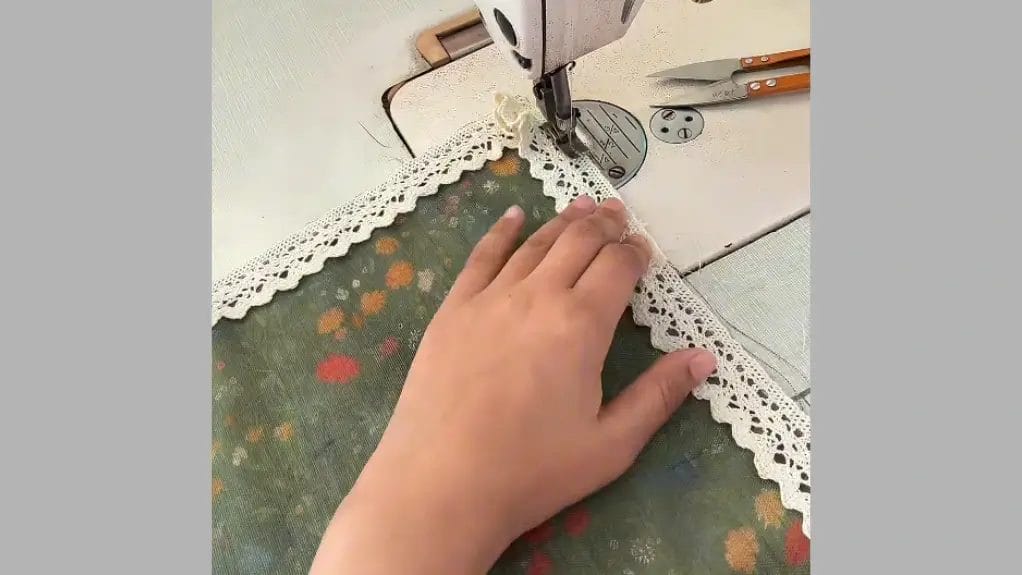
Turn this fabric piece right side up. Lay your lace trim along all four edges of the square fabric.
Starting at one corner, pin or clip the lace in place. When sewing the lace trim onto the fabric edges, pay special attention to the corners:
- For neat corners, sew the lace straight along one edge towards the corner.
- Stop sewing exactly at the corner point.
- Pivot the fabric and lace 90 degrees.
- Continue sewing along the next edge.
This technique creates clean mitered corners where the lace meets seamlessly.
Sew all four sides until the lace trim is securely attached.
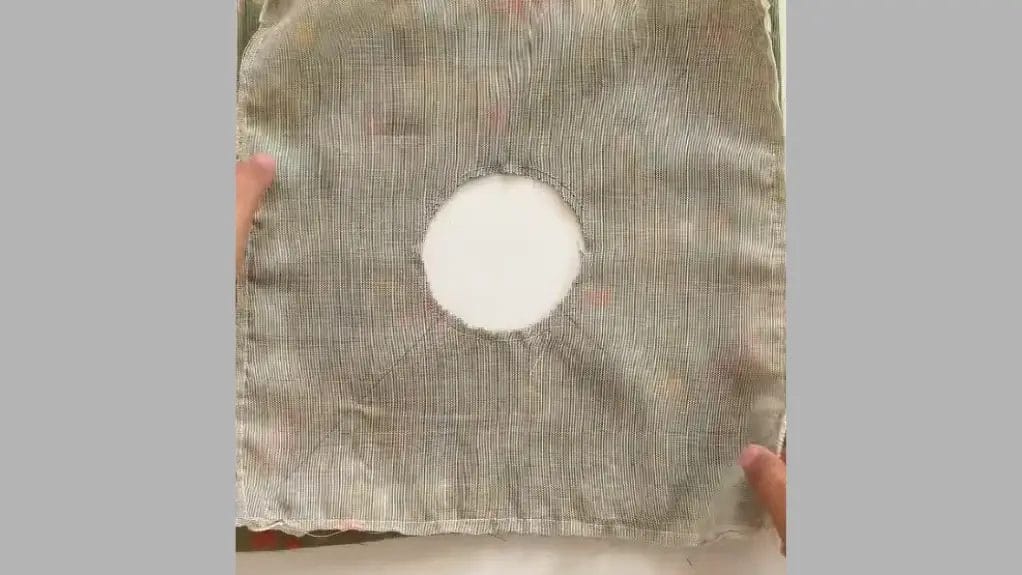
Step 4: Sew Fabric Pieces Together Along Marked Circle
Take the second piece of fabric and place it right sides together with the lace-trimmed piece, aligning edges.
Using the circle mark on the first fabric as your guide, sew along this circular line, joining both fabrics precisely on this curve.
After sewing, carefully cut out the center circle from both layers along the sewn line, leaving a small seam allowance and being careful not to cut through your stitches.
Step 5: Turn Fabric Right Side Out Through Center Opening
Pull the fabric through the circular hole to turn it right side out. The right sides of both fabrics should now be facing outward.
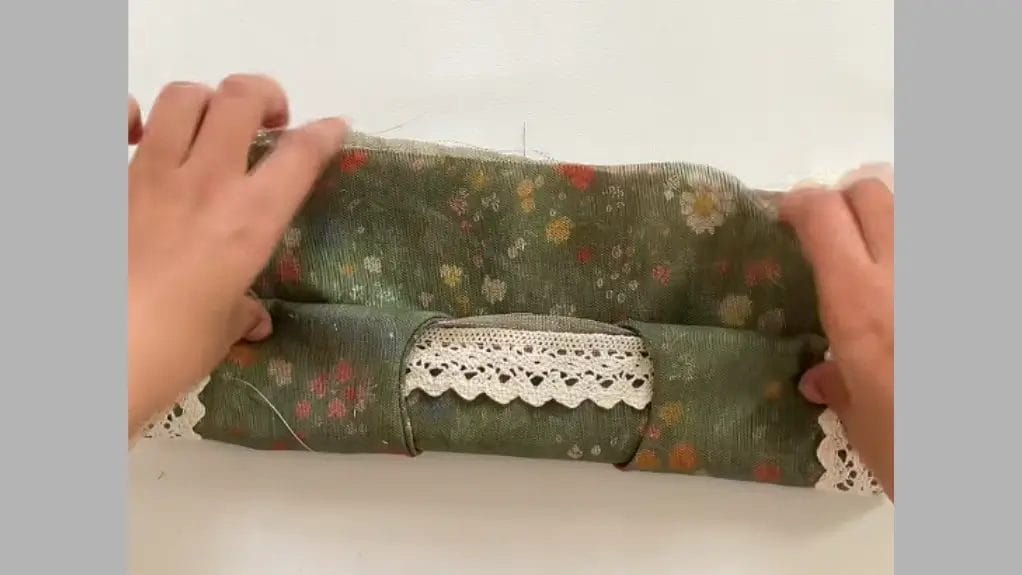
Step 6: Fold and Sew Outer Edges Leaving Opening for Elastic
Fold the entire fabric square from bottom upwards, then fold again at the top so that the two folded edges meet.
Make sure the folded fabric layers are aligned evenly. Sew along all four edges to form a neat square scrunchie body — but leave about a 4 cm opening unsewn on one side for turning later and inserting elastic.
Important: Avoid sewing into any fabric that has been folded inward; only sew layers that lie flat together.
Step 7: Turn Scrunchie Right Side Out and Insert Elastic
Turn your scrunchie right side out through the opening you left. Carefully push out and shape all four corners so that the scrunchie has a crisp square shape.
Using a safety pin attached to one end of your elastic band, thread it through the fabric tube inside the scrunchie. Once threaded fully around, tie a secure knot in the elastic ends.
Step 8: Close Opening and Final Press
Hand sew or machine stitch the opening closed using hidden stitches for an invisible finish.
Give your scrunchie a final press with an iron (if your fabric allows) to smooth out edges and enhance its shape.
Your beautiful square scrunchie is now complete!
Frequently Asked Questions (FAQ)
Can I use stretchy fabric for my square scrunchie?
Stretchy fabrics can be used, but lightweight woven fabrics like cotton are easier to work with and hold shape better for this project.
How do I make sure my lace corners look neat?
Sew up to each corner point, pivot your fabric and lace 90 degrees without cutting thread, then continue sewing along next edge for clean mitered corners.
What size elastic should I use?
An elastic band about 18 cm long works well for most wrist sizes. Adjust length if you prefer tighter or looser scrunchies.
Can I skip adding lace trim?
Yes! You can sew the scrunchie without lace for a simpler look or add other trims like ribbons or piping according to your style.
Can I wash my finished scrunchie?
Most fabric scrunchies can be hand washed gently in cold water. Check care instructions for your specific fabric choice.
Final Thoughts
Making your own square scrunchies is a delightful way to personalize your hair accessories while honing sewing skills. With just a few materials and simple techniques, you can create beautiful, functional pieces perfect for gifting or personal use. Enjoy crafting your unique scrunchies and experimenting with different fabrics and trims!
Happy sewing!
0 comments