

If you're looking for a charming DIY project that'll bring a touch of whimsy to your home, you can't go wrong with a fabric cloud ornament. You'll love how this simple craft transforms basic materials into something magical. The best part? You don't need advanced sewing skills to create this adorable decoration. With just a few supplies and some basic stitching, you'll discover how a fluffy cloud can float right into your crafting repertoire.
Key Takeaways
- Draw and cut a gentle cloud shape template around 5-6 inches wide with rounded bumps on top for natural proportions.
- Cut two identical cloud shapes from white cotton fabric using sharp scissors and the template as a guide.
- Sew the fabric pieces together with right sides facing inward, leaving a small opening for stuffing.
- Fill the cloud with soft polyester fiberfill, distributing evenly to maintain cloud-like curves and fullness.
- Close the opening with neat stitches, attach a hanging loop, and add optional decorative elements like beads or embroidery.
Materials Needed
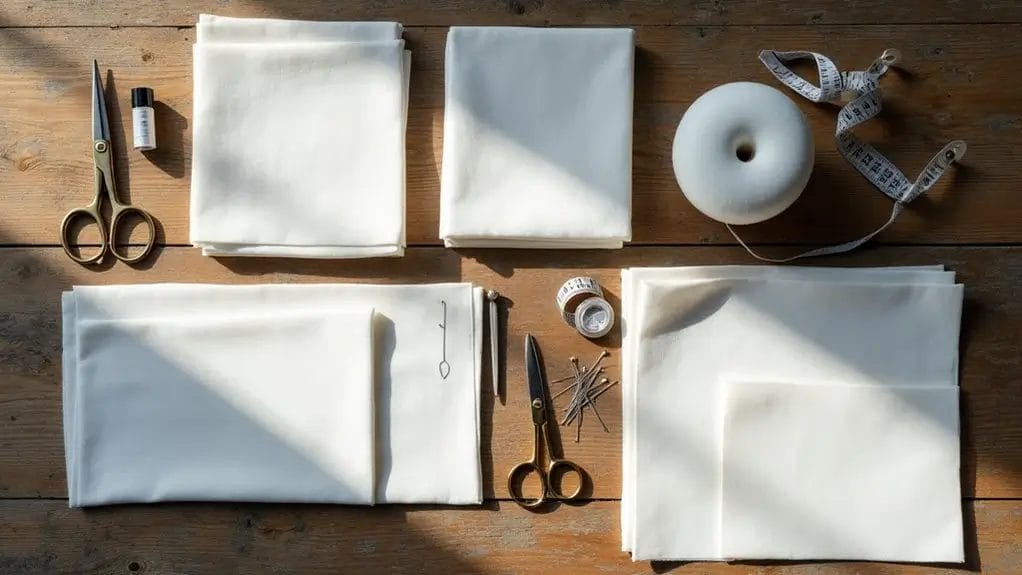
You'll need a few basic supplies to create your charming cloud ornament, starting with several pieces of white cotton fabric that will form the cloud's fluffy exterior.
To give your cloud its soft, pillowy shape, you'll want to gather plenty of cotton filling material, along with a sturdy needle and strong thread for assembly.
Don't forget a sharp pair of scissors to cut your fabric pieces into the perfect cloud-like shapes.
Several Pieces of White Cotton Fabric
To create your charming fabric cloud ornament, you'll need several pieces of crisp white cotton fabric.
Soft Cotton Filling
Soft polyester fiberfill serves as the ideal stuffing material for your cloud ornament, providing the perfect balance of loft and squishiness.
You'll need approximately 1-2 handfuls of filling to create that cozy, cloud-like appearance. Be certain to select high-quality fiberfill that's designed specifically for craft projects - it'll maintain its shape better over time.
Needle and Thread
A sharp needle and sturdy thread form the essential foundation for crafting your fabric cloud ornament. You'll need a medium-sized sewing needle with an eye large enough to accommodate strong white thread.
For best results, select all-purpose polyester thread, as it's durable and won't snap easily while you're working.
Scissors
Sharp fabric scissors make all the difference when creating your cloud ornament!
You'll want a pair of scissors specifically designated for fabric cutting to guarantee clean, precise edges that won't fray. When you make your cloud, dull scissors can snag or tear the material, compromising your final design.
How to Make A Fabric Cloud Ornament

You'll start by creating a cloud template on paper and cutting two matching cloud shapes from white cotton fabric.
Next, you'll place the fabric pieces right sides together, sew around the edges while leaving a small opening, and then turn the cloud right side out through the opening.
Finally, you'll stuff your cloud with soft cotton filling until it reaches your desired plumpness, making sure to get the stuffing into all the curved areas before closing up the final seam.
Step 1: Draw the Outline of a Cloud on Paper as a Template
Creating your cloud template begins with a simple sketch on standard printer paper or cardstock. Draw a gentle, rounded shape that captures the soft, billowy essence of a DIY cloud ornament.
Your template will guide your fabric cutting, so take care to make it just the right size for hanging.
- Make the cloud about 5-6 inches wide for ideal ornament proportions
- Draw smooth, curved bumps along the top edge to create classic cloud puffs
- Keep the bottom slightly flatter than the top for a natural cloud appearance
- Round off all corners to avoid sharp angles
- Draw the shape in one continuous, flowing line
Step 2: Cut Two Cloud Shapes from the White Cotton Fabric
With your paper template ready, lay out your white cotton fabric on a flat, clean surface and pin the cloud pattern securely in place.
Using sharp fabric scissors, carefully cut around the template, keeping your cuts smooth and even. For this delightful DIY tutorial, you'll need to repeat this process to create two identical cloud shapes.
Make certain you're cutting through a single layer of fabric at a time for the most precise results.
Double-check that both pieces match perfectly by laying them on top of each other. If needed, trim any uneven edges to guarantee your cloud ornament will look professionally crafted.
Step 3: Align the Two Pieces of Fabric with the Right Sides Facing Each Other
The next essential step in your cloud ornament journey involves carefully aligning your two freshly-cut fabric pieces. Your new cloud shapes need to be positioned with their right sides facing inward, creating a material sandwich that'll form the ornament's exterior when turned right-side-out later.
- Feel the smooth, finished side of each fabric piece with your fingertips
- Match up the curved edges precisely, creating perfect cloud-like bumps
- Check that no corners are folded or tucked under
- Verify both pieces are wrinkle-free and lay completely flat
- Hold the aligned pieces firmly together to prevent shifting
Step 4: Sew Along the Edges, Leaving a Small Opening
Now that your fabric pieces are perfectly aligned, it's time to secure your cloud design with some careful stitching.
Starting at one end, sew about 1/4 inch from the edge, following your traced outline. Keep your stitches even and steady as you work your way around the cloud shape.
Remember to leave a 2-inch opening along one of the straight edges - you'll need this to turn your cloud pillow right side out and add stuffing.
Double-check that you've secured all other edges completely. If you're using a sewing machine, consider backstitching at the start and end points for extra strength.
Step 5: Fill the Cloud with Soft Cotton
Gently turn your cloud right-side out through the opening you left, using your fingers to push out all the corners and curves until they're smooth and well-defined.
You'll love how your cloud is taking shape! Now it's time to give your cloud the perfect fullness.
- Use small tufts of cotton batting, gradually stuffing them into the cloud shape
- Push the cotton into all corners using a pencil or chopstick
- Add more filling to create plump, fluffy sections
- Distribute the cotton evenly to avoid lumps
- Keep checking the shape as you stuff to maintain cloud-like curves
Step 6: Close the Opening and Decorate
Finally, you'll transform your stuffed cloud into a polished ornament by closing the opening and adding decorative touches.
Use small, neat stitches to hand-sew the opening closed, making sure the seam blends seamlessly with the rest of your cloud.
Add a hanging loop by threading blue ribbon through the top of your cloud, securing it with a strong knot.
For extra sparkle, stitch small silver beads along the cloud's edges or add embroidered details like raindrops. You can even attach tiny felt rainbows or stars.
Now step back and enjoy your handmade cloud ornament - it's ready to brighten any space!
Frequently Asked Questions
How Long Does the Fabric Cloud Ornament Typically Last?
Your fabric cloud ornament will last for years if you keep it clean and dry! With proper storage and gentle handling, it'll remain a charming decoration you can enjoy season after season.
Can I Use a Sewing Machine Instead of Hand-Stitching?
Yes, you can definitely use a sewing machine! It'll make the process faster and create more uniform stitches. Just be careful when maneuvering curves and make sure you're using the right stitch length.
Will the Ornament Hold Its Shape if Hung Outdoors?
You'll want to keep your cloud ornament indoors, as rain and wind can damage the fabric and stuffing. If you'd like outdoor decor, try weather-resistant materials like plastic or treated fabrics instead.
What's the Best Way to Clean the Fabric Cloud Ornament?
You'll want to spot clean your cloud with a damp cloth and mild soap. Don't submerge it in water! For dusty clouds, try using a soft brush or vacuum with gentle suction.
Can I Make the Ornament Larger or Smaller Than the Pattern?
Yes, you can easily scale the pattern up or down! Just make sure you're adjusting all pieces proportionally and using the same seam allowances to maintain the cloud's shape and fullness.
Conclusion
You've created an adorable cloud ornament that'll brighten any space! Don't forget to add your personal touch with embroidered details, sequins, or even a sweet face. Whether you're hanging it in a nursery, gifting it to someone special, or decorating for the holidays, your handmade cloud will bring a whimsical charm to any setting. Display your crafty creation proudly - you've made something truly special!
0 comments