

You'll love creating this charming heart-shaped card holder that transforms your fabric scraps into something both beautiful and practical. Whether you're looking for a unique way to organize your cards or want to craft a thoughtful handmade gift, this project offers the perfect blend of creativity and functionality. Don't let the elegant design fool you - with some basic sewing skills and the right materials, you can complete this lovely accessory in just a few simple steps.
Key Takeaways
- Create a heart template by folding cardstock in half and cutting a symmetrical heart shape.
- Trace the heart pattern onto fabric pieces using fabric chalk or pen.
- Sew around the heart outline and cut out the heart center.
- Attach a fabric strip as a hanging strap and finish with optional embellishments like buttons or decorative stitching.
Materials Needed
You'll need 4 pieces of fabric in your chosen colors - 2 for the exterior and 2 for the lining.
Get your hands on a heart template, along with basic sewing tools including scissors, pins, and a sewing machine.
Don't forget to gather thread that matches your fabric, a marking pen or chalk, and an iron for pressing your seams.
- Fabric: 2 pieces of outer fabric (10x13cm), 2 pieces of lining fabric (10x13cm), 1 piece of fabric for the hanging strap (4x6cm)
- Heart template: A heart shape with a diameter not exceeding 5cm
- Sewing tools: Needle and thread or sewing machine, scissors
Step-by-Step Instructions
You'll create a beautiful heart-shaped card holder by following these essential steps, starting with preparing and tracing your template.
Next, you'll carefully sew along the heart's outline and remove its center to create the hollow design that makes this project unique.
Finally, you'll flip the lining fabric to give your card holder a polished, professional finish that's perfect for holding your precious cards and notes.
Step 1: Prepare the Heart Template
Begin by creating a heart-shaped template. The diameter of the heart should not exceed 5cm. You can easily draw this on a piece of cardstock or thick paper. This template will be used to trace the heart shape onto your fabric, ensuring uniformity in your design.
Step 2: Trace the Heart Outline
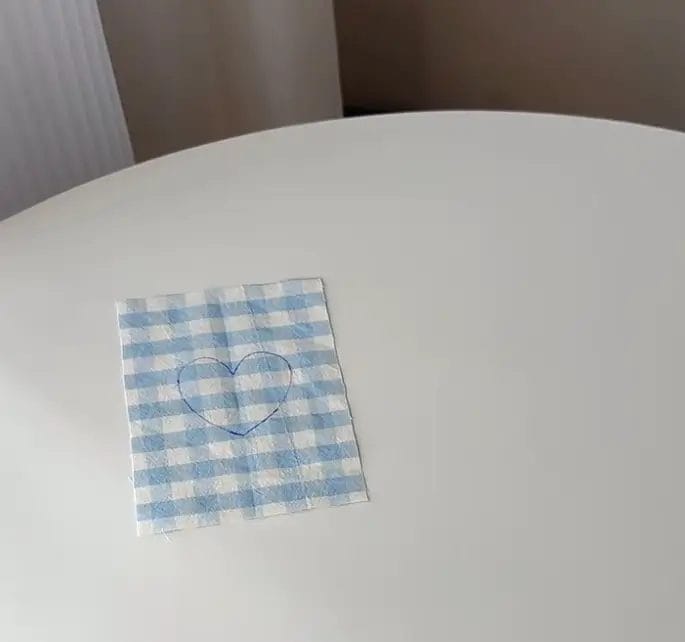
Once your template is ready, take one piece of lining fabric and center the heart template on it. Use a pen or fabric marker to trace around the outline. Make sure the outline is clear and visible, as this will guide your sewing later on.
Step 3: Sew the Heart Shape
Now, take one piece of outer fabric and align it with the lining fabric that you have just traced.
Pin the two fabrics together to prevent them from shifting while you sew.
Using your sewing machine or needle and thread, sew along the traced heart outline. This stitching will create the shape of your hollow heart.
Step 4: Cut Out the Heart Center
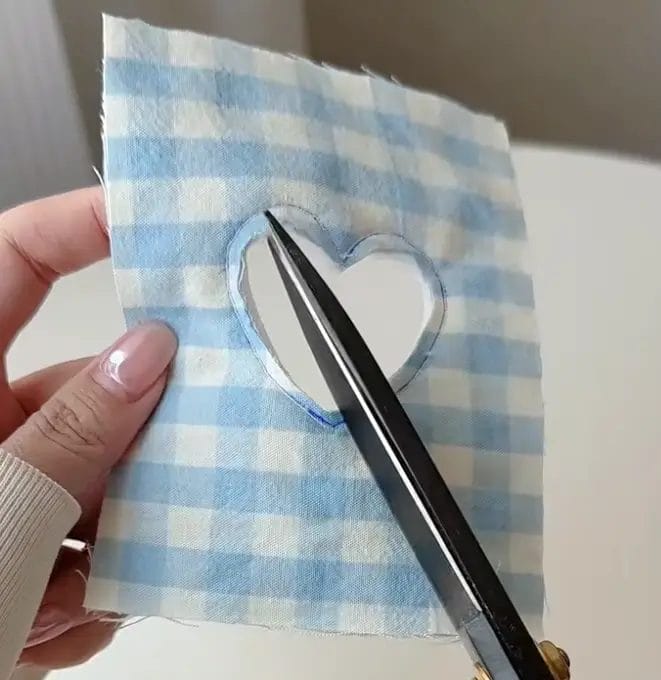
Carefully cut out the fabric inside the heart shape you just sewed. This is where the magic happens!
As you cut, consider creating a scalloped edge along the heart's border for a decorative touch. This not only adds flair but also enhances the overall design of your card holder.
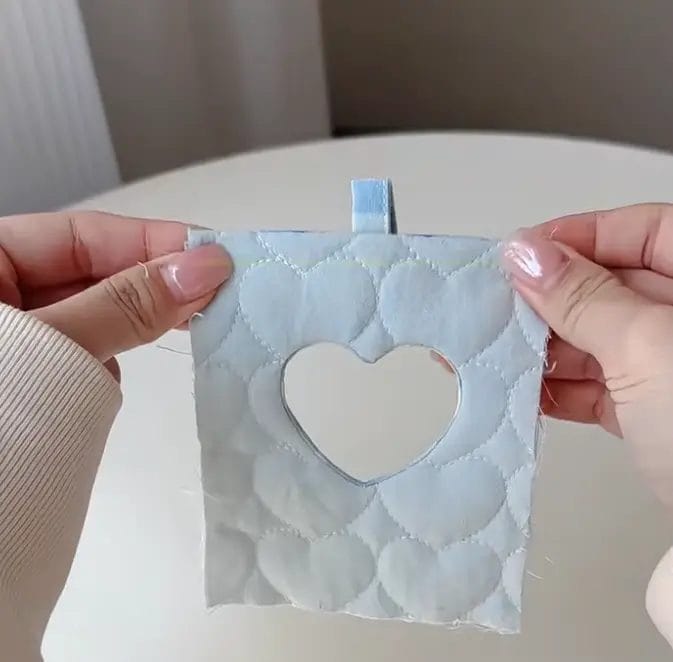
Step 5: Flip the Lining Fabric
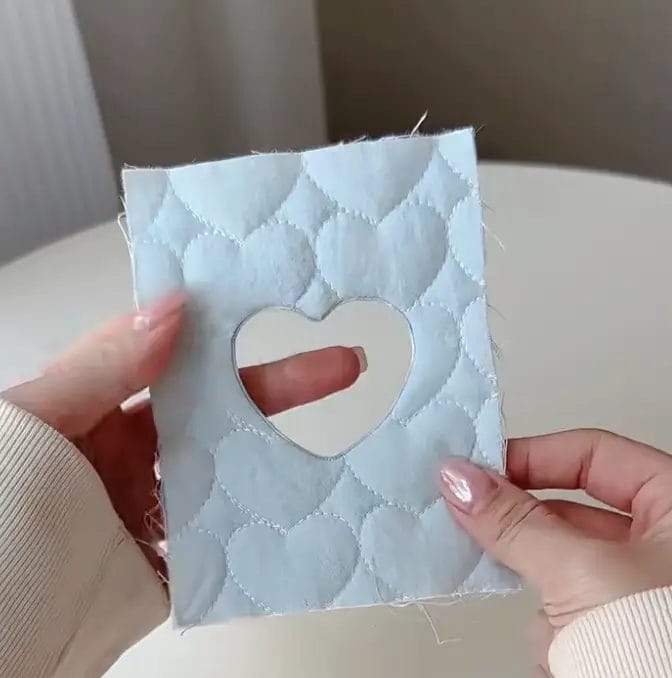
With the heart shape now cut out, it’s time to turn the lining fabric to the back side. This step reveals the hollow heart design, showcasing the beautiful contrast between the outer fabric and the lining.
Step 6: Create the Hanging Strap
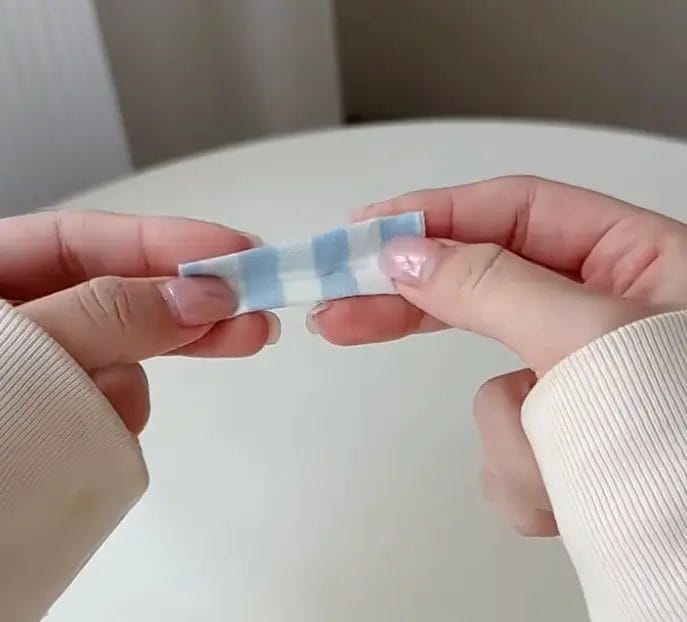
Next, take the 4x6cm piece of fabric and fold it to create a hanging strap.
This strap will allow you to hang the card holder where it’s easily accessible, making it not just a decorative item but also a practical one.
You can choose to sew the strap or simply fold it and press it with an iron to hold the shape.
Step 7: Assemble the Card Holder
Now, it’s time to put everything together.
Fold both layers of fabric inward by 1cm. This will create a clean edge for the card holder.
Take the folded strap and insert it between the two layers of fabric, positioning it 0.5cm from the edge. Pin it in place and sew to secure everything together.
Step 8: Attach the Remaining Fabric Pieces
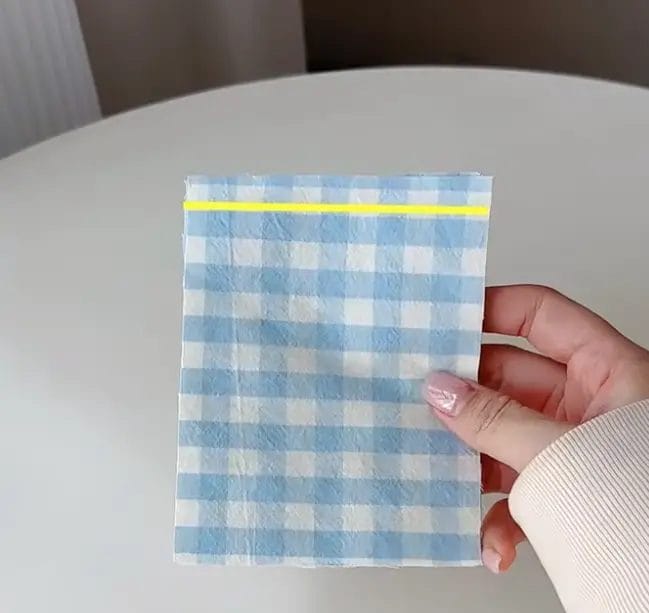
Take the two remaining pieces of outer and lining fabric and align them so that they are facing each other.
Sew along the shorter side, approximately 1cm from the edge.
Once done, flip this piece right side out. Press a line 0.5cm from the edge to create a neat finish.
Step 9: Final Assembly
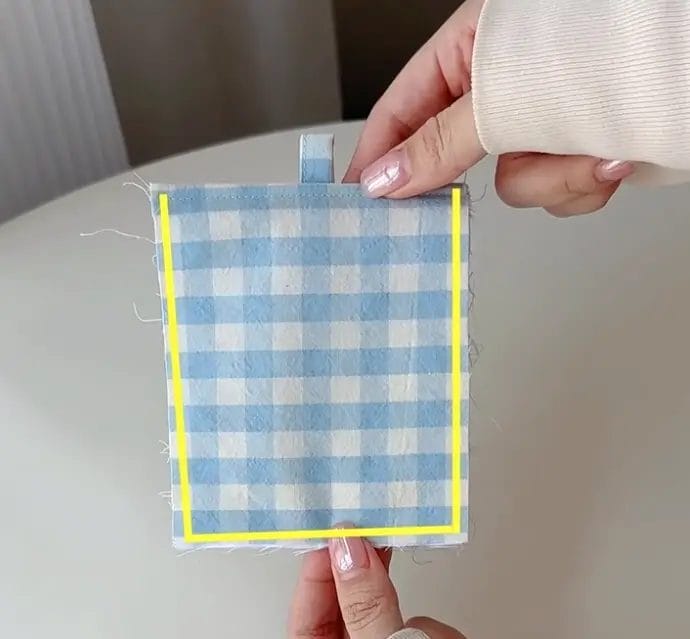
Align the prepared fabric pieces and sew them together, keeping a distance of 0.5cm from the edge. This will create the main body of your heart hollow card holder, allowing it to hold cards securely while maintaining that lovely heart shape.
Step 10: Trim and Finish
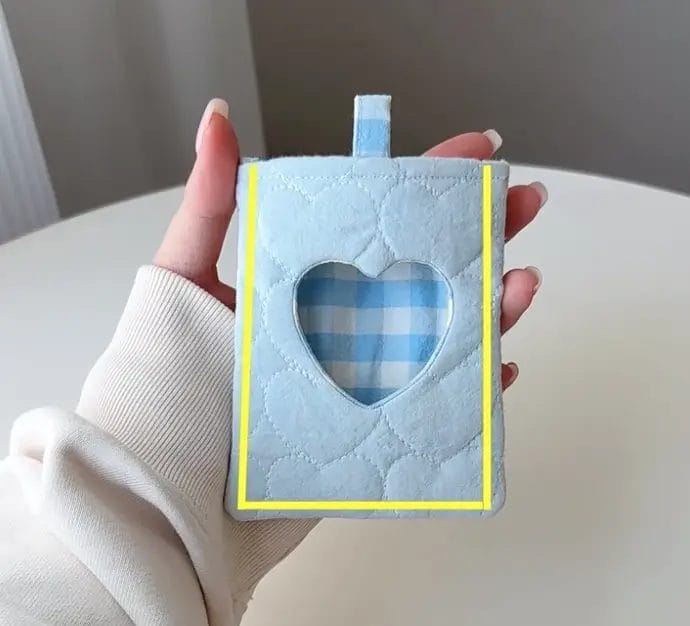
Finally, trim any excess fabric for a neat finish. Flip the holder to the right side, and sew along the remaining three edges, maintaining a distance of 0.5cm from the edge. This will give your card holder a polished and professional look.
Frequently Asked Questions
Can I Use Interfacing to Make the Heart Holder More Sturdy?
Yes, you'll love using interfacing! Iron medium or heavy-weight fusible interfacing to your fabric's wrong side before construction. It'll give your heart holder perfect structure and help it maintain its shape beautifully!
How Long Does the Fabric Heart Holder Typically Last With Regular Use?
With proper construction and moderate use, you'll find your fabric heart holder can last 1-2 years! If you've used quality materials and reinforced stitching, it'll hold up even longer for your daily card-carrying needs.
Can I Make This Heart Holder Waterproof With Special Fabric Treatment?
Yes, you can waterproof your heart holder! Spray it with fabric waterproofing treatment, or brush on a fabric sealant. You'll need two coats for best results, letting each layer dry completely between applications.
Will the Heart Holder Work With Plastic Cards and Hotel Keys?
Yes, you'll love how your heart holder works perfectly with plastic cards and hotel keys! The fabric pocket's flexible nature easily accommodates standard-sized cards, and they'll slide in and out smoothly without any issues.
Conclusion
You've created a charming heart-shaped card holder that's both practical and beautiful! Don't forget to test the card slots to ensure they're working perfectly. If you'd like to add extra flair, try attaching decorative buttons, ribbons, or embroidery to your finished piece. Your handmade holder won't just keep your cards organized - it'll bring a heartfelt touch to your everyday essentials. Time to show off your crafting skills!
0 comments