

You'll discover that transforming leftover gauze fabric into delicate, ethereal flowers isn't just resourceful—it's surprisingly achievable. With basic materials like wire and spray paint, you can turn these airy textile scraps into lasting botanical art pieces that capture the translucent beauty of natural petals. Whether you're looking to create a single statement bloom or a full bouquet, this technique offers endless possibilities for customizing your own fabric flowers.
Key Takeaways
- Cut gauze fabric into teardrop-shaped petals using templates ranging from 1 to 2.5 inches for a layered flower effect.
- Secure 12-inch floral wire as the stem, creating a small loop at one end for the flower's center.
- Layer and gather fabric petals around the wire loop, starting with the largest pieces first, securing with fabric adhesive.
- Shape individual petals by gently rolling and gathering edges to create natural-looking curves and dimension.
- Spray paint the assembled flower with fabric-specific paint, then seal for protection and enhanced durability.
Gather Materials
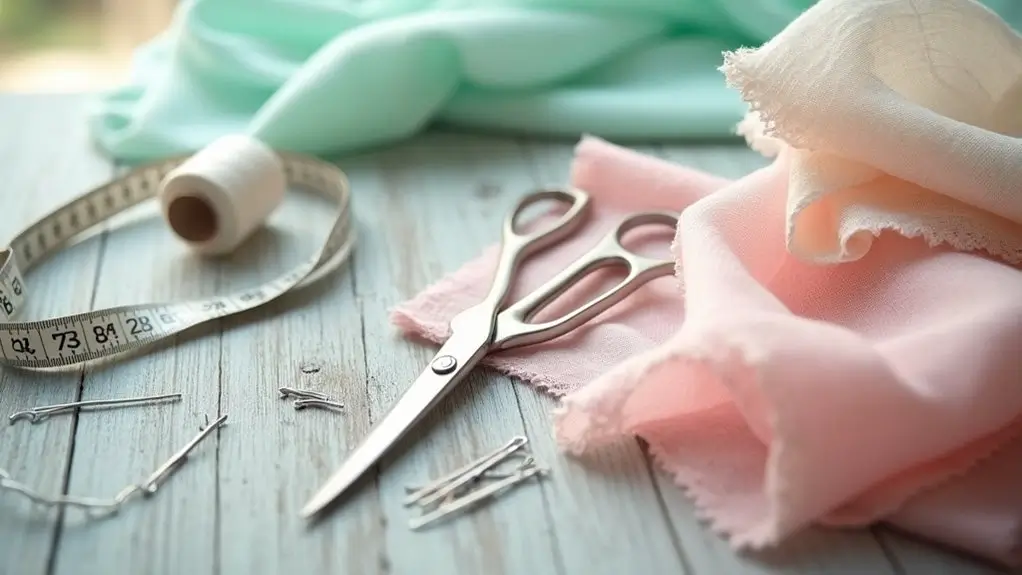
You'll need several essential items to create your gauze fabric flower: a paper template for the petals, lightweight gauze fabric scraps, and wire for the stem.
A quality fabric adhesive or hot glue will secure your flower's components together, while spray paint in your chosen color will give the finished piece a cohesive look.
Having sharp scissors and wire cutters within reach will make the construction process smoother and more efficient.
- Template: Creating beautiful fabric flowers starts with gathering the essential materials. You'll need a basic petal template cut from cardstock or cardboard. Draw petals in graduated sizes, ranging from 1 inch to 2.5 inches in length. Make sure each petal has a teardrop shape with a slightly rounded base.
- Gauze Fabric: Two essential types of gauze fabric work best for this project: cotton cheese cloth or loosely woven muslin. You'll need approximately one square foot of fabric per flower. Choose clean, unstarched material with a loose, open weave that's pliable enough to shape but sturdy enough to hold its form. For optimal results, select gauze in white or neutral tones.
- Wire: A versatile wire forms the foundation of your fabric flower, providing both structure and flexibility. You'll need about 12 inches of wire for a medium-sized flower. Cut the wire using sharp wire cutters, ensuring a clean edge to prevent snags in your gauze fabric.
- Spray Paint: Selecting the right spray paint ensures your fabric flower achieves a professional, customized finish. Choose fabric-specific spray paint that's flexible when dry and won't crack or flake on gauze.
- Adhesive: Strong adhesives form the foundation of your fabric flower construction. You'll need fabric glue designed specifically for delicate textiles - opt for clear-drying varieties that won't seep through the gauze weave.
How to Make a Flower with Gauze Fabric
You'll begin by cutting your gauze fabric using a template pattern.
Then sandwich thin wire between two layers to create each petal's foundation.
Next, shape your wire-reinforced petals into graceful curves and enhance them with your choice of spray paint colors.
Finally, you'll craft a total of six identical petals and join them together at their bases to form a complete, dimensional fabric flower.
Step 1:Prepare the template and cut the gauze fabric according to the template pattern.
Begin by creating a petal template measuring 3 inches in diameter from sturdy cardboard or cardstock. Trace the template onto your scrap gauze fabric using a fabric pencil or washable marker.
The gauze's loose weave requires careful handling during cutting. Hold the fabric taut but avoid stretching it, as this can distort the petal shape.
Consider using pinking shears for edges that will remain visible in the final design.
Step 2: Attach wires between two layers of gauze fabric to create the petal shape.
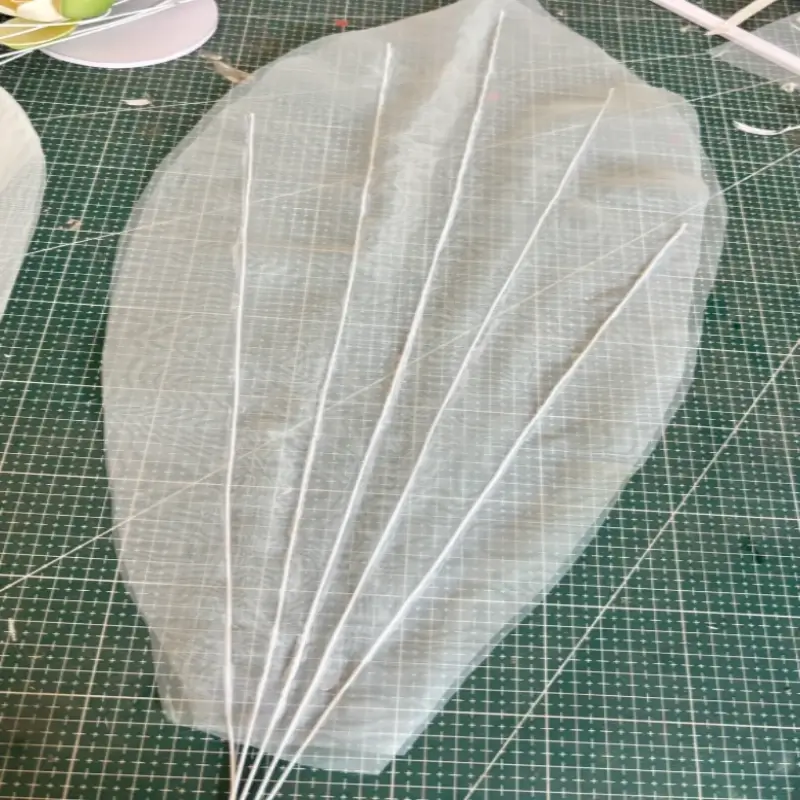
To create dimensional petals that hold their shape, sandwich several thin wires between two fabric circles. Pin the layers together, ensuring the wire stays in place. Using strong adhesive to bond wire and gauze fabric together.
Step 3: Bend the wire to form the desired petal silhouette and curve.
Once the wire is securely enclosed between the gauze layers, gently manipulate each petal's shape by bending the wire into graceful curves that mimic natural flower forms. Fine-tune each petal's silhouette until you achieve a balanced, lifelike flower form that showcases the gauze's delicate texture.
Step 4: Spray the petals with your favourite colors using spray paint.
After shaping your petals to perfection, the artistic phase of adding color brings your gauze flower to life.
Lay your petals on a protected surface in a well-ventilated area. Hold the spray paint can 8-10 inches away from the gauze fabric for even coverage. Apply light, sweeping strokes to prevent paint pooling in the gauze's mesh.
You'll want to spray both sides, letting each layer dry completely between coats. For dimension, try layering different shades or adding subtle highlights with metallic paint.
Don't forget to protect your workspace with newspaper or a drop cloth.
Step 5: Repeat the process to make several petals, then assemble all petals together to form a flower.
While creating a single petal sets the foundation, you'll need to craft several identical pieces to achieve a full, realistic flower form. Secure them at the center using strong thread or hot glue.
- Layer the petals in ascending size order for a natural bloom appearance
- Position each petal at a 60-degree angle from the previous one
- Pinch the base of each petal to create natural curves
- Add a decorative button or bead center to conceal attachment points
Adjust and shape the assembled petals until you've achieved your desired three-dimensional flower structure.
Step 6: Use the same methods to create the leaves of flower.
Crafting leaves follows a similar technique to the petals but requires adjusting the fabric shape into elongated ovals or pointed teardrops. Cut your gauze into 4-inch strips, then shape them into leaf forms about 3 inches long.
Step 7: Combine the leaves and flowers together.
Now that your leaves and flower petals are complete, bring them together to form a cohesive bloom. Position your floral elements carefully, layering them to create a natural appearance.
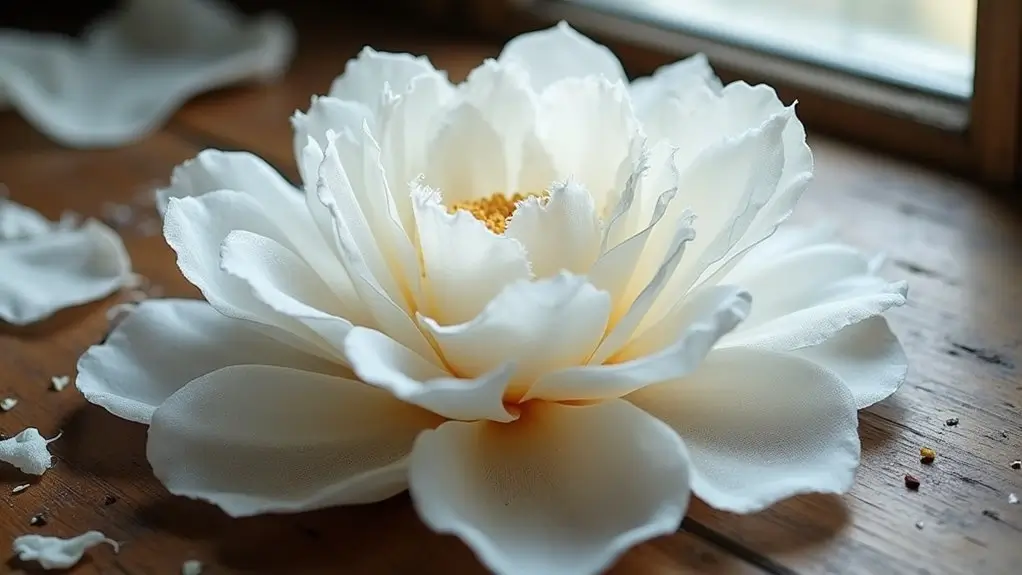
Add final touches by gently shaping the gauze petals with your fingers, creating subtle curves and waves. Your handcrafted fabric flower should now display a delicate, airy quality characteristic of gauze material.
Conclusion
You've now mastered crafting delicate gauze flowers from simple scraps. With your carefully layered petals, precisely shaped wire stems, and artfully sprayed colors, you've transformed basic gauze into an ethereal botanical creation. Your attention to textile manipulation and strategic assembly has resulted in a remarkably authentic-looking bloom. The skills you've learned - from template cutting to petal shaping - will serve you well in future fabric flower projects.
I can’t wait to make these in so many beautiful colors! Thank you! 😊