

Are you ready to unleash your creativity and add a personal touch to your projects? Making a fabric bow is a delightful craft that not only enhances your gifts but also allows you to express your unique style!
Crafting a beautiful bow is easier than you might think, whether you're sprucing up a present, decorating your home, or creating a fashionable accessory.
With just two rectangular fabric pieces, you can transform them into a stunning bow that will impress everyone. Let's dive in and get started!
Key Takeaways
- Measure and cut two rectangular pieces of fabric in different sizes for a layered effect.
- Fold the fabric pieces in half and sew along the edges, leaving openings to turn them inside out.
- Flip the fabric pieces inside out and securely sew the openings closed.
- Layer the smaller piece on top of the larger one. Secure the center with a strip of fabric or contrasting ribbon.
- Attach a hanging method to convert the bow into a decor item or hair accessory.
- Enhance your bow with embellishments such as beads, contrasting ribbons, or small decorations.
Prepare the Necessary Materials
To get started on making bow ornaments, you'll need some necessary materials:
- Scrap Fabrics
- Scissors
- Sewing Machine or Needle and Thread
- Ruler
- Pins
- Decorative Elements
- A Ribbon or Fabric Strip for Hanging
How to Make a Fabric Bow: An Easy DIY Fabric Bow Tutorial
Let's start making fabric bows with this simple and quick sewing tutorial. Follow these steps and finish this sewing project perfectly.
Step 1: Measure and Cut Two Rectangular Fabric
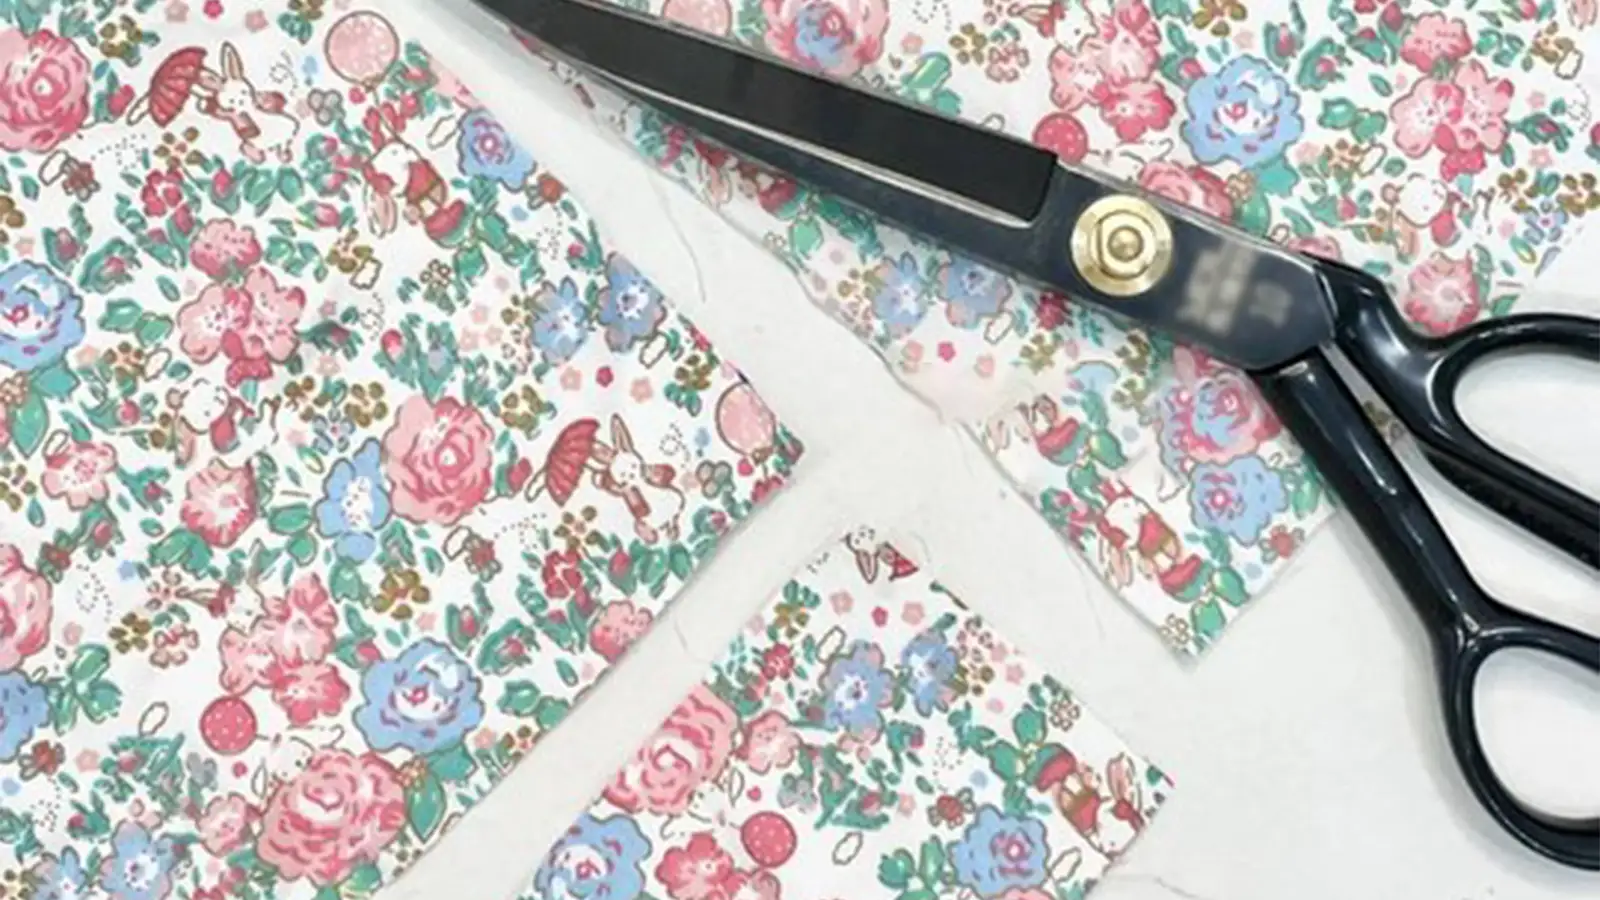
Start by measuring and marking two rectangular pieces of fabric. Make sure the two pieces are not the same size.
Once marked, use sharp scissors to cut the fabric along the lines for clean edges.
Step 2: Fold and Sew the Pieces
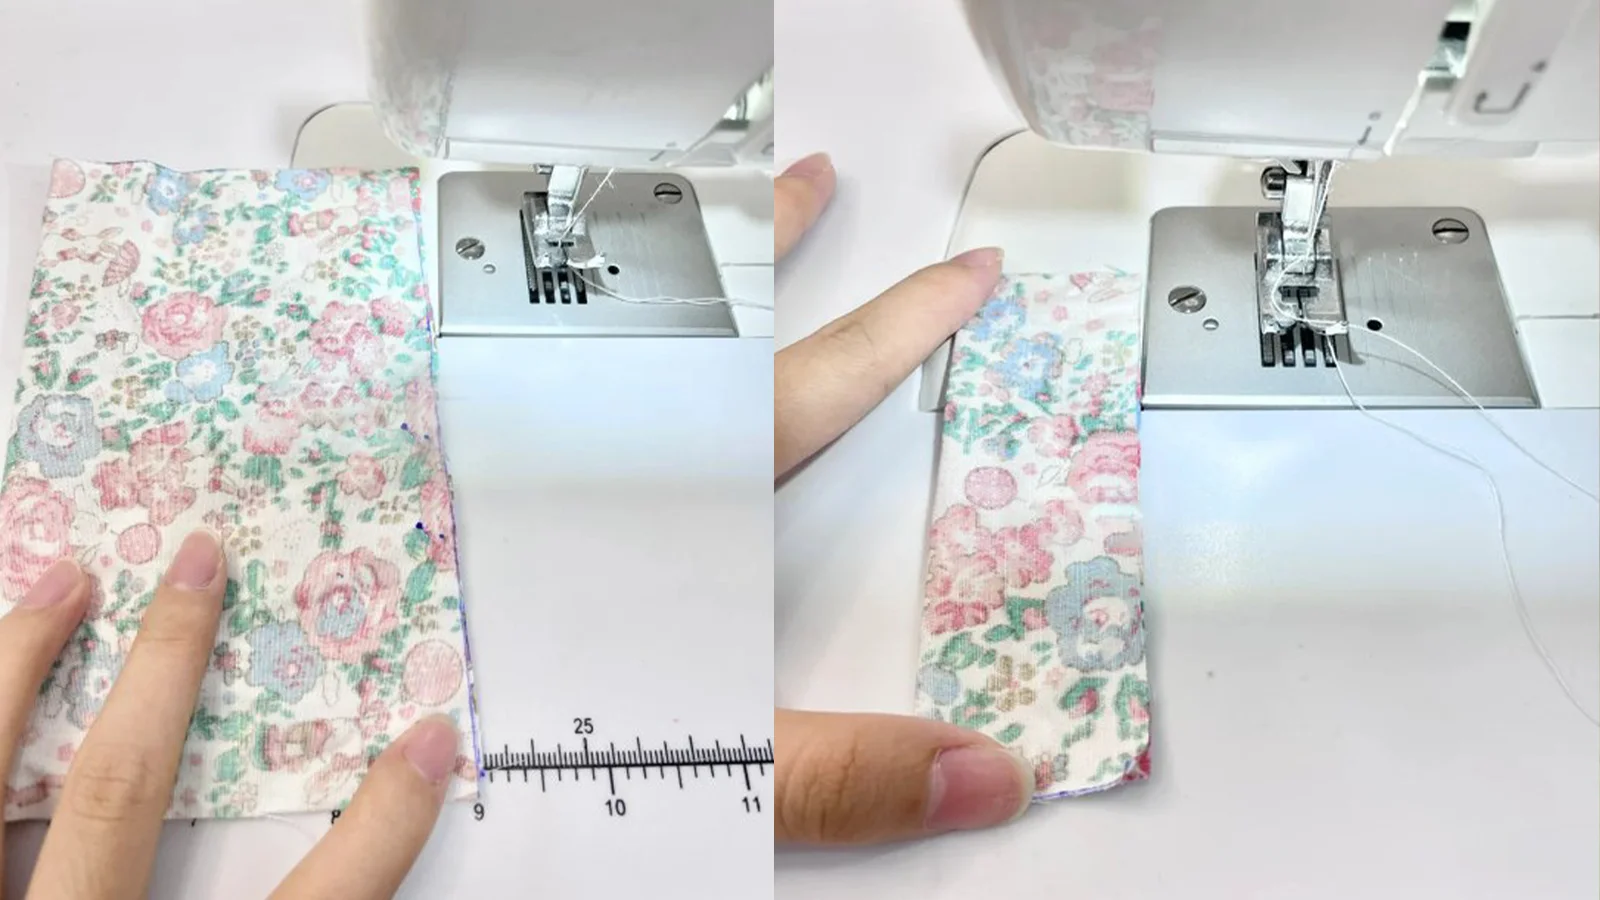
After cutting, fold the two pieces in half with the right sides together. Align the edges perfectly.
Then, it's time to sew the pieces. Pin the fabric and sew along the edges, leaving openings for turning.
Carefully trim the excess fabric at the corners to reduce bulk. These steps will help you create neat, professional-looking bow ornaments.
Step 3: Turn Inside Out and Close the Openings
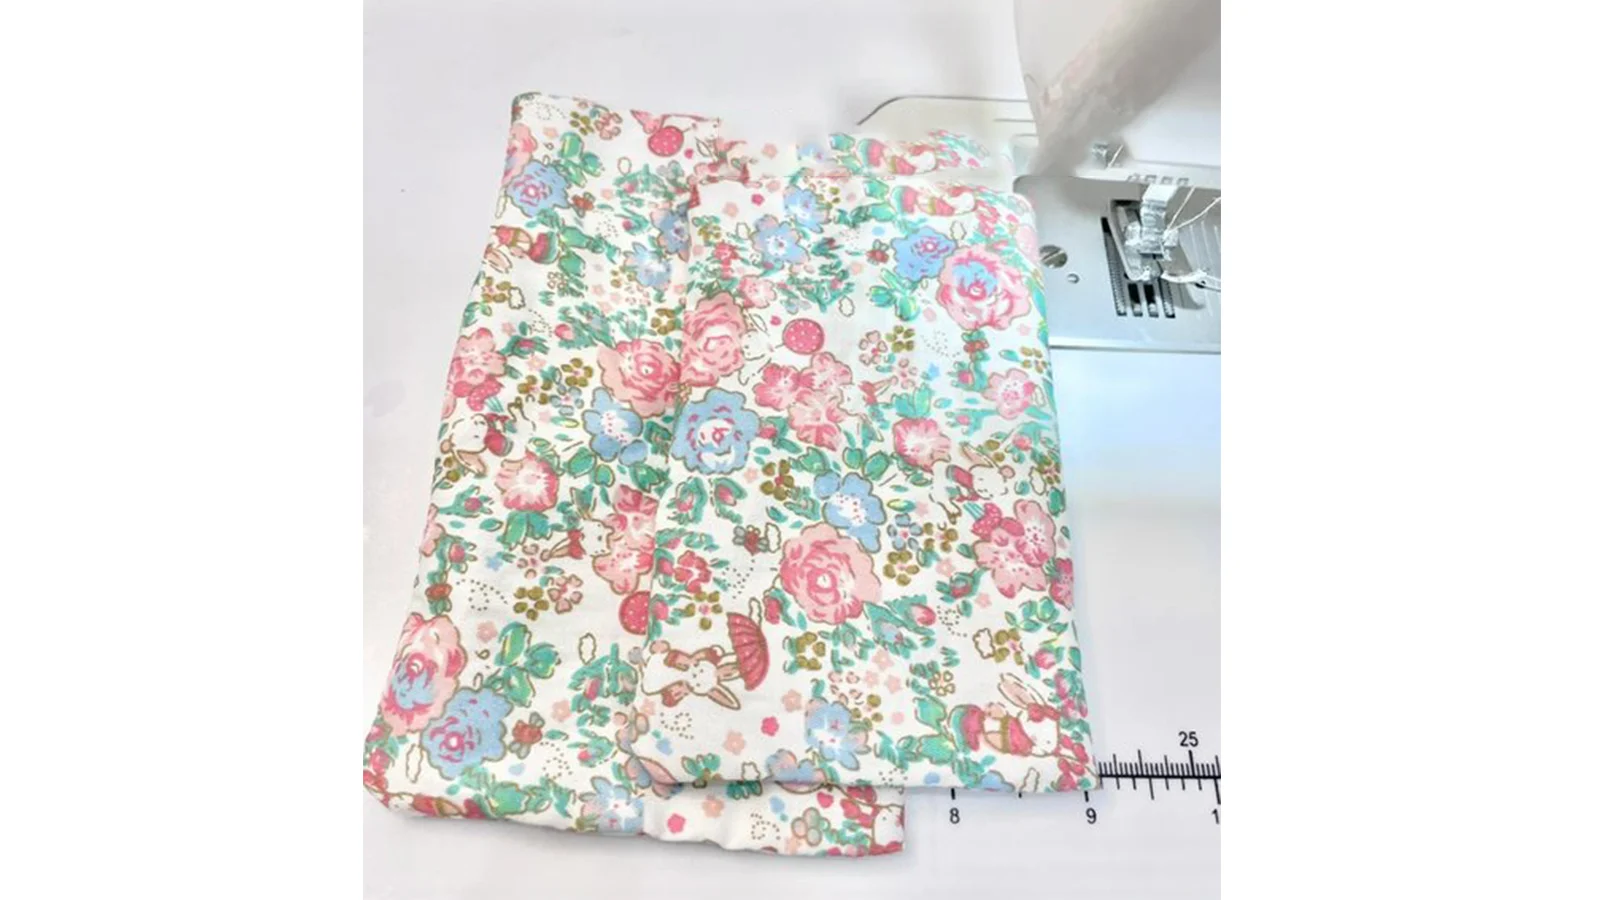
Carefully flip the two fabric pieces inside out to hide the seams and give it a neat appearance.
Ensure all edges and corners are fully turned and smooth out any creases.
Securely close the openings by sewing, ensuring they're tightly sealed to keep the bow's structure hidden and intact.
Step 4: Gather the Center and Add a Strip

Layer the smaller piece over the larger one, then stitch the center.
Next, gather the two pieces tightly in the center to form a fabric bow. Secure the gathered bow using a strip from the same fabric with glue. You can also choose a ribbon in a contrasting color to secure the bow center.
Step 5: Add a Hanging Method

Once you've secured and fluffed your bow, it's time to add a hanging method.
Here, I used a pearl lanyard to hang this fabric bow.
You can also add a hair clip on the back to make it an elegant fabric hair bow.
Now, you get a new finished bow for either home decor or hair accessories.
Step 6: Add Extra Embellishments
Now that your fabric bow is nearly complete, consider adding final embellishments for extra flair.
- Use hot glue to secure small decorations like beads or sequins.
- Incorporate contrasting ribbons for additional loops, adding depth.
- Attach tiny ornaments, flowers, or greenery for a festive touch.
- Personalize your creation with handwritten tags or messages.
These embellishments will ensure your bow looks polished and unique.
Conclusion
You've now crafted beautiful fabric bows with ease! Following these simple steps, you've created items perfect for home decor or as hair accessories. Remember, adding personal touches like embellishments can make each bow unique.
With practice, you'll perfect the art of bow-making and spread joy with your charming creations. Happy crafting!
Learn more sewing projects on the Longan Craft Blog, and dive into the fabric world with Longancraft!
FAQs
How to Make a Simple Decorative Bow?
To make a simple decorative bow, start by cutting a long ribbon. Fold it into loops, pinch the center, and secure it with a twist tie. Fluff the loops and trim the ends for a polished look.
How Do You Make a Christmas Bow for a Package?
To make a Christmas bow for a package, start by wrapping a wired ribbon around your hand. Secure the loops tightly in the center, trim the tails, and fluff. Attach it to your package with glue or by tying it.
How to Make Small Bows for Crafts?
To make small bows for crafts, cut your ribbon to the desired length, form loops, and secure the center with a twist tie or glue. Fluff the loops and trim the tails for a neat finish.
0 comments