

A cat crossbody bag is a charming accessory that combines cuteness with practicality. Whether you’re a cat lover or just enjoy unique handmade items, creating your own fabric cat crossbody bag can be a rewarding project. I'll guide you with the entire process step-by-step, from preparing materials to sewing and assembling the bag, including adorable details like a tail.
Materials You Will Need
- 2 pieces of outer fabric
- 2 pieces of interfacing
- 2 pieces of lining fabric
- 2 pieces of fabric for the cat tail
- 2 small fabric pieces
- 1 piece of fabric measuring 130 cm x 6 cm (for the strap)
- Metal hardware (D-rings, buckles, clasps)
How to Make a Cute Cat Crossbody Bag
Prepare all materials and work in a clean, well-lit space. Follow each step carefully for the best results.
Step 1: Prepare the Outer Fabric
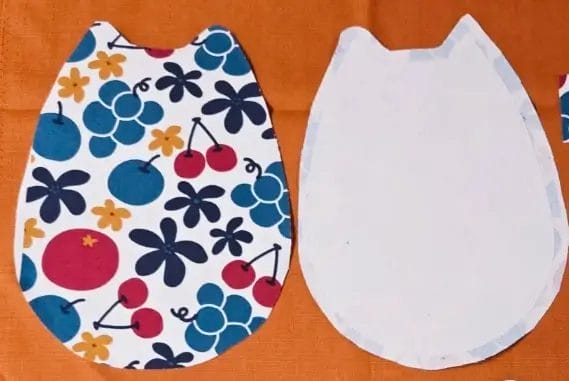
Take the two pieces of outer fabric and fuse the interfacing to their wrong sides using an iron. This will add extra stability and structure to your bag.
Step 2: Make the Cat Tail
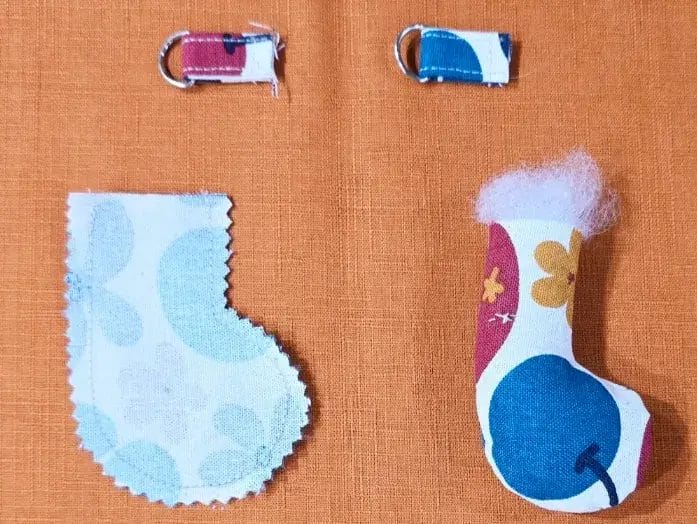
Place the two cat tail fabric pieces right sides together. Sew along the edges, leaving a small opening to turn it right side out. After turning, stuff the tail with cotton or fiberfill to give it a plush shape.
Step 3: Prepare the Bag Strap
Fold each small fabric piece using a triple-fold method (fold the fabric lengthwise into thirds), then sew along the edges to secure the folds neatly. Thread a D-ring through each folded piece, and sew the ends securely to form reinforced loops.
Next, take the 130 cm x 6 cm piece of fabric for the strap. Iron it with a 1.5 cm fold along both long edges to create clean, even folds. Fold the fabric lengthwise again so that all raw edges are enclosed within the strip. Sew along the length of the folded fabric to form a long, narrow strap with neat edges. Finally, attach metal hardware such as buckle adjusters and clasps to the strap to make it adjustable and easy to connect to the D-rings on the bag.
Step 4: Assemble Outer Bag Body
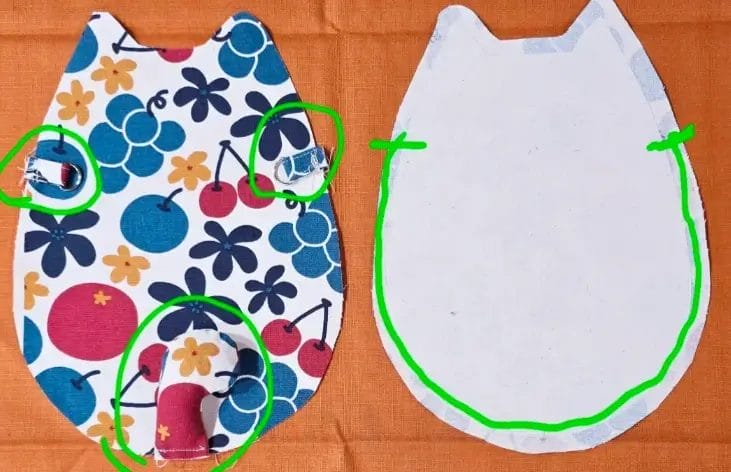
Lay one piece of outer fabric flat with the right side facing up. Position the D-ring loops and the stuffed cat tail on their respective places on this fabric according to your design. Secure them temporarily with pins or clips.
Take the second piece of outer fabric and place it right sides together with the first piece. Sew around the body of cat, leaving one side open for later turning and attaching lining. Start and stop sewing at points corresponding to where the D-rings are attached for neat finishing.
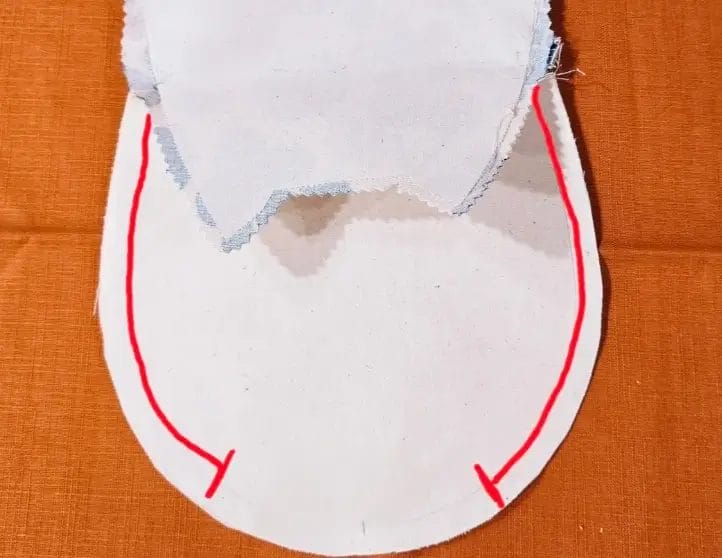
Step 5: Attach Ears to Outer Fabric
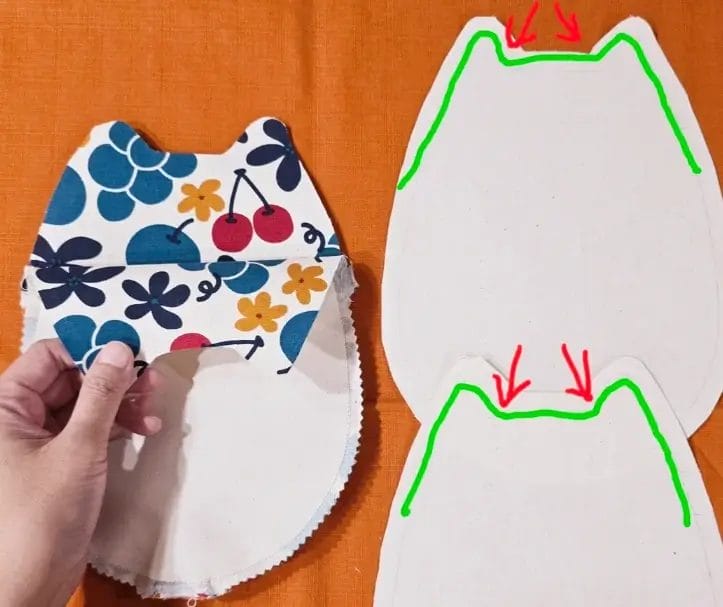
Take one piece of lining fabric and place it right sides together with one piece of outer fabric. Align the edges and sew only the ear-shaped sections together. After sewing the ear parts, carefully clip the curved seam allowances around the ears to help them turn out smoothly without bulk or puckering.
Step 6: Sew Lining Pieces Together
Insert the lining into the outer bag body with right sides facing each other. Align edges carefully and sew around the opening, leaving room to turn your bag right side out through an opening in the lining.
Turn your bag right side out through this opening, pull out the ears so they stand properly. Close the lining opening invisibly using ladder stitch (also called hidden stitch).
Step7: Final Touches
Add buttons or snaps at the top edge of your bag for closure. Attach the strap to the D-rings securely. Give your cat crossbody bag a final press if needed, and your adorable handmade accessory is ready to use!
Final Thoughts
Making your own cat crossbody bag is not only fun but also allows you to carry a unique piece that reflects your personality and love for cats. This project combines simple sewing techniques with creative details, making it suitable for intermediate sewers who want to try something special.
Enjoy crafting this cute and functional accessory that’s sure to attract compliments wherever you go!
Frequently Asked Questions (FAQ)
What fabric is best for making a cat crossbody bag?
Medium-weight cotton or canvas fabrics work well, providing durability and structure while being easy to sew.
How do I attach the metal hardware securely?
Use folded fabric loops sewn tightly around D-rings, reinforced with multiple stitches to ensure strength.
Can I adjust the strap length?
Yes, the strap includes adjustable metal buckles so you can customize the length to your preference.
Can beginners make this bag?
This project is suitable for those with basic sewing skills. Beginners should take their time and may benefit from practicing on scrap fabric first.
0 comments