
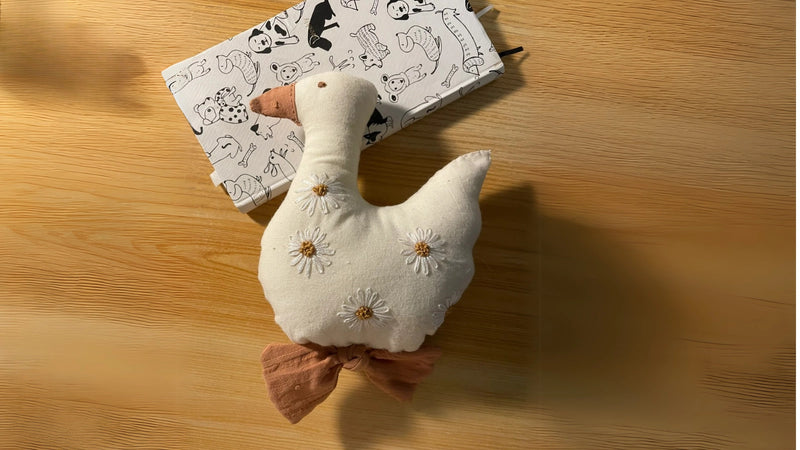
Imagine crafting your very own plush duck, a soft and cuddly companion that's uniquely yours!
Start by sketching a simple pattern, then choose a soft, huggable fabric like cotton or minky. Stitch up the pieces with care, stuff it full of polyfill, and add delightful details like tiny embroidered flowers and felt eyes.
The charm of this project lies in your ability to personalize every inch. Ready to bring your plush friend to life?
Key Takeaways
- Use soft cotton or minky fabric to create a huggable plush duck body.
- Cut and sew using a personalized pattern for an adorable design.
- Embroider vibrant flowers for a unique and charming touch.
- Stuff the body with polyfill, ensuring a soft and cuddly feel.
- Customize with felt appliques, ribbons, or bold colors for personality.
Gather All the Materials
To craft your charming plush duck, you'll need a delightful assortment of materials that bring this cuddly creation to life.
- Fabric: Choose a soft fabric like fleece, minky, or felt for the duck's body.
- Stuffing: Polyester fiberfill is commonly used to stuff plush toys.
- Thread: Match the color of your fabric for sewing.
- Needle: A sewing needle suitable for the fabric chosen.
- Scissors: For cutting fabric and thread.
- Pattern: A pattern for the duck, which can be printed or drawn.
- Pins: To hold pieces of fabric together while sewing.
- Embroidery Floss: For decorations and details like eyes and beak.
- Chalk or Fabric Marker: For tracing the pattern onto the fabric.
DIY Plush Duck Toy: A Step-by-Step Guide
Ready to make a cuddly companion? Follow these steps to craft a lovely plush duck toy.
Step 1: Create a Pattern
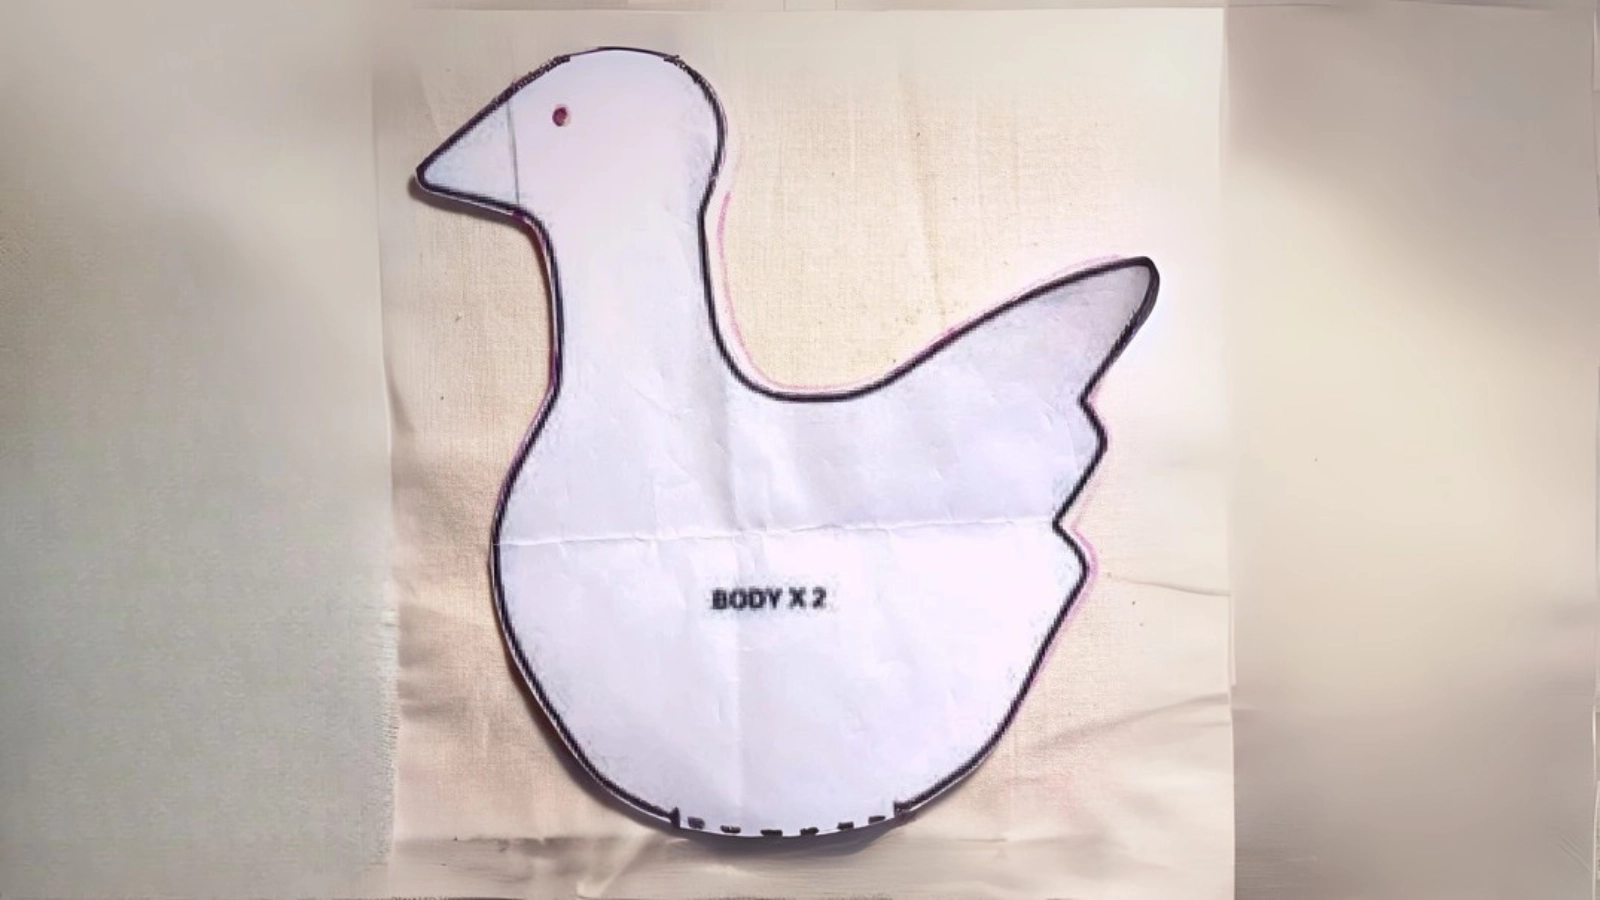
It's very easy to create a pattern for your plush duck. Draw a large head and chubby duck body on pattern paper.
Alternatively, you can find a pattern online and print it out.
Step 2: Embroider Flowers
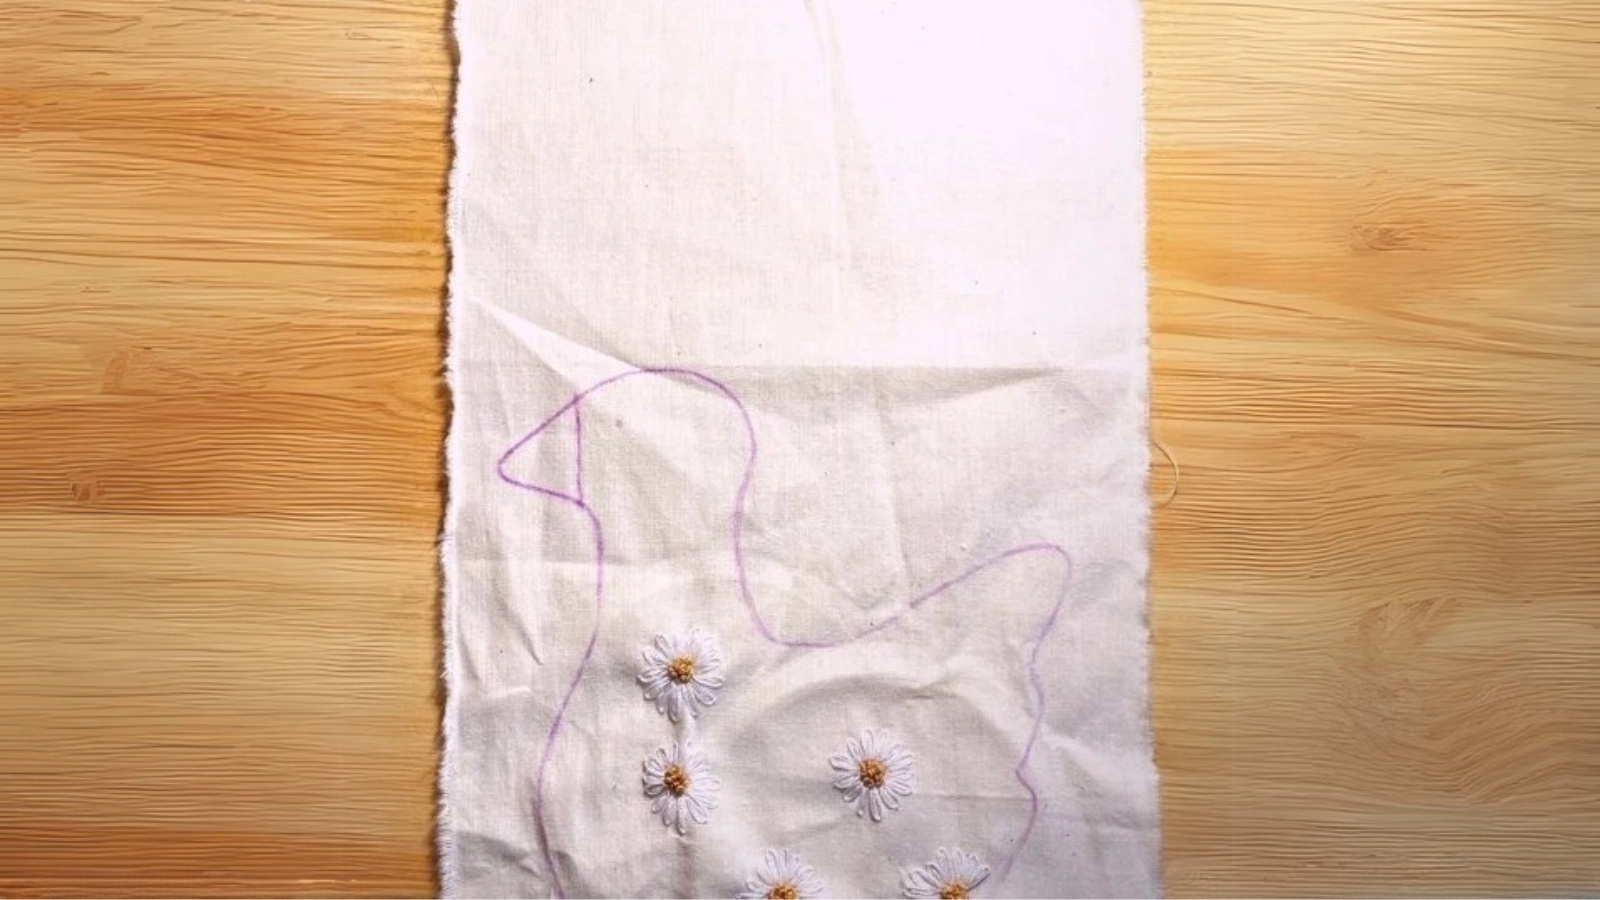
Trace the duck body on your chosen fabric. Then, select bright, quality embroidery threads that complement the colors of your duck toy.
Load your flower design into an embroidery hoop, ensuring the fabric is taut. Use a fabric marker or chalk to mark where each blossom will go, balancing your design across the plush toy.
Begin at the flower's center, using satin stitches for petals and French knots for centers. Once finished, gently press with an iron to ensure the embroidery enhances the charm of your duck toy.
Step 3: Cut Two Duck Body Pieces
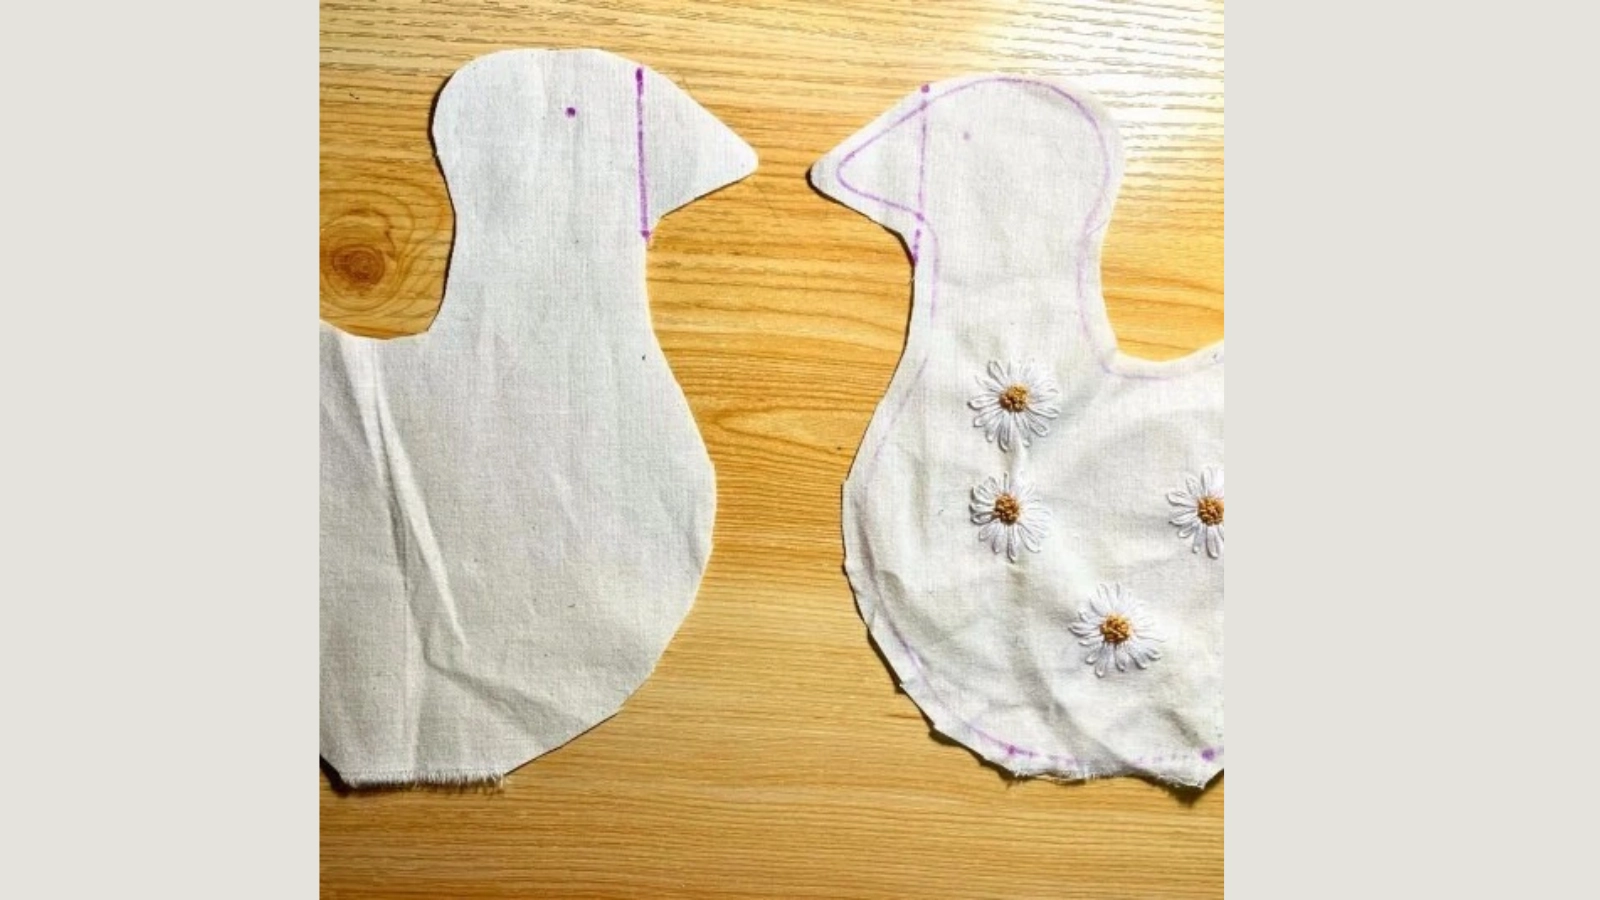
After embroidering flowers on one piece of the duck's body, grab your scissors and plunge into cutting the two body pieces.
Remember, you'll need to cut two identical body pieces. Don't forget those seam allowances—about half an inch should do the trick!
Step 4: Add Fabric Pieces to Decorate the Beak
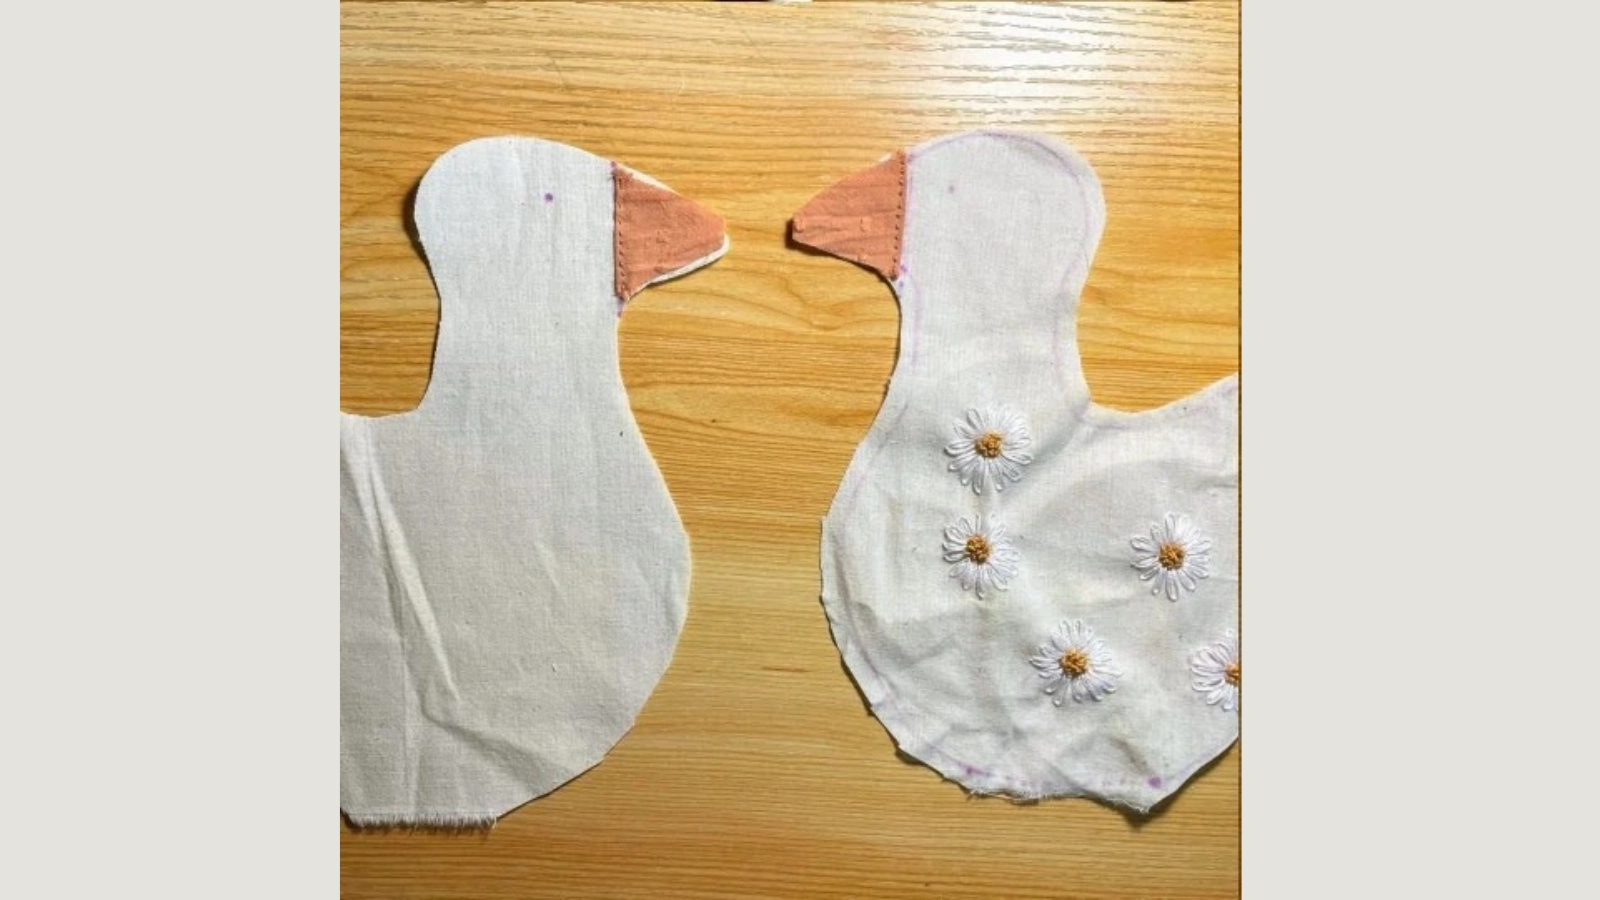
Cut two identical triangles to match the personality of your duck soft toy. Iron the fabric piece to create a neat crease, then pin it to the duck's head where the beak should be.
Stitch along the edges to secure them firmly on each right side of the body pieces. So you can sew the beak together after you sew the body together.
Finish with shiny black buttons for the eyes, making your duck irresistibly cute! Or you can also embroider the eyes if you like.
Step 5: Sew and Stuff the Duck Body
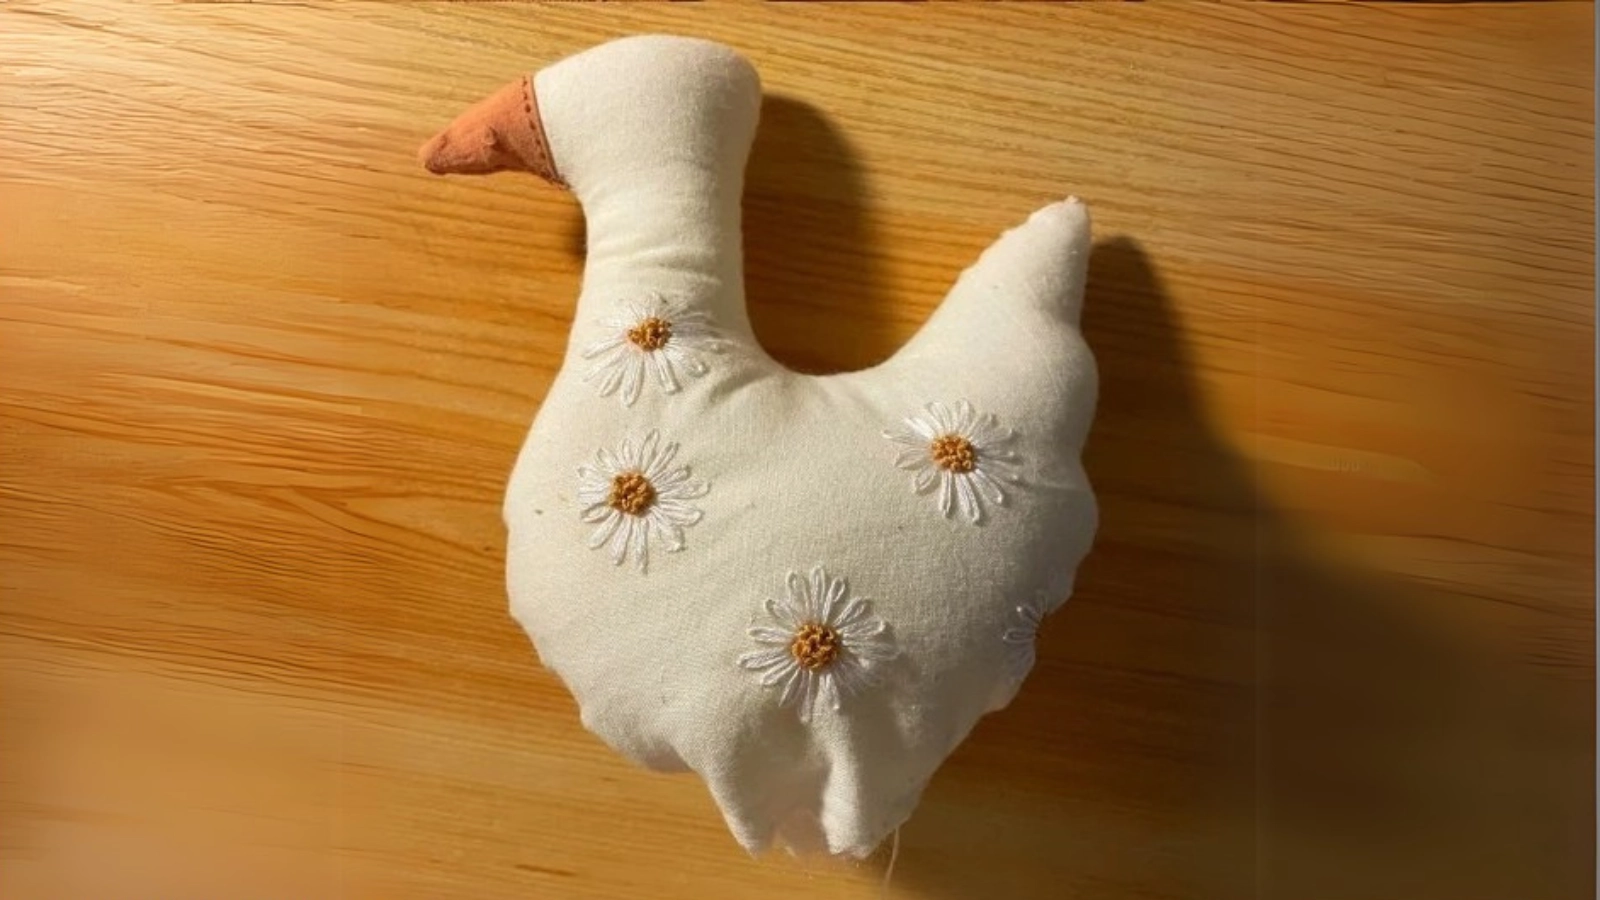
Now that your duck's beak is looking delightful, it's time to bring the body to life!
Pin the right sides of two duck body pieces together, leaving the bottom open. Stitch along the edges, ensuring those corners maintain their rounded charm.
Then, flip your creation right-side-out and get ready to stuff! Fill the duck body with polyfill until it's firm yet plush.
Finally, hand stitch the opening shut.
Step 6: Add Duck Leg and Foot
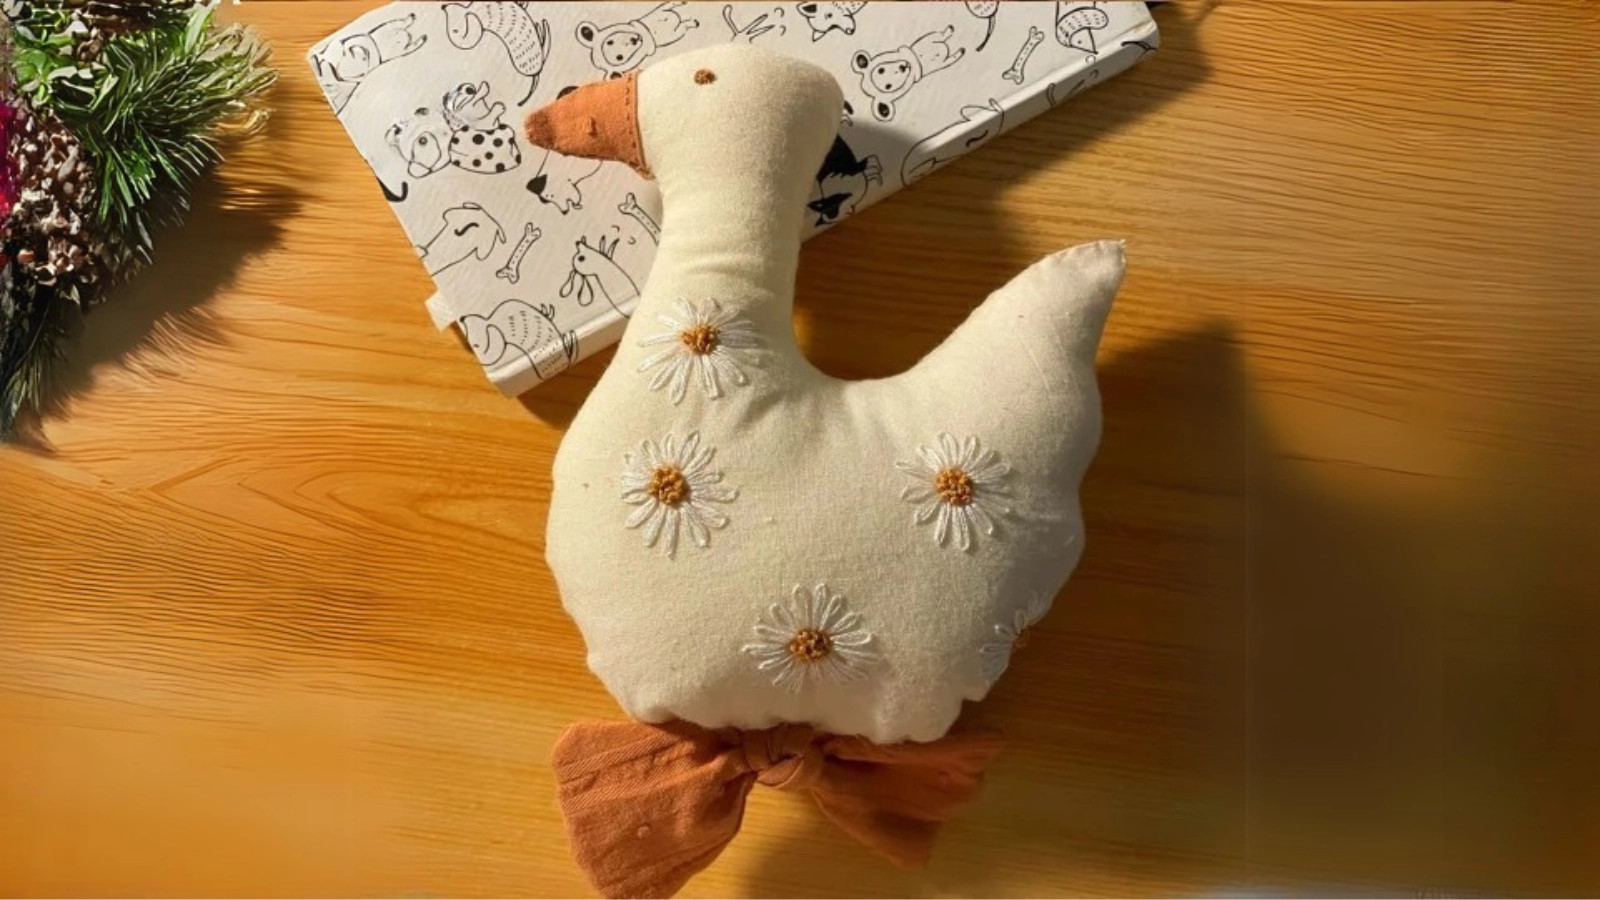
Adding duck leg and foot will make your duck toy more adorable! Here is an easy way to make them:
Select a fabric that matches the duck's beak. Cut two rectangular pieces from this fabric and sew them together. Create a knot in the center and attach it to the duck's underside by sewing or using glue.
Thus, your adorable DIY duck toy is complete!
Conclusion
You've created your very own cute duck, a charming bundle of fluff and personality. With each stitch and detail, you've infused creativity and care, crafting a one-of-a-kind companion that will bring smiles.
Remember, the joy of DIY is in the journey, and your duck reflects your unique touch. Display it proudly, gift it joyfully, or cuddle it close—your little masterpiece is ready to quack its way into hearts! Keep crafting, and let your imagination soar!
Learn more sewing projects on the Longan Craft Blog, and dive into the fabric world with Longan Craft!
FAQs
How Long Does It Take to Complete a Plush Duck Project?
You'll typically spend about 3-5 hours crafting a plush duck. First, gather materials and sew with care. Then, stuff the duck lovingly and add quirky details like felt beaks. Enjoy the playful process, and your creation will shine!
What Is the Best Fabric to Use for Softness?
You should use minky fabric for ultimate softness. It's like hugging a cloud! When you sew, its plush texture adds a cuddly feel. Just guarantee your scissors are sharp, as minky can be slippery. Enjoy crafting!
Can the Plush Duck Be Machine Washed?
Yes, you can toss your plush creation into the machine! Use a gentle cycle, cold water, and mild detergent. Secure any loose parts, and place the duck in a pillowcase to protect those adorable beaks and button eyes.
0 comments