

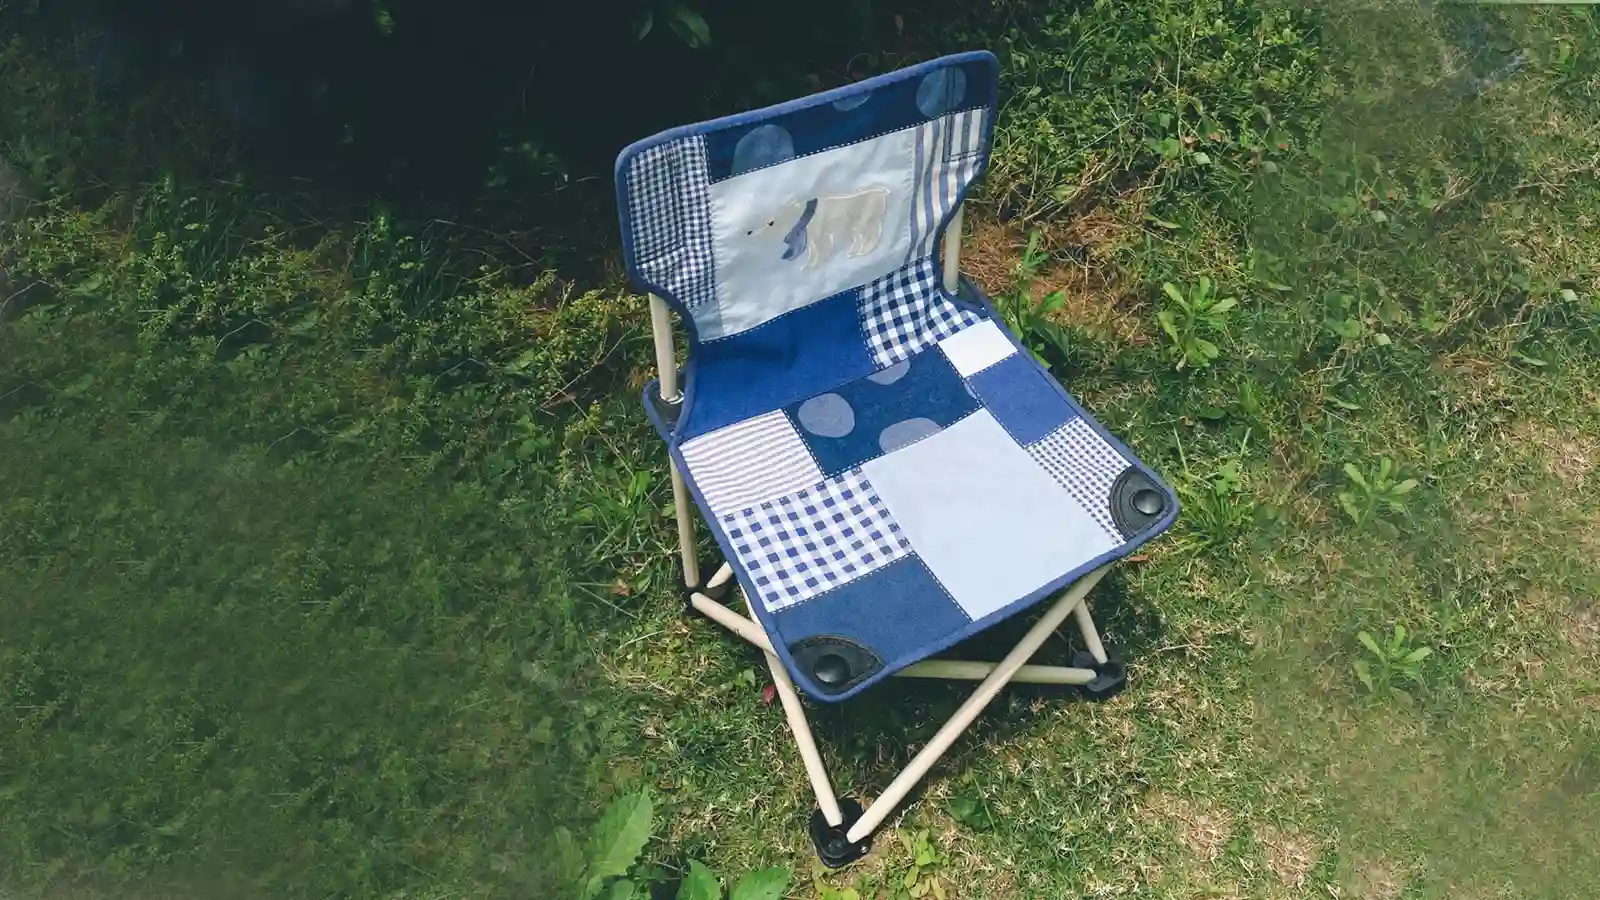
A DIY patchwork camping chair is more than just a piece of furniture. It’s a creative way to upcycle old fabric scraps and turn them into something functional and beautiful. This project lets you design a one-of-a-kind chair that reflects your personality while being eco-friendly.
The process is simple, and the satisfaction of crafting your own chair is unmatched. With every stitch and pattern, you’ll feel the joy of creating something unique. Plus, following a tutorial makes it easy to explore this fun and rewarding DIY adventure.
Key Takeaways
- Upcycle old fabric scraps to create a unique, eco-friendly chair that reflects your style.
- Carefully measure and design your patchwork layout before sewing to achieve a professional and polished look.
- Securely attach the patchwork to the chair frame using fabric glue or a heavy-duty stapler for durability.
- To enhance its appearance and longevity, add finishing touches like sanding, painting, and waterproofing the frame.
Materials Needed for Your DIY Patchwork Camping Chair
Before you start crafting your patchwork chair, gather all the materials. Here’s what you’ll need:
- Old Fabric Scraps or Quilting Squares: Use leftover fabrics or repurpose old clothes, table runners, or blankets.
- A Sturdy Folding Chair Frame: Find a folding chair with a durable frame. You can use an old chair or pick one up by shopping a thrift store.
- Basic Sewing Supplies: Gather sewing tools like a needle, thread, scissors, and pins.
- Measuring Tape: Accurate measurements are essential for cutting fabric pieces that fit perfectly.
- Fabric Glue or Heavy-Duty Stapler: These tools will help secure the fabric to the chair frame.
- Waterproof Spray or Sealant: Protect your chair from outdoor elements by using a waterproof spray.
How to Create a DIY Patchwork Camping Chair
Follow these instructions to ensure your patchwork looks polished and fits perfectly on your DIY folding camping chair.
Step 1: Disassemble the Chair
Start by carefully taking apart your chair. Remove the seat and backrest from the frame. If your chair has screws or bolts, use the appropriate tools to loosen them. Keep all the hardware safe so you don’t lose anything.
Step 2: Measure the Fabric
Grab your measuring tape and measure the dimensions of the seat and backrest. Write down the measurements to avoid mistakes later. Add an extra inch or two to each side for seam allowances.
Step 3: Select Fabric Scraps and Design the Patchwork
Now comes the fun part—choosing your fabric scraps! Look for pieces with different colors, patterns, and textures to create a lively patchwork design. If you prefer a more uniform look, stick to a specific theme or color palette.
Lay out the fabric pieces on a flat surface and experiment with different arrangements. Move them around until you find a design that feels just right. Once you’re happy with the layout, take a photo or sketch it as a reference during the project.
Step 4: Sew and Secure the Patchwork to the Chair
Start by arranging your fabric scraps according to the design you planned earlier. Once you're satisfied, begin sewing them together. Use a sewing machine for faster results, or sew by hand if you prefer a more personal touch.
After sewing, place the patchwork over the seat and backrest of the chair. Trim any excess fabric, leaving enough for a clean edge. Secure the patchwork to the frame using fabric glue or a heavy-duty stapler.
To achieve a polished appearance, use bias tape to cover the edges. This process ensures your patchwork looks professional.
Step 5: Reassemble the Chair
With the patchwork securely attached, it’s time to put the chair back together. Gather the hardware you set aside earlier and reattach the seat and backrest to the frame. Tighten all screws and bolts to ensure the chair feels stable and safe to use. Test the chair by sitting on it to confirm everything is secure.
Admire your work—you’ve transformed an ordinary chair into a unique piece of functional art!
Step 6: Finish Touches
Once your patchwork is securely in place and the chair is reassembled, it’s time to add those final touches.
Grab some sandpaper and smooth the chair out. Then, apply spray paint for an even coat or a brush for more control. Once the paint dries completely, your chair will have a fresh, vibrant look that matches your creative vision.
Outdoor chairs needs protection from the elements. Use a waterproof spray or sealant to shield the fabric and frame from moisture. Spray the patchwork evenly, ensuring every inch gets covered.
Now, let’s add some decorative flair. Attach small embellishments like buttons, fabric flowers, or even patches. These details give your chair a personal touch and make it stand out.
With these finishing touches, your project is complete!
Conclusion
Creating a DIY camping chair is a rewarding journey that combines creativity and sustainability. You’ve learned how to upcycle fabric scraps, assemble a unique design, and transform an old frame into something extraordinary. This project not only gives you a functional chair but also highlights the beauty of upcycled furniture.
Following this tutorial, you’ve embraced the art of furniture upcycles while adding a personal touch to your outdoor gear. Now it’s your turn to inspire others! Recycle an old chair and try this fun project. Let your creativity shine!
Learn more sewing projects on the Longan Craft Blog, and dive into the fabric world with Longan Craft!
FAQs
What type of fabric works best for a patchwork camping chair?
Durable fabrics like canvas, denim, or outdoor upholstery material work best. These materials handle wear and tear well and provide the strength needed for outdoor use.
How do I make sure my patchwork design stays in place?
Secure your patchwork using fabric glue or a heavy-duty stapler. Apply even pressure when attaching the fabric to the frame. For extra durability, reinforce the edges with additional staples or glue.
What should I do if my chair frame feels unstable?
Inspect the frame for loose screws or bolts. Tighten them using the appropriate tools. If the frame still wobbles, check for cracks or weak joints. Reinforce these areas with additional hardware or replace damaged parts to ensure safety.
0 comments