

Unlock your creativity and add a personal touch to your reading experience with a delightful DIY leaf bookmark made from fabric scraps! This fun and easy autumn project not only breathes new life into leftover materials but also allows you to express your unique style.
Whether you're an experienced crafter or just starting out, this charming bookmark will inspire you to dive into your fabric stash and create something beautiful. Let's embark on this crafting adventure and transform your reading routine into a vibrant and artistic journey!
Key Takeaways
- Cut leaf shapes from fabric scraps using a template for symmetry.
- Layer fabric with interfacing for added stability and a polished look.
- Sew or glue fabric pieces, leaving an opening for turning right side out.
- Add decorative stitching or embellishments like beads for personalization.
- Use contrasting thread or fabric paint for intricate designs and visual appeal.
Gather All the Materials
To start your DIY leaf bookmark project, gather all the necessary materials to ensure a smooth crafting experience.
- Fabric Scraps: Choose various colors and patterns that you like.
- Wax Rope: Use it as the stem of the leaf.
- Leaf Templates: You can either print out leaf shapes or draw them yourself on paper.
- Scissors: Sharp fabric scissors are essential for cutting the fabric neatly.
- Needle and Thread: For sewing the leaf pieces and adding decorative stitching.
- Fabric Marker or Chalk: To trace leaf shapes onto the fabric.
- Pins: To hold fabric layers together if needed.
Now, you're ready to begin crafting!
How to Make a DIY Leaf Bookmark Using Fabric Scraps
To create your DIY leaf bookmark for fall, you'll need to follow this tutorial for step-by-step instructions.
Step 1: Prepare the Fabric Scraps
Start by selecting fabric scraps you like. Fold the fabric scrap in half to add a layered effect, which enhances the bookmark's visual appeal.
Next, press the fabric with an iron to smooth out any wrinkles, ensuring a clean finish.
Step 2: Create the Leaf Templates
Once you've prepared your fabric, it's time to focus on creating the leaf templates.
Begin by drawing leaf shapes on paper or cardstock. Aim for a size suitable for your bookmark, typically around 6 inches long and 3 inches wide at the broadest point. Carefully cut out these leaf shapes to create your templates.
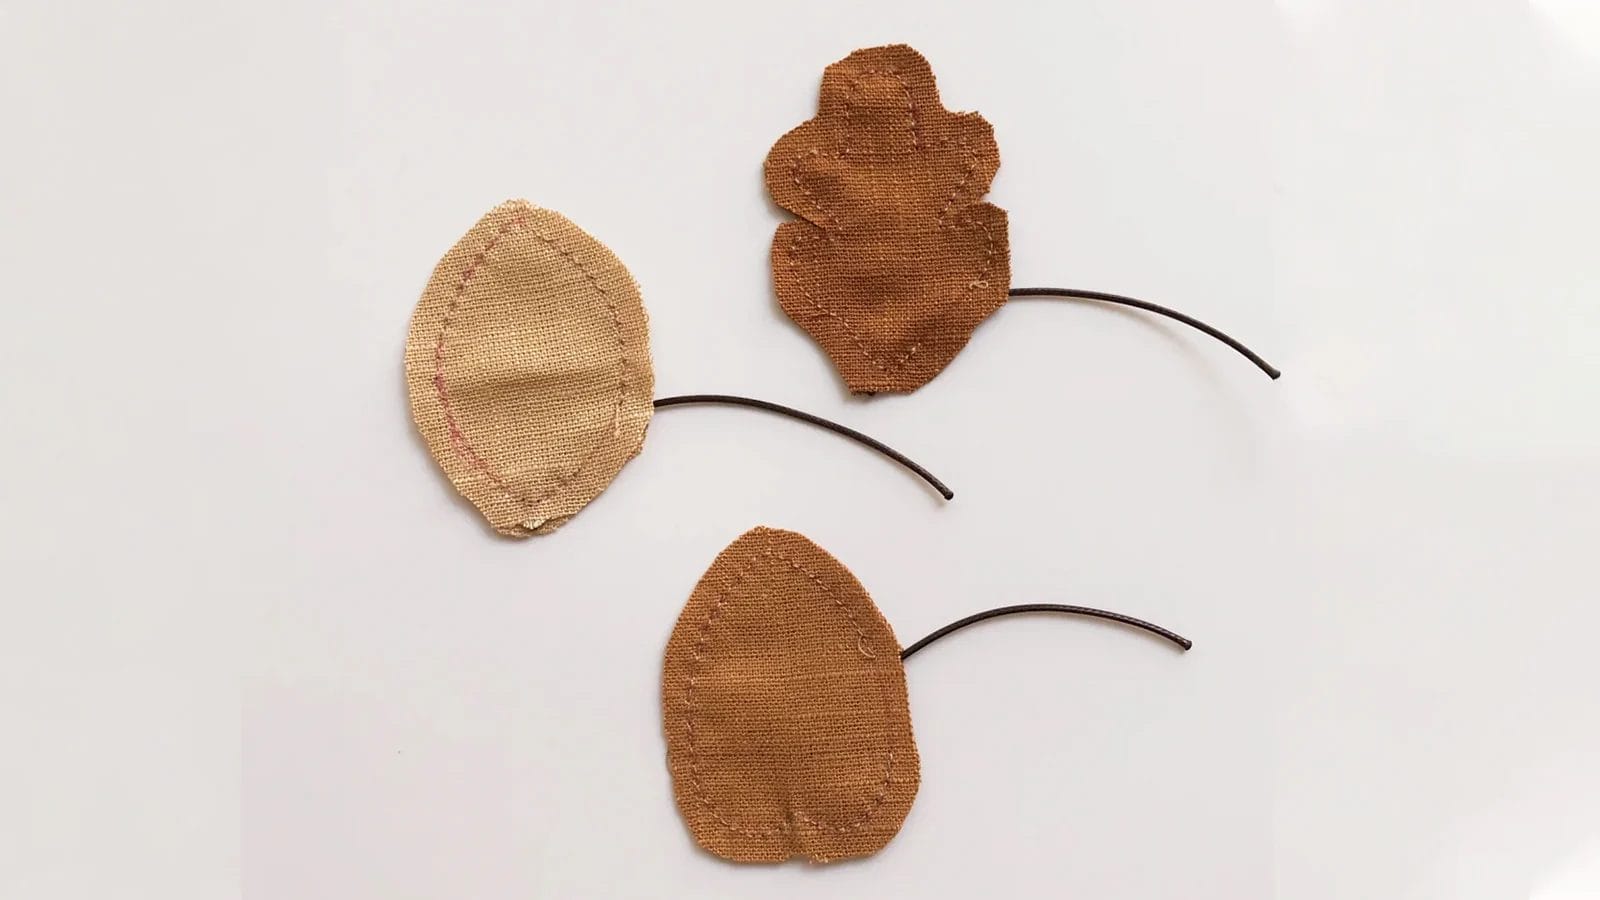
Step 3: Cut Out the Leaf Pieces
With the templates ready, pin them to your chosen fabric scraps and carefully cut out two identical leaf shapes. These will form the front and back of your bookmark.
For added stability, consider incorporating interfacing or batting between the fabric layers. Ensure each edge is cut cleanly to achieve a polished finish once assembled.
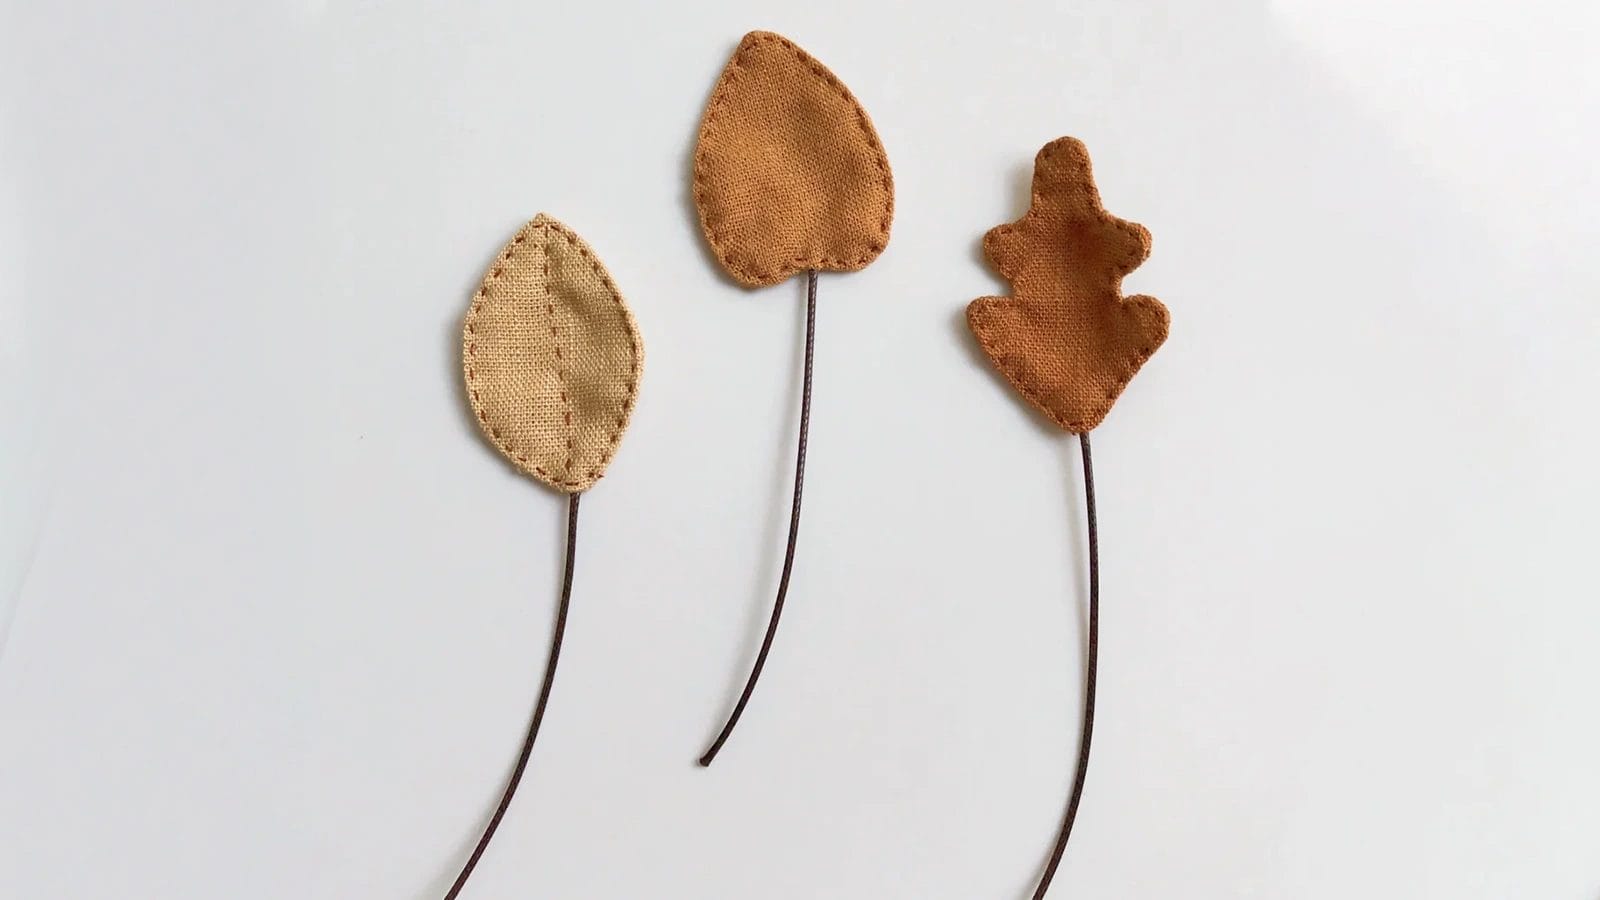
Step 4: Layer and Sew the Leaves
The vibrant fabric scraps you've chosen are ready to be transformed into a charming leaf bookmark.
Layer your fabric pieces with their right sides facing each other. If you opt for sewing, pin the layers together and stitch along the edges, leaving a small opening. Don't forget to cut a piece of wax string for the stem and insert it into the leaf while sewing.
Alternatively, apply fabric glue along the edges, pressing the layers together, but remember to leave an opening for turning.
After turning the fabric right side out, use a blunt tool to gently push out the leaf points and close the opening.
Step 5: Add Details (Optional)
After securing the layers of your leaf bookmark, it's time to enhance its charm with some creative details.
Begin by using contrasting thread for decorative stitching along the edges of your fabric scraps. This not only adds visual appeal but also boosts durability. If desired, you can also stitch the leaf vein in a similar manner.
Don't hesitate to layer different textures of fabric scraps to create a dynamic design that stands out.
With these details, your bookmark is now ready to grace your favorite reads!
Ideas for Additional Embellishments
When it comes to embellishing your DIY leaf bookmark, creativity knows no bounds.
- Use fabric paint or markers to create intricate designs directly on the fabric, enhancing the bookmark's aesthetic.
- Consider attaching tiny beads or buttons to give it a three-dimensional effect, making your bookmark stand out.
- Lace or ribbon can serve as delicate embellishments, adding a whimsical charm.
- For a layered look, experiment with fabric appliqué by adding different fabric shapes to create complex designs on the surface.
Each embellishment choice allows you to express your unique style, transforming simple fabric scraps into a delightful and functional piece of art.
Conclusion
You've now crafted beautiful leaf bookmarks from fabric scraps, transforming what might've been discarded into a charming accessory. With your creativity, you added personal touches that make them unique gifts.
Imagine flipping open your favorite book and being greeted by this vibrant, handmade piece—it's not just a bookmark; it's a reminder of your resourcefulness and artistic flair. Enjoy the satisfaction of your DIY project and let it inspire future creative endeavors. Happy reading!
Learn more sewing projects on the Longan Craft Blog, and dive into the fabric world with Longan Craft!
FAQs
What Fabric to Use for Bookmarks?
Choose cotton or cotton blends for bookmarks since they're durable and easy to clean. Avoid stretchy fabrics like knits, which complicate sewing. Lightweight options, such as quilting cotton, provide flexibility without bulk, ensuring your bookmark remains sleek.
How to Use Leftover Fabric Scraps?
You can transform leftover fabric scraps into creative projects. Use them for patchwork quilts, applique designs, or small crafts like coasters and keychains. Repurpose scraps for eco-friendly projects that minimize waste while expressing your creativity.
How to Make a Leaf Bookmark?
To make a leaf bookmark, choose fresh, flat leaves and place them between wax paper sheets. Press leaves or flowers in a heavy book for 1-2 weeks. Optionally, seal the leaves with lamination or contact paper. You can punch a hole at the top and add a ribbon for decoration.
How Do You Make a Fabric Bookmark With a Tassel?
Cut fabric to your bookmark size. Fold, sew, and turn it right side out. Make a tassel with embroidery floss, attach it through a loop, and top stitch around the bookmark to secure everything and finish neatly.
0 comments