

A fabric tissue box is a simple yet stylish way to add warmth and personality to any room. It not only protects the tissue from damage but also blends seamlessly with your home décor, making everyday essentials look elegant and inviting. Making your own fabric tissue box is easy, affordable, and allows you to customize it with your favorite colors and patterns.
In this detailed tutorial, I will guide you step-by-step through creating a beautiful fabric tissue box. Whether you are an experienced sewist or a beginner, this project is manageable and rewarding.
Key Takeaways
- Simple Materials: The project requires only two pieces of fabric cut to size, making it cost-effective and easy to prepare.
- Basic Sewing Skills: Sewing straight seams and boxed corners are all you need; perfect for beginners.
- Customization: Choose fabrics that match your decor or express your personality—cotton prints, linen textures, or even velvet for a luxurious feel.
- Versatility: This fabric box fits standard rectangular tissue boxes, making it a practical addition to any room.
- Gift Idea: Handmade fabric boxes make thoughtful gifts that combine utility with handmade charm.
Materials Needed
- Outer fabric: 25 cm x 36 cm
- Lining fabric: 25 cm x 36 cm
- Sewing machine or needle and thread
- Pins or sewing clips
- Fabric chalk or pen
- Scissors
- Iron
DIY Fabric Tissue Box: Step-by-Step Instructions
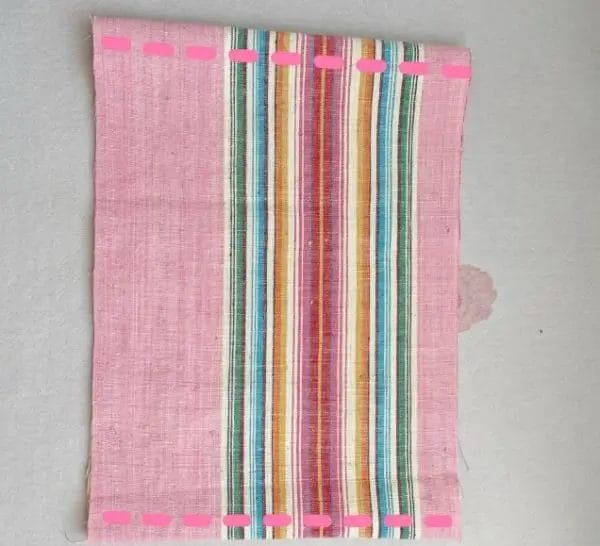
Step 1: Cut the Fabrics
Cut one piece each of the outer fabric and lining fabric measuring 25 cm by 36 cm. Make sure your fabrics are ironed flat before cutting for accurate dimensions.
Step 2: Sew Outer Fabric and Lining Together
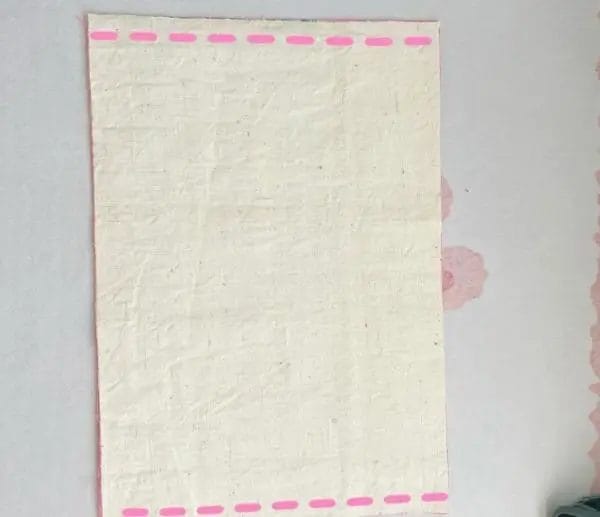
Place the outer fabric and lining fabric pieces right sides together, aligning edges carefully. Sew along the two short sides (the 25 cm edges), leaving the longer sides open. Use a straight stitch with about 1 cm seam allowance.
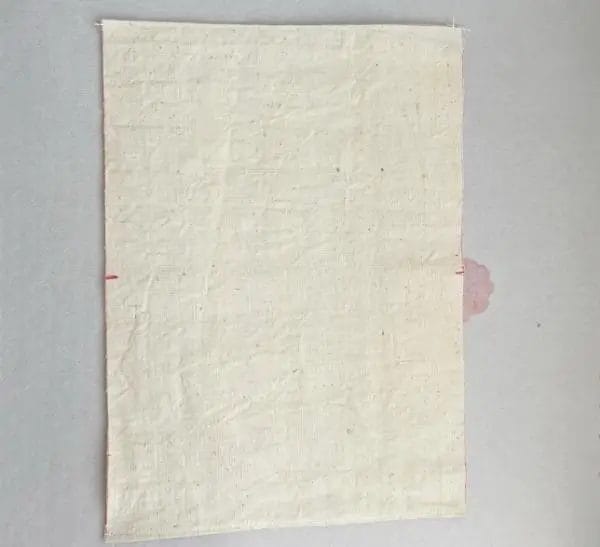
Step 3: Turn Fabric Right Side Out and Press Seams
Turn the sewn piece right side out through one of the open ends. Press the seams flat on both sides using an iron to create crisp edges. Then topstitch along both short sides close to the edge for a neat finish.
Step 4: Mark Center Points on Long Sides
Using fabric chalk or a washable pen, mark the center point along each of the two longer edges (36 cm sides). These marks will guide you in folding and shaping the box.
Step 5: Fold Sides Inward and Overlap by 1 cm
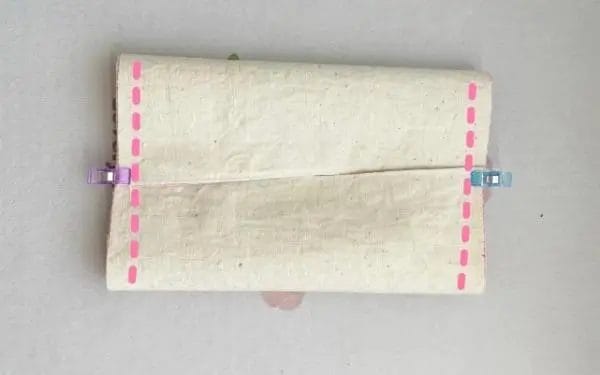
Fold each short side inward towards the center so that the edges overlap by approximately 1 cm at the center point marked in Step 4. Secure these folds with pins or clips. Press the folds flat with an iron to help keep them in place.
Step 6: Draw Auxiliary Lines on Corners

On both front and back sides of fabric, draw squares measuring 3 cm by 3 cm at each corner where the sides are folded. These lines will guide your corner stitching.
Step 7: Open Corners and Sew Along Marked Lines
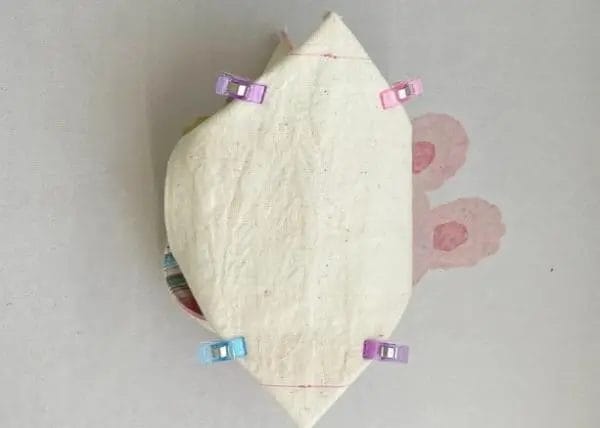
Open each corner so that the fabric layers lie flat, forming a triangle shape. Sew along the drawn 3 cm lines on all four corners. This step shapes the tissue box by creating boxed corners.
Step 8: Trim Excess Fabric from Corners
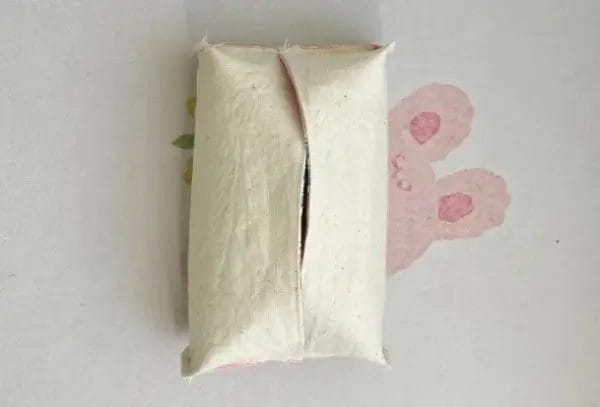
After sewing, cut away the extra fabric beyond your stitched lines at each corner to reduce bulk when you turn the box right side out.
Step 9: Turn Cover Right Side Out and Final Press
Turn the tissue box right side out through the open end. Push out the corners neatly to form a clean shape resembling a box. Give the entire cover a final press with an iron to sharpen all edges.
Your beautiful fabric tissue box is now complete!
Frequently Asked Questions (FAQ)
Can I use different fabrics for outer and lining layers?
Yes! Mixing fabrics allows you to add contrast or texture. Just ensure both fabrics have similar weights for easier sewing and better shape retention.
What if my tissue box has different dimensions?
Measure your tissue box carefully and adjust the fabric dimensions accordingly, adding seam allowances and extra length for folding.
How do I keep the fabric box clean?
Use washable fabrics and spot clean as needed. Removable covers can be hand washed or machine washed on delicate cycles depending on fabric choice.
How can I add embellishments?
Embroidery, appliqué, patches, or decorative trims can be added before sewing for a personalized touch.
Can this pattern be adapted for square or round tissue boxes?
This tutorial is designed for rectangular boxes. For square or round shapes, modifications in measurements and corner shaping would be necessary.
Final Thoughts
Making your own fabric tissue box is a quick and satisfying project that adds comfort and style to your living space. It’s an excellent way to practice sewing skills while creating something functional and beautiful.
Whether you choose bold prints or subtle tones, this cozy accessory will brighten up any room and elevate ordinary tissue boxes into charming decor pieces. Enjoy crafting your unique fabric tissue box!
0 comments