

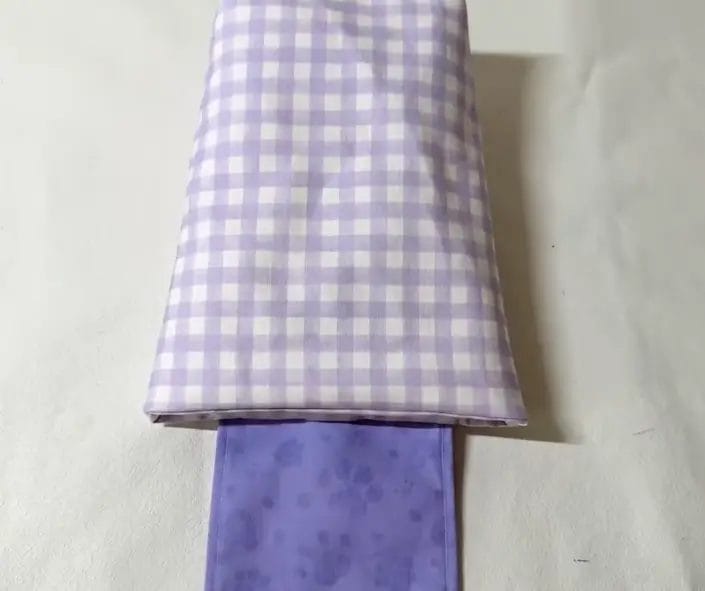
Giving gifts wrapped in fabric makes presents look thoughtful and elegant — and it’s a sustainable alternative to single‑use paper. This tutorial shows you how to make a structured, reusable fabric gift bag with a flap and little hanging loop. The finished bag is sturdy enough for small to medium gifts and can be customized with prints, trims, or bows.
Key Takeaways
- Stabilize outer fabric with interfacing to create a shapely, reusable gift bag that holds form even when empty.
- Making a separate lining with a turning opening yields neat interior seams and a polished finish.
- Boxed corners and short topstitch lines create a structured base so the bag stands up on its own.
- Adding a flap with a small loop and snap gives a secure closure and an elegant presentation.
- This project is easily customized: change sizes, fabrics, trims, or add pockets and embroidery to tailor the bag for any occasion.
Materials Needed
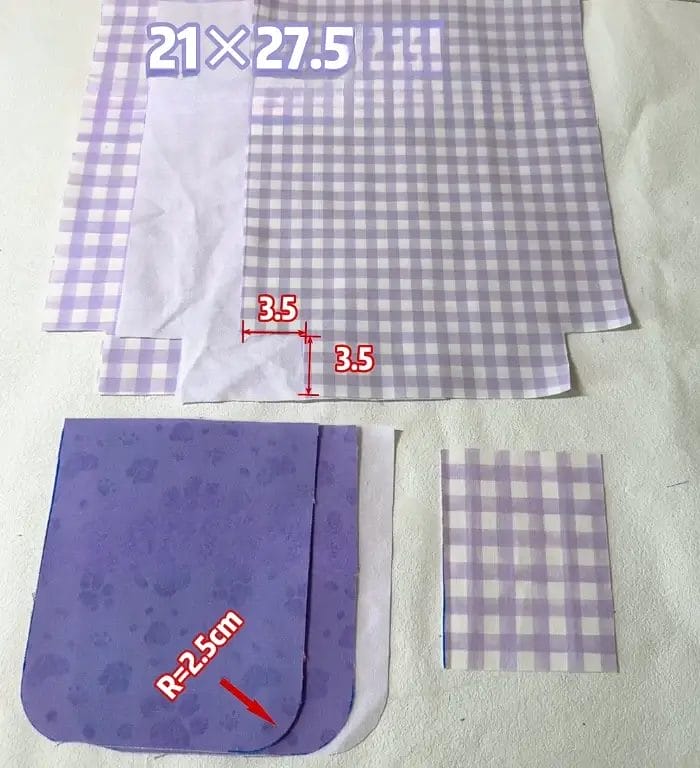
- Bag body: 21 × 27.5 cm — cut 2 outer fabric pieces, 2 lining pieces, and 2 interfacing (fuseable) pieces
- Flap: 13 × 15 cm — cut 2 outer flap pieces and 1 interfacing piece
- Loop: 8 × 10 cm — 1 outer fabric piece (or ribbon)
- Matching thread, sewing machine, pins/clips, iron, scissors or rotary cutter, fabric marker
- Optional: hand‑sewn snap set (4‑part snap) or magnetic snap, small press tool or snap pliers
Prepare Fabric Before Sewing Gift Bag
- Prewash and press your fabrics (unless they’re prewashed) to avoid later shrinkage and to make cutting accurate.
- Use medium‑weight cottons or linens for a stable bag; lightweight fabrics need heavier interfacing.
- Choose a fusible interfacing appropriate to your fabric: woven or non‑woven fusible for structure.
How to Sew Pretty, Reusable Fabric Gift Bags
Step 1: Fuse Interfacing to Outer Pieces

Fuse interfacing to the two bag‑body outer fabric pieces (21 × 27.5 cm) and to one flap outer piece (13 × 15 cm) following the interfacing manufacturer’s instructions. Fuse the interfacing to the wrong side of the fabric so the right side remains clean. Press well so the stabilizer adheres evenly.
Step 2: Make the Flap
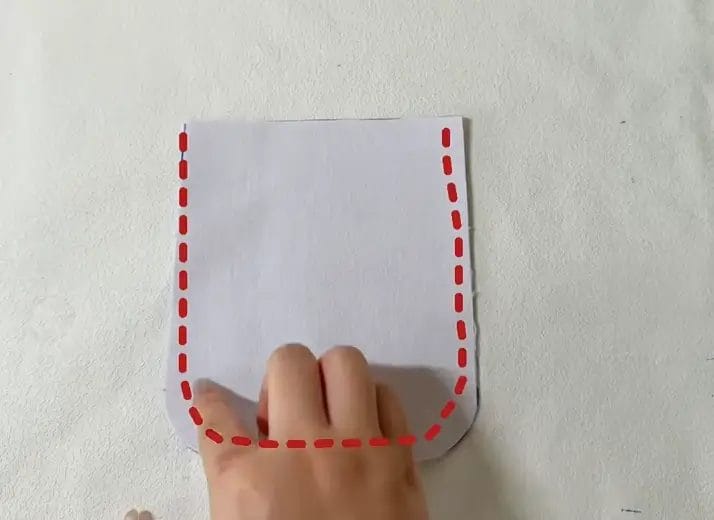
Place the two flap outer pieces right‑sides together and pin. Sew around three sides, leaving the top straight edge open. If your flap design uses a rounded edge, clip small notches into the seam allowance around curves (without cutting the stitching) to reduce bulk for a smooth turn.
Trim seam allowances and turn the flap right side out through the open side. Use a blunt tool to push out corners and curves neatly.
Press the flap flat, then topstitch a neat 0.5 cm (5 mm) from the sewn edges on the three sewn sides. Topstitching stabilizes the flap and gives a crisp edge.
Step 3: Make the Hanging Loop
Take the 8 × 10 cm piece and fold it into a small loop: fold long edges in (or fold in thirds for a narrow strap), press, then sew close to both long edges to form a neat strap. Alternatively use a short length of pre‑made ribbon.
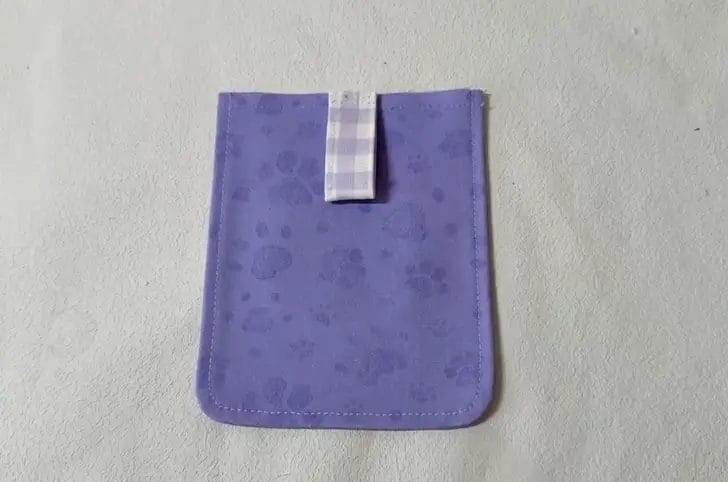
Center the finished loop on the flap’s top with the loop opening toward the flap’s free edge so that when the flap is attached the loop will be exposed.
Step 4: Place Flap on Bag Body
Take one of the two outer bag body pieces with interfacing fused and position the stabilized flap centered along the top edge where the flap will fold over when closed. Align the flap’s raw top edge with the top raw edge of the bag body so that when the bag is assembled the flap will rest over the front. Temporarily baste the flap in place with a few stitches or clips; ensure the loop is sandwiched where desired.
Step 5: Sew bag body outer pieces
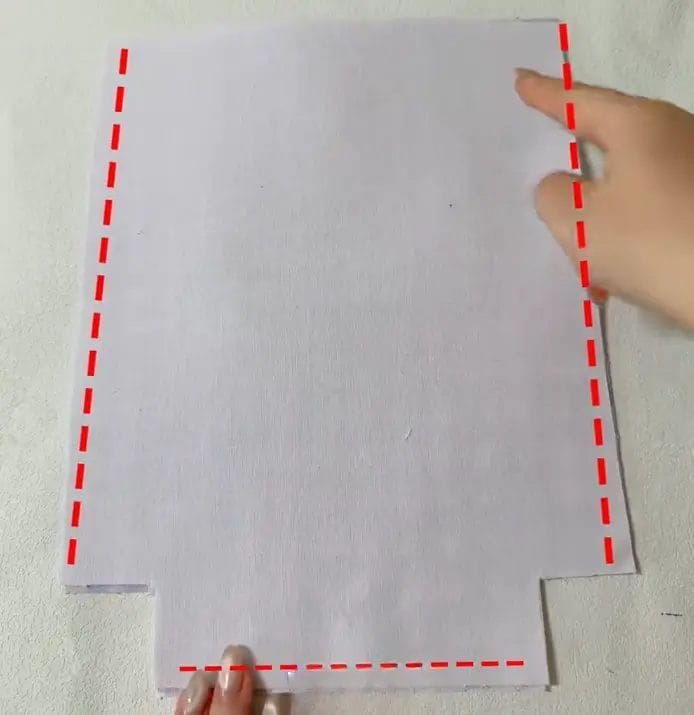
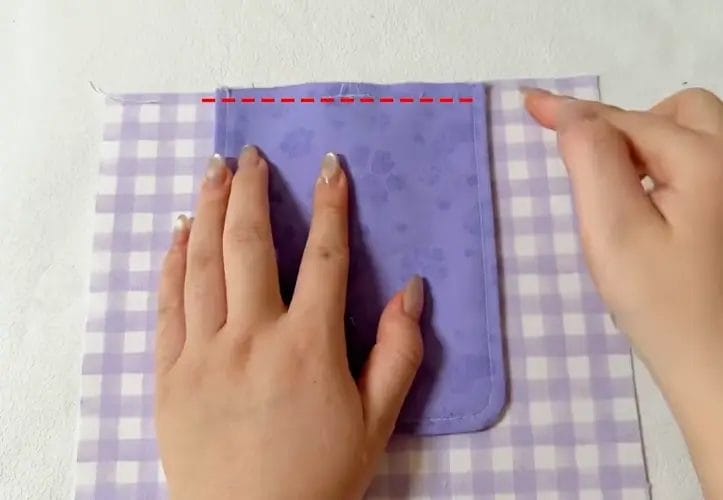
Place the two interfaced outer bag pieces right‑sides together and sew along three sides (two short sides and the bottom), leaving the top open. For a clean finish and easier corner shaping, sew with a standard seam allowance (1 cm is fine).
After sewing, box the corners: at each bottom corner, fold the corner so side seam and bottom seam align, and sew to shape a flat bottom. Trim seam allowances to reduce bulk.
Repeat step 5 with the two lining pieces, but leave a 5 cm opening in the center of the bottom seam (this is the return opening used later to turn the bag right side out). Make the same boxed corners on the lining as you did on the outer bag.
Step 6: Sew Outer Bag into Lining
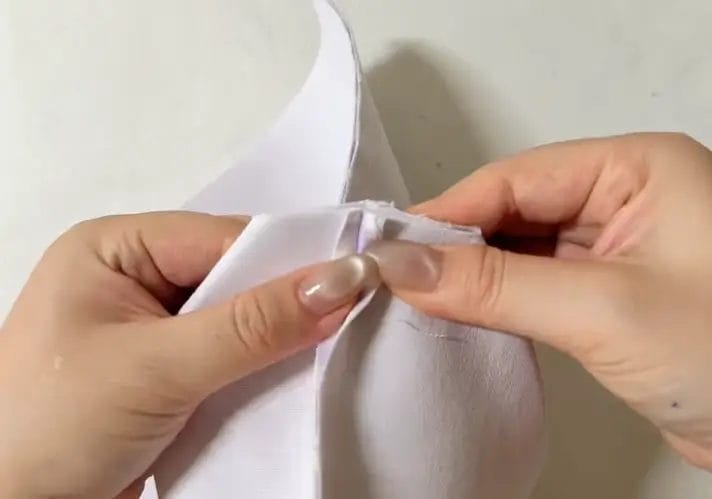
Turn the lining right side out. Keep the outer fabrc inside out. Insert the lining into the outer bag so right sides face each other. Align the top raw edges and pin or clip all around so seams line up and flap and loop remain positioned correctly.
Sew around the top edge with your chosen seam allowance, leaving the bag still inside out at this stage. Make sure seam is even; this seam will be hidden when you turn it.
Step 7: Turn Bag and Close Opening
Reach into the lining’s 5 cm opening and pull the outer bag through so the whole bag is now right side out. Push the lining into the outer bag and press the top edge flat. Press seam allowances neatly.
Hand‑stitch the 5 cm opening in the lining closed with an invisible ladder stitch or use a small machine topstitch if preferred. Press again.
Step 8: Shape the Bag Mouth and Define Corners
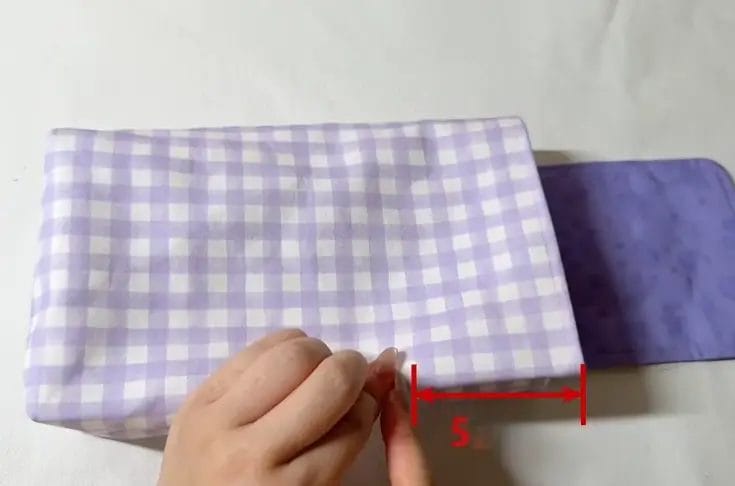
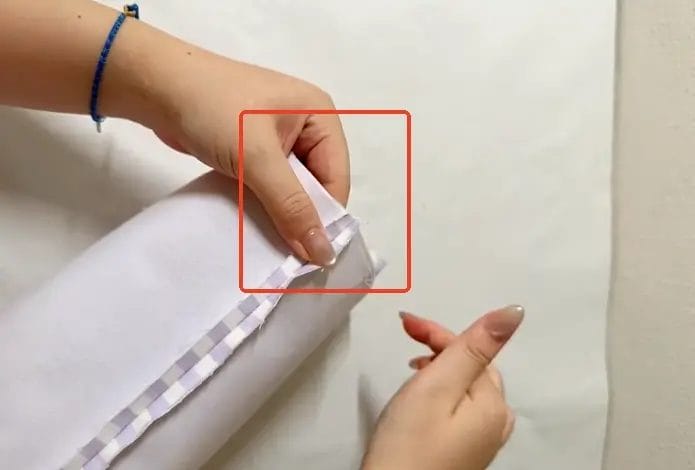
Press the bag so edges are crisp. To get defined edges, fold the four side edges into pleats: measure and fold the side seams toward the center and topstitch a short 5 cm line from the top down on each corner to hold those folds in place.
Make small evenly placed topstitches along the top edge (0.5 cm from edge) for a finished look and extra durability.
Step 9: Install Snap Closure on Flap and Bag Front
Mark matching locations for the snap on the flap and the front body. Follow the snap manufacturer’s tool instructions to attach the male/female snap halves. Test closure strength and alignment before finalizing — place the flap closed and check position.
Frequently Asked Questions (FAQ)
What fabrics work best for fabric gift bags?
Medium‑weight woven cottons, linen blends, canvas, or home‑decor weight fabrics are ideal. They provide enough body to hold gifts and respond well to interfacing. Lightweight fabrics can be used if you add a heavier interfacing.
How do I size the bag for different gifts?
Base sizes scale up simply. Keep the same proportions (width × height) and increase dimensions as needed. Add 1–2 cm seam allowance for each edge for easier sewing and turning.
Can I machine wash these bags?
Most cotton bags with fusible interfacing can be gently machine washed on a cold, delicate cycle. Air dry to maintain shape; repeated high‑heat drying may loosen interfacing.
How do I get crisp, professional seams?
Press every seam with an iron. Trim seam allowances on curves and corners. Topstitch near edges to flatten seams and secure layers.
Can I make the flap magnetic instead of using snaps?
Yes — small magnetic snaps work well but be aware they require a small amount of bulk and precise cutting for installation. Use interfacing and reinforcement to prevent fabric wear.
How do I add an inner pocket?
Cut a small pocket piece (for example 12 × 10 cm), hem the top edge, then place on inside of one lining panel and stitch the sides and bottom before assembling the lining.
Final thoughts
A handmade fabric gift bag elevates any present and reduces waste. Once you’ve made your first bag, the process goes faster and you can adapt the design for birthdays, holidays, weddings, and more. Keep a few on hand in different sizes and fabrics for quick, beautiful, eco‑friendly wrapping that recipients will appreciate and reuse.
0 comments