

Transforming old jeans into a stylish DIY apron is a creative way to repurpose denim and add a unique touch to your kitchen or craft space. This project reduces waste and allows you to showcase your style.
With just a few simple tools and some basic sewing skills, you can create a functional and fashionable apron that's perfect for cooking, gardening, or any hands-on activity. Dive into this fun and eco-friendly project to give your favorite jeans a new lease on life!
Key Takeaways
- Select sturdy denim jeans in good condition for adequate fabric.
- Cut the jeans along the inner seam to create flat denim pieces.
- Assemble the apron by sewing panels symmetrically with an ½ inch seam allowance.
- Customize with pockets, decorative stitching, and vibrant bias tape.
- Attach long straps securely to the apron bib for wearing.
Prepare the Materials Needed
To kick off your DIY apron project, it's vital to gather all the materials:
- Old Jeans: Choose two pairs that you no longer wear but still have good fabric.
- Fabric Lining (Optional): This is optional if you want to add an inner lining for extra strength or style.
- Sewing Thread: Choose a color that matches or contrasts with your denim, depending on your preference.
- Bias Tape or Fabric Strips: For creating ties and possibly raw edging, if desired.
- Scissors: For cutting denim.
- Sewing Machine: For stitching pieces together.
- Pins or Clips: To hold pieces together while sewing.
- Measuring Tape: To measure and mark your cuts accurately.
- Tailor’s Chalk or Fabric Marker: For marking cutting lines on the denim.
- Seam Ripper: To carefully remove seams if needed.
DIY Apron From Jeans: Step-by-Step Instructions
Are you ready to give your old pair of jeans a new purpose? Follow this simple tutorial to make a DIY apron.
Step 1: Select and Prepare the Jeans
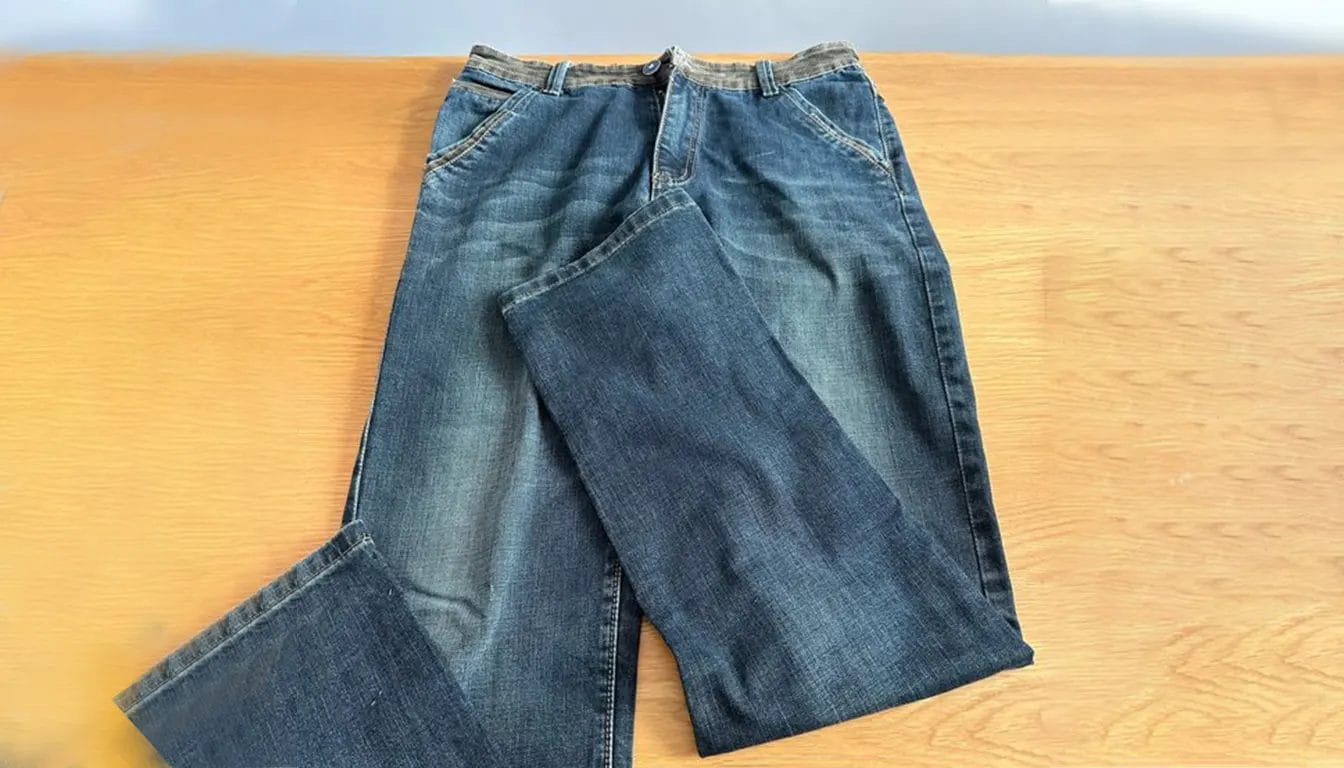
First, select old but in good condition jeans. You want enough denim to guarantee that your apron meets your desired length and style.
A personal tip: Use a pair of men's jeans, as they're big enough. Once you've chosen, prepare by laying the jeans flat. Remove any additional embellishments or pockets. You can reuse them later for a personal touch.
Before cutting, iron the denim to smooth out wrinkles. This makes the cutting process easier and cleaner.
Step 2: Cut Two Jeans Legs
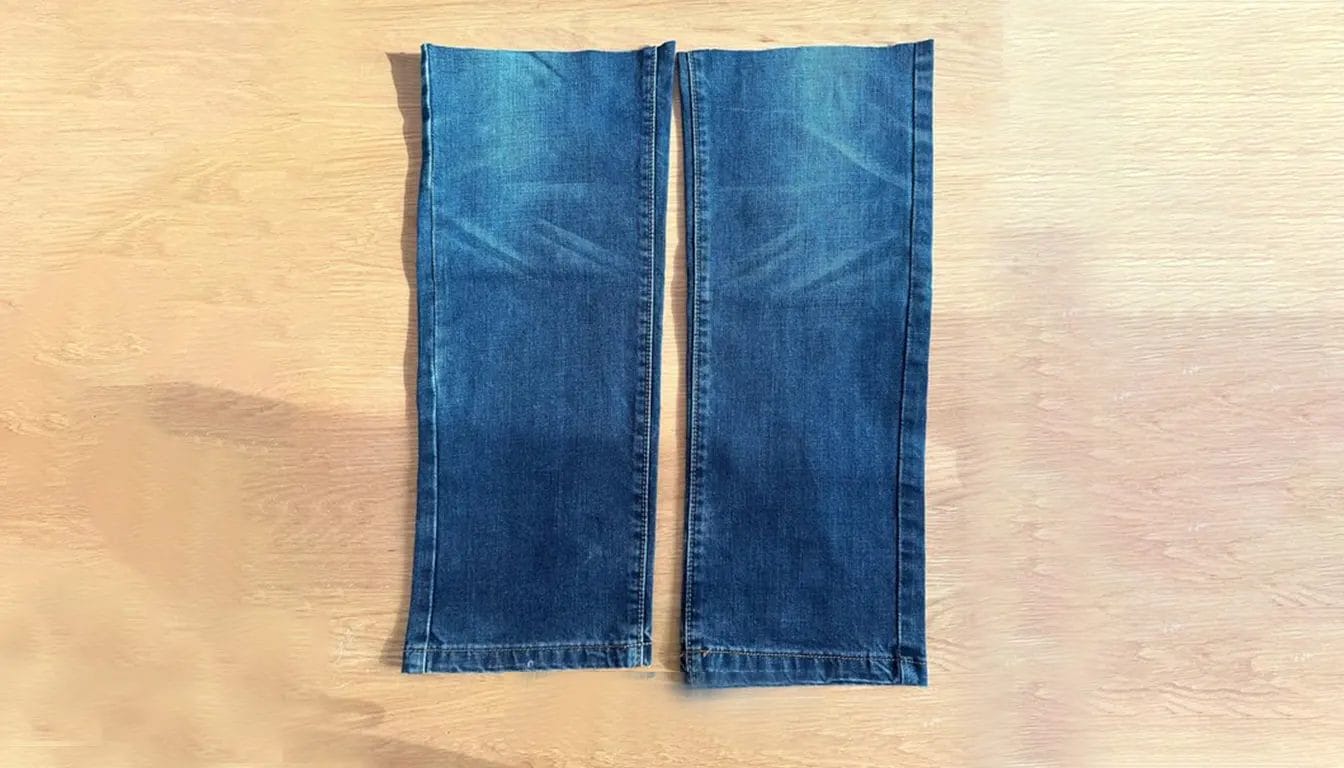
With your chosen jeans, cut the two legs about 38cm. Based on your measurements, you can cut longer.
Then, carefully cut along one of the inner seams of each leg. Unfold them, and you will have two rectangular denim pieces.
Step 3: Cut One Leg Piece in Half and Arrange These Pieces
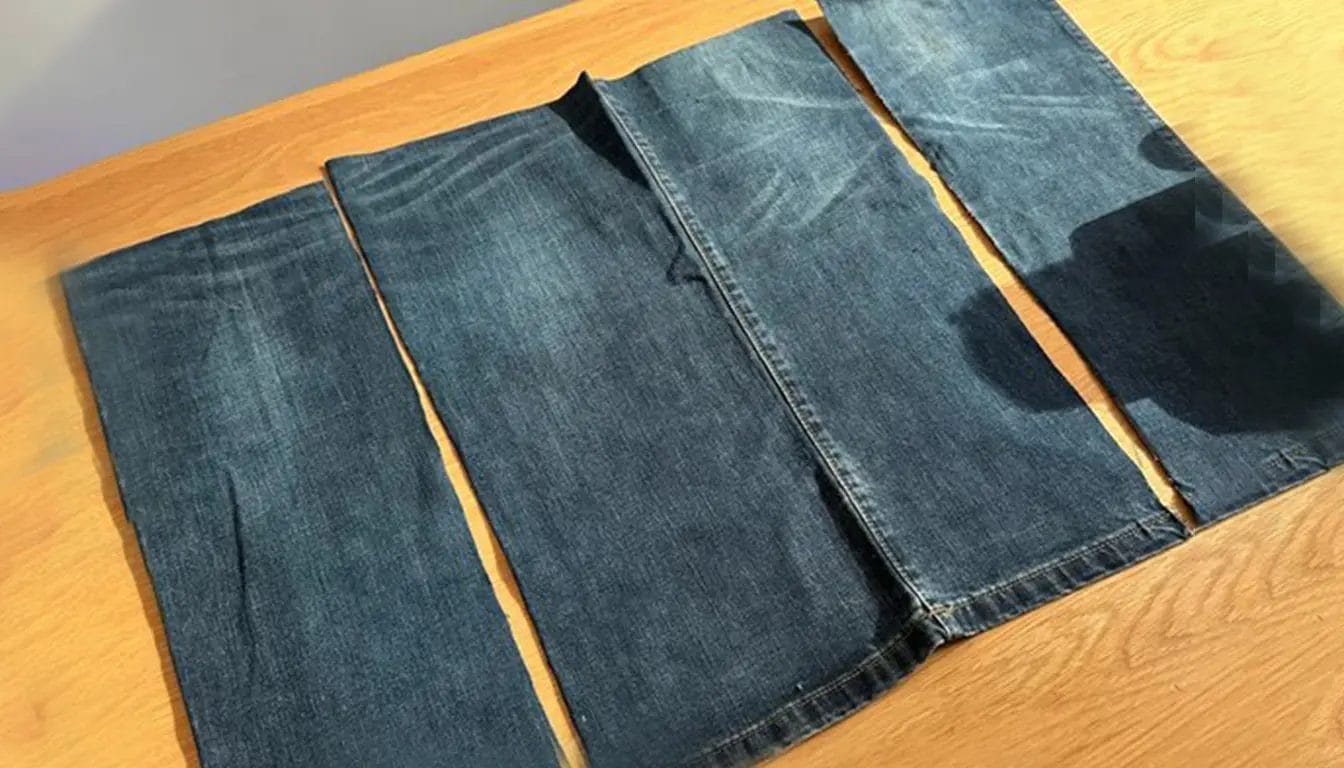
Cut one leg in half lengthwise to create two side panels. These will add that extra width, perfect for any creative or culinary endeavor.
Then, position these panels symmetrically on both sides of the uncut trouser legs. Leave about ½ inch to guarantee you can sew them securely.
Pin the panels in place meticulously. Once pinned, visualize the final apron and adjust as needed for symmetry.
Step 4: Sew the Three Pieces Together
Sew the pieces with a sewing machine or by hand, using backstitching for extra durability. After sewing, press the seam with an iron to achieve a flat, polished finish.
Step 5: Cut and Stitch a Trapezoidal Denim Piece
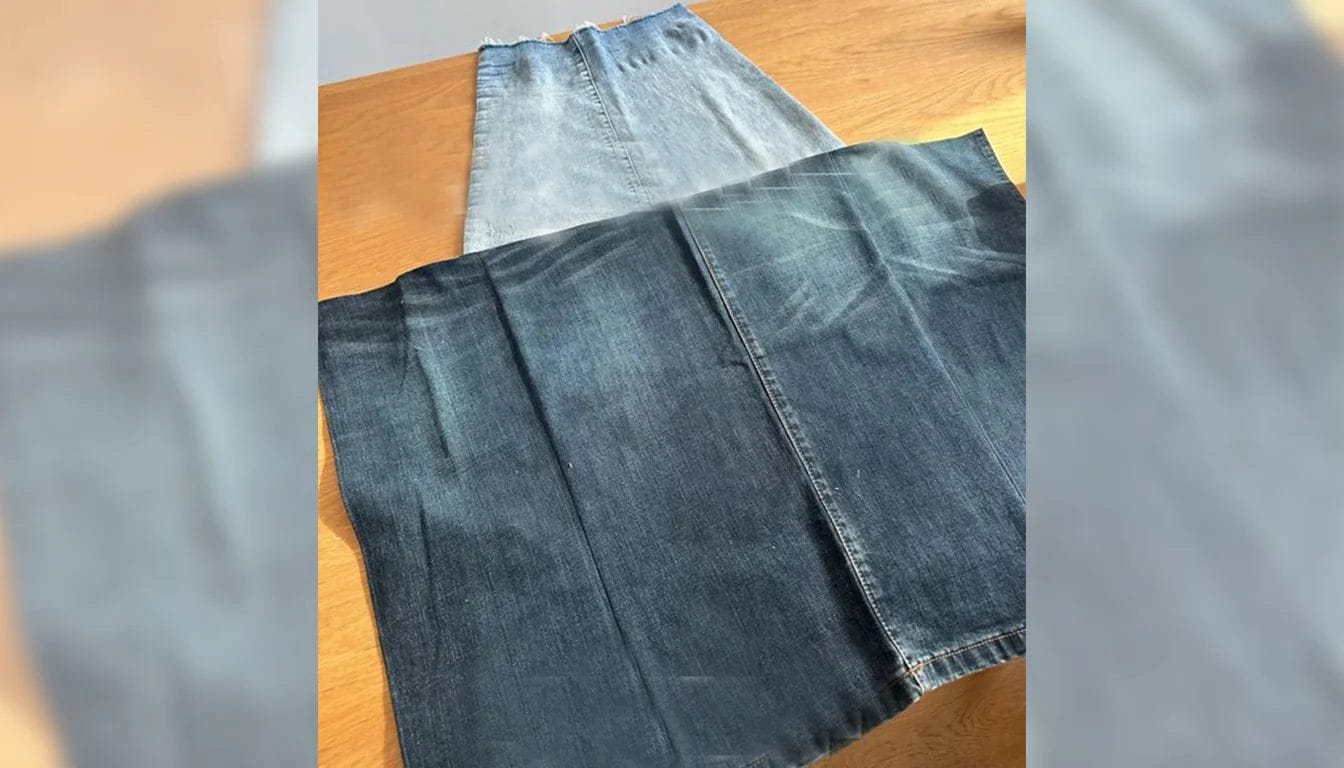
Based on the width of the middle piece you just sewed, cut a trapezoidal piece from another pair of jeans or another fabric.
Once you have your trapezoidal piece, align it with the middle of your apron body. Secure it with strong backstitches; this will ensure that it won't budge.
Step 6: Add a Waistband and Pockets
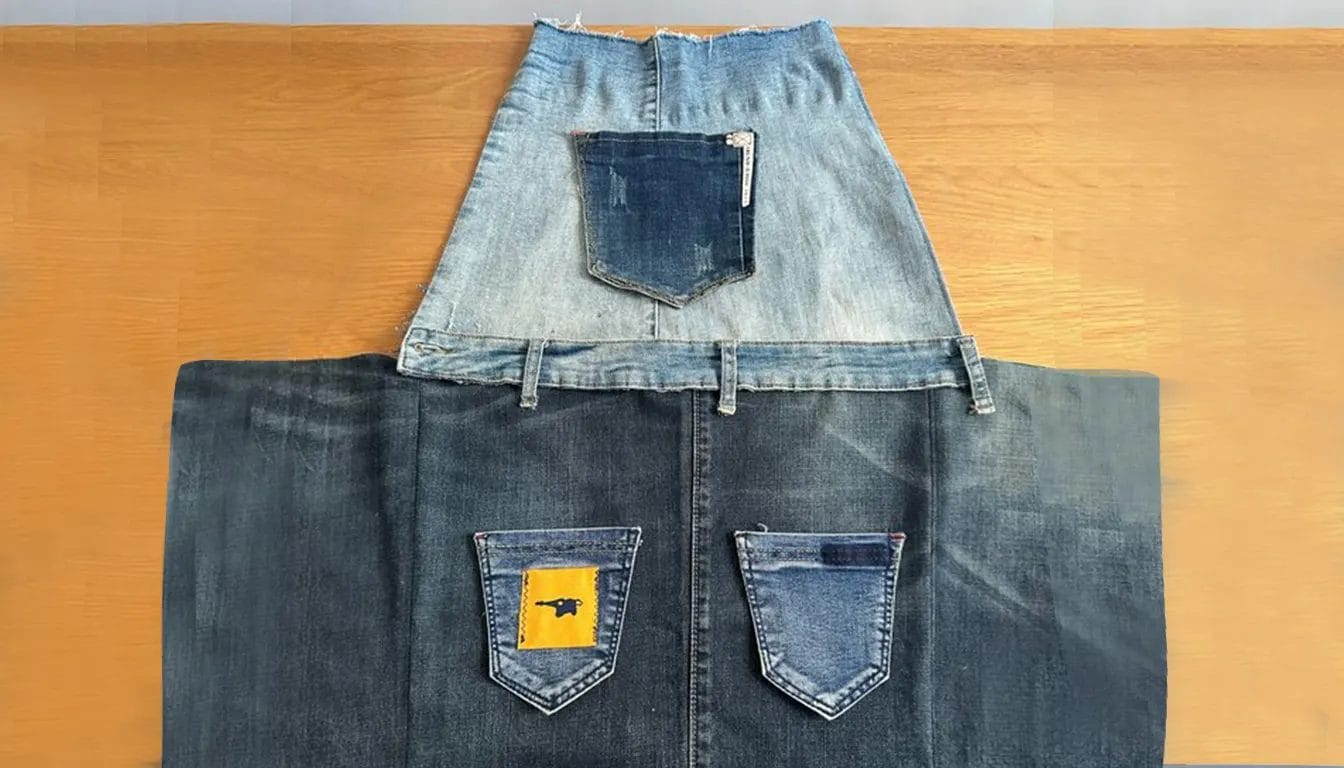
To add the finishing touches to your denim apron, you can cut a waistband from your jeans and secure it by sewing or gluing.
Next, use a seam ripper to detach several pockets from the old jeans. Before attaching, consider adding decorative stitching to personalize them. Securely sew these pockets onto the apron's front.
Step 7: Fold the Apron and Cut the Excess Fabrics
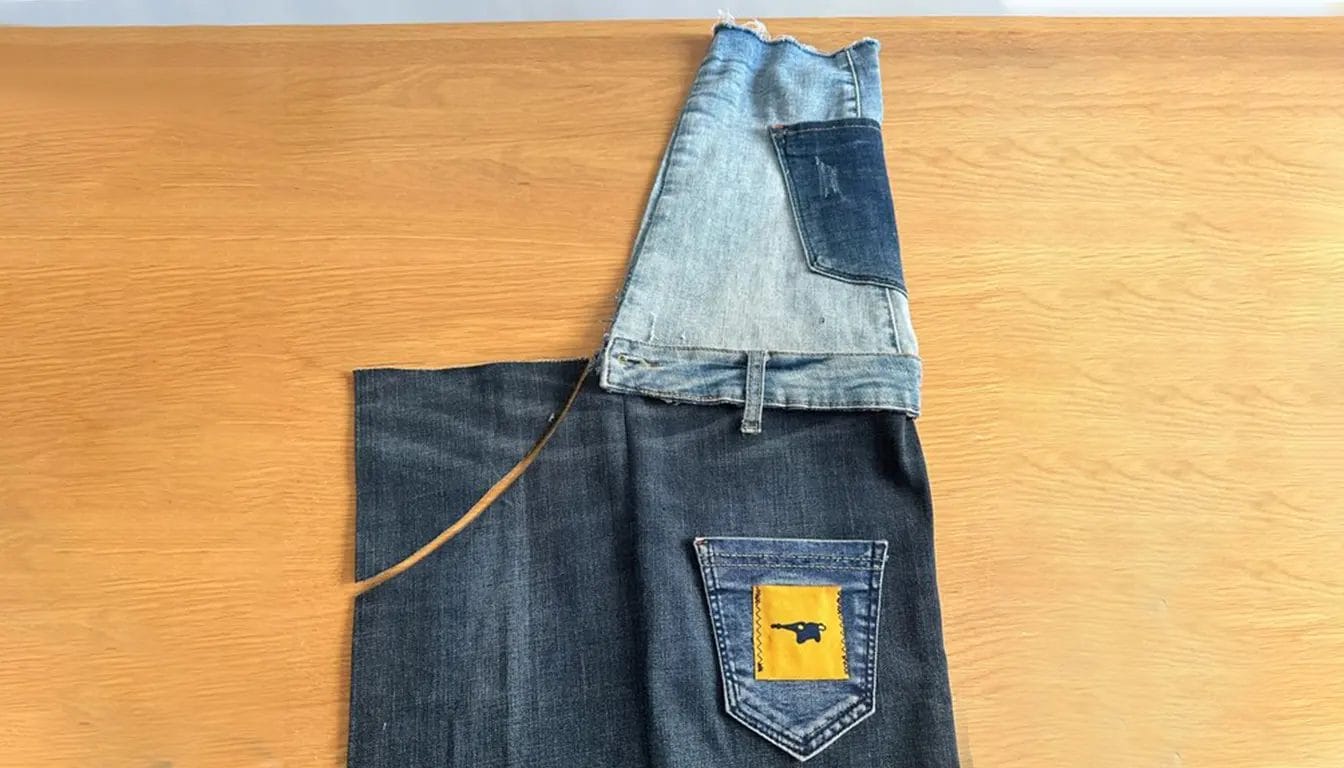
Fold your apron in half lengthwise. Grab your sharp fabric scissors and cut off the excess fabric along the sides of the trapezoid.
Once cut, don't forget to neaten those edges with a zigzag stitch. This step prevents fraying and gives your apron a professional finish.
Step 8: Add Apron Straps and Finish it Up
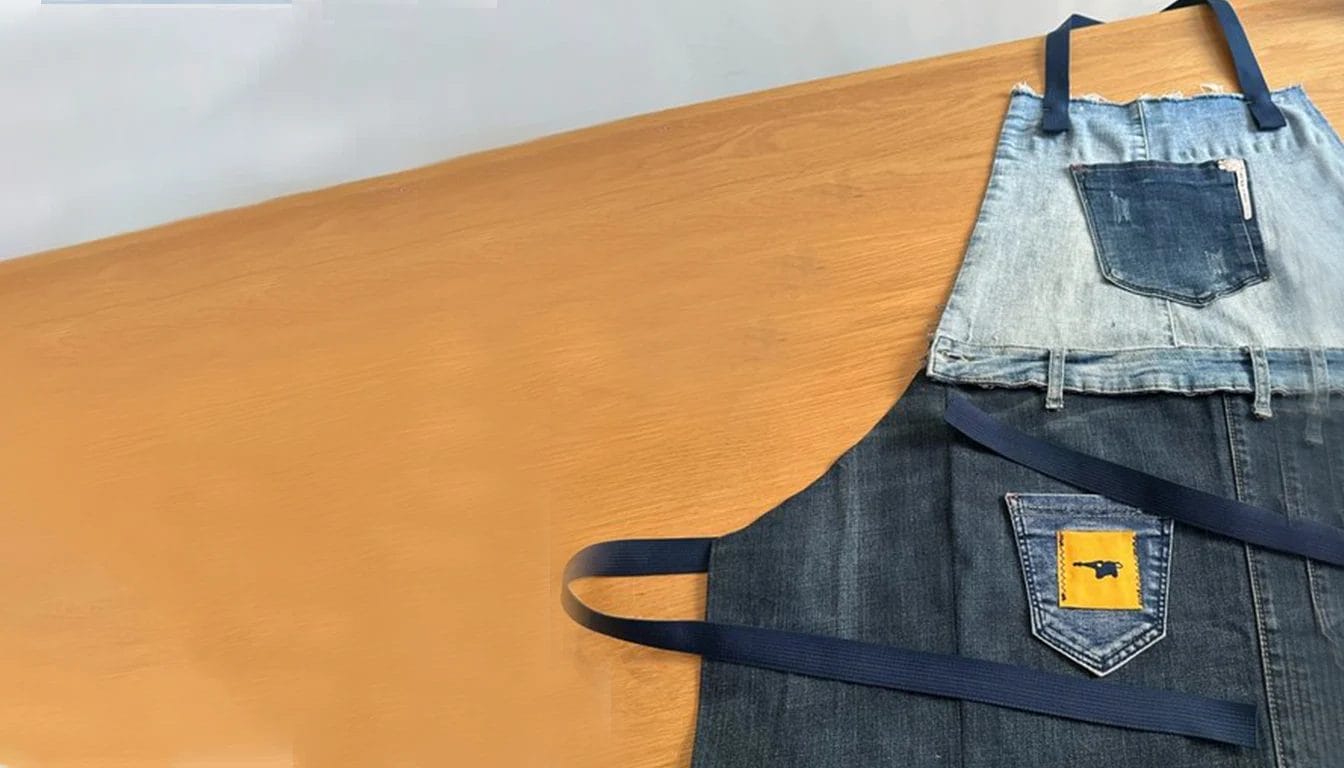
Ready to add straps to your apron? Cut two strips of leftover denim about 3 inches wide and 30-36 inches long.
Fold each strip lengthwise, right sides together, and sew along the long edge, leaving the ends open. Use a safety pin to turn the straps right side out, then press them flat with an iron.
A simpler method involves using bias tape or ribbons, which can be either sewn or glued into position.
After adding straps, your DIY denim apron is ready to use!
Ideas for Personalizing the Apron
When you want to add a personal touch to your DIY denim apron, release your creativity with various customization options.
- Embroidery: Add some embroidery designs or initials to give it a personal touch. You can stitch flowers, patterns, or even your name.
- Patches: Sew on colorful patches or fabric pieces to add some flair. These can be fun shapes, logos, or themed designs that reflect your interests.
- Paint: Use fabric paint to create unique designs or patterns. You can stencil on shapes or freehand a design that you love.
- Trim and Lace: Add lace or trim around the edges or pockets of the apron for a feminine touch.
- Buttons and Beads: Decorate the apron with buttons or beads for added texture and visual interest.
- Fabric Appliqué: Cut out fabric shapes and sew them onto the apron for a layered look. This could include hearts, animals, or abstract shapes.
- Bleaching/Distressing: Use bleach to create a tie-dye effect or distress certain areas for a vintage look.
Conclusion
With your new denim apron ready, you're not just showcasing your creativity but embracing sustainability. Think about adding personal touches like embroidery or fabric paint to make it truly yours.
Whether you're baking cookies or painting a masterpiece, this upcycled creation is both a conversation starter and a symbol of your crafty ingenuity. Enjoy every moment wearing it!
Learn more sewing projects on the Longan Craft Blog, and dive into the fabric world with Longan Craft!
FAQs
How Do I Choose the Right Pair of Jeans for an Apron?
Choose a pair of jeans with thick, durable fabric. Opt for those with minimal wear or stains. Personalize by selecting jeans with unique pockets or stitching. Remember, a personal favorite pair adds sentimental value to your project. Understanding denim fabric characteristics and uses can further enhance your selection process. Different weights and weaves contribute to the durability and style of jeans, making it crucial to choose wisely. Additionally, considering how these fabrics interact with various washes and finishes can lead to a more tailored fit and appearance.
Can I Make an Apron Without a Sewing Machine?
Absolutely, you can create an apron without a sewing machine! Grab a sturdy needle and thread. Use fabric glue for hems and seams. Add buttons and patches for a personal touch.
How Do I Clean and Maintain a Denim Apron?
To clean a denim apron, hand wash it with mild detergent and cold water to maintain its color. Hang it to dry in the shade. For stains, spot-treat with vinegar. This method keeps your apron looking fresh.
What Size Jeans Are Best for Making an Apron?
Choose jeans that fit your desired apron size. Larger jeans provide more fabric for coverage and pocket options, while smaller sizes are ideal for a minimalist design. Experiment with different sizes for creative variations.
Are There Any Safety Tips for Cutting Denim?
When cutting denim, make certain you use sharp scissors to prevent fraying and strain. Always cut away from your body to avoid accidents.
0 comments