

You'll find that creating a festive phone bag doesn't require advanced sewing skills or complex patterns. This Christmas stocking design combines practicality with holiday charm, letting you carry your phone in style while spreading seasonal cheer. With just a few fabric pieces and basic stitching techniques, you can transform simple materials into a charming accessory that'll make your friends wonder where you bought it.
Key Takeaways
- Cut two pieces each of festive Christmas fabric, lining, and batting in a stocking shape to fit your phone.
- Layer batting with outer fabric, sew edges together, then stack with lining fabric and sew, leaving a turning opening.
- Create a carrying strap by folding and sewing a long fabric strip, then turning it inside out.
- Attach the strap securely 2 inches below the cuff using strong box stitching for durability.
- Add a decorative cuff at the top of the stocking by sewing it around the circumference with a quarter-inch seam.
Materials Needed

You'll need to gather 2 pieces each of outer fabric, lining fabric, and batting to create your festive phone bag.
Make sure your fabric selections include 1 piece for the decorative cuff, which will form the top of your stocking design.
Your fabric choices should coordinate well together, with the outer fabric setting the Christmas theme, while the lining provides a clean interior finish.
2 Pieces of Outer Fabric
The main outer fabric for your Christmas stocking phone bag requires two identical pieces.
You'll use these pieces to create the front and back of your stocking-shaped holder. Cut these pieces from festive Christmas-themed cotton fabric, such as plaids, prints, or solid colors that match your holiday decor.
2 Pieces of Lining Fabric
For creating the inner lining, cut two identical pieces of fabric - the same dimensions as your outer fabric pieces.
You'll want to use a lightweight cotton or similar material that's comfortable against your phone's surface. Choose a contrasting color or complementary pattern that'll add a special touch to your phone bag's interior.
Make certain your lining fabric is pre-washed and pressed to prevent future shrinkage.
2 Pieces of Batting
Now that your outer and lining fabrics are ready, batting will add a protective layer of padding between them.
You'll need batting pieces that match the size of your stocking pattern to cushion your phone and protect it from scratches. Cut the batting slightly larger than your pattern pieces to allow for shifting during sewing.
1 Piece of Cuff Fabric
When creating your stocking's decorative top, you'll need one piece of contrasting fabric for the cuff.
Choose a fabric that complements your stocking's main color and theme - velvet, faux fur, or festive prints work well.
How to Make a Christmas Stocking Phone Bag
To create your Christmas stocking phone bag, you'll start by cutting the sock shape from your outer fabric, lining fabric, and batting before attaching the batting to the outer fabric's wrong side.
You'll then place the outer fabric pieces right sides together and sew them, followed by layering your materials with lining on both sides of the outer fabric and stitching around the edges.
Finally, you'll prepare and attach the decorative cuff to complete your festive phone holder.
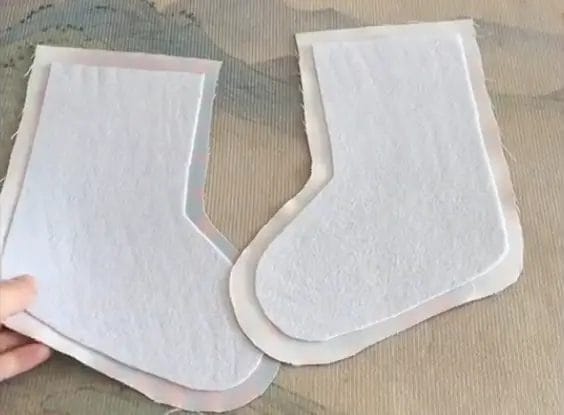
Step 1: Cut the outer fabric, lining fabric, and batting into the shape of a sock.
Gather your materials by laying out the outer fabric, lining fabric, and batting on a flat work surface.
Draw or trace a stocking pattern onto paper, making sure it's large enough to fit your phone with extra space for seam allowance. Cut along the pattern lines carefully.
- Position your paper pattern on the folded outer fabric, pin it securely, and cut around the edges to create two identical pieces.
- Repeat the cutting process with your lining fabric to create two matching pieces.
- Layer the batting underneath and cut one piece slightly smaller than your fabric pieces.
Step 2: Adhere the batting to the back of the outer fabric.
Securing the batting to your outer fabric creates a sturdy foundation for your phone bag.
Place the batting flat on your work surface, then lay the outer fabric on top with the wrong side facing up.
Use fabric adhesive spray, holding the can 6-8 inches away, and apply an even coat across the batting.
Carefully lower the fabric onto the batting, smoothing from the center outward to eliminate air bubbles.
Press firmly with your hands, ensuring complete adhesion.
Let it dry for 15 minutes before proceeding.
This bond will keep your layers from shifting during sewing.
Step 3: Place the two pieces of outer fabric right sides together and sew along the edges.

Once you've allowed sufficient drying time, align your two fabric pieces with their right sides facing each other and their batting sides facing outward.
Pin the edges together carefully to prevent shifting during sewing. Using your sewing machine, stitch along the sides and curved top of the stocking shape, leaving the straight top edge open. Maintain a consistent 1/4-inch seam allowance throughout.
- The fabric pieces should form a stocking silhouette with the toe pointing to the left
- Your pins should be perpendicular to the edges, spaced about 2 inches apart
- The batting layers should feel plush and even against the outside of both fabric pieces
Step 4: Stack the fabrics in the order of lining, outer fabric, and lining, then sew along the edges.
Lay out your fabrics in a specific stacking order, with the first lining piece face up, the outer fabric piece (with batting) face down in the middle, and the second lining piece face up on top.
Pin all three layers together carefully, ensuring they're perfectly aligned.
Using your sewing machine, stitch around the edges with a 1/4-inch seam allowance, but remember to leave a 3-inch opening at the bottom for turning.
Backstitch at the start and end of your seams to secure them.
Double-check that you've caught all layers in your stitching before moving to the next step.
Step 5: Prepare the cuff fabric and sew it.
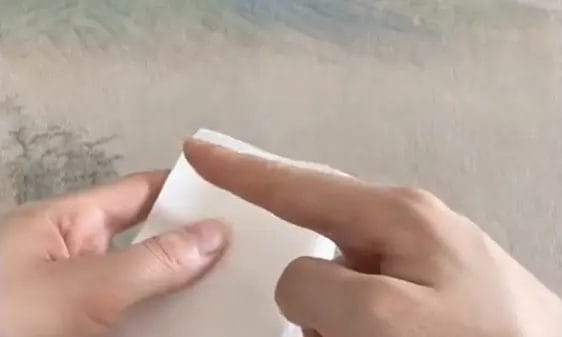
The cuff will give your phone bag that classic Christmas stocking look.
Cut your cuff fabric 2 inches wider than the top opening of your stocking and twice the height you'd like the finished cuff to be.
Fold the fabric in half lengthwise with right sides together, then press with an iron.
- Pin the raw edges of your cuff piece to the top opening of your stocking, matching the seams.
- Sew around the circumference using a 1/4 inch seam allowance.
- Fold the cuff down over the outside of the stocking and press it flat.
Step 6: Sew the cuff fabric around the top of the sock portion and turn the sock bag right side out.
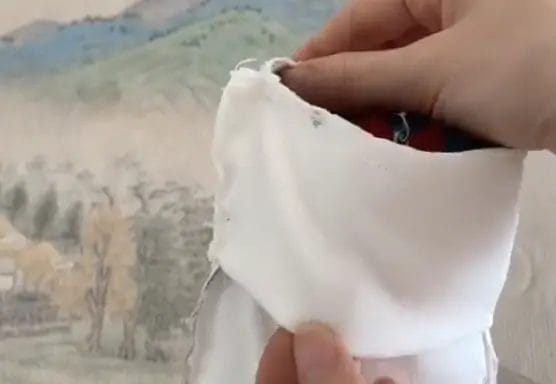
After securing the cuff piece to your stocking's top opening, you'll need to sew the edges together to create a clean, finished look.
Pin the cuff's raw edges together, guaranteeing they're properly aligned. Use a straight stitch to sew along the pinned edge, maintaining a 1/4-inch seam allowance.
Once you've sewn the cuff completely, gently pull the entire stocking right side out through the opening.
Press the cuff with an iron to flatten any wrinkles, and ensure the seam lies flat against the back of your phone bag.
Step 7: Create and attach the strap to the finished Christmas stocking phone bag.
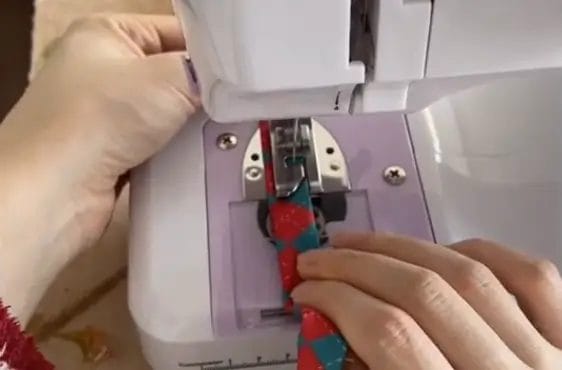
Now that your stocking phone bag is taking shape, you'll need to create a functional strap for easy carrying.
Cut a strip of fabric 2 inches wide and 24 inches long. Fold the strip lengthwise with right sides together, sew along the edge, then turn inside out to create a clean tube. Press flat with an iron.
- Position the strap ends 2 inches below the cuff on each side of the stocking.
- Pin the strap in place, making sure it's not twisted.
- Sew the strap ends securely with a box stitch pattern for durability.
Frequently Asked Questions
Can I Use Glue Instead of Sewing for This Project?
You can use fabric glue, but it won't be as durable as sewing. If you're set on gluing, choose a strong fabric adhesive and let it dry completely before use.
How Long Does the Phone Bag Take to Make?
You'll need about 30-45 minutes to complete the phone bag if you're a beginner. With basic sewing experience, you can finish it in 15-20 minutes or less.
Will This Stocking Phone Bag Fit Larger Smartphone Models?
You'll need to adjust the pattern for larger phones. The standard size fits phones up to 6 inches, but you can easily increase dimensions by adding 1-2 inches to each measurement.
Can I Wash the Stocking Phone Bag in the Washing Machine?
You can hand wash your stocking phone bag with mild soap and cold water. Don't machine wash it, as this could damage the seams and any decorative elements you've added.
What's the Best Fabric Choice if I Want It Waterproof?
You'll want to use waterproof nylon, vinyl-coated polyester, or PUL fabric. For extra protection, add a waterproof lining like ripstop nylon or laminated cotton between your outer and inner layers.
Conclusion
You'll love how your Christmas stocking phone bag turned out! After attaching the strap securely, test the bag's durability by gently placing your phone inside. Double-check all seams to verify they're strong and reinforced. Your festive creation isn't just adorable - it's practical too. Now you've got a unique holiday accessory that keeps your phone safe while spreading Christmas cheer wherever you go.
0 comments