

If you're looking to create professional-quality seams in your sewing projects, you can learn how to sew a flat felled seam. This type of seam produces a sturdy, double-stitched finish that encases raw edges completely. It's perfect for heavy-duty garments and items that need extra reinforcement.
While it might seem complex at first, you can achieve this classic seam style with just a few precise steps. Let's explore how to create this clean, strong finish that's found in everything from jeans to outdoor gear.
Key Takeaways
- Place fabric pieces wrong sides together and sew a 5/8-inch seam using a straight stitch.
- Press the seam flat, then trim one seam allowance edge to half its width.
- Fold the longer seam allowance over the trimmed edge and press it down flat.
- Stitch close to the folded edge through all layers to secure the flat-felled seam.
What Materials Do You Need?
A well-stocked sewing kit forms the foundation for creating professional flat-felled seams.
- Sharp scissors for precise cutting;
- Straight pins to secure your fabric;
- Iron to make the seam allowance flat;
- Sewing machine with appropriate needles;
- Thread that matches your fabric weight;
- Clear ruler or measuring tape to mark the 5/8-inch seam allowance;
- Pattern-marking tools to trace your pieces correctly;
- Seam gauge to ensure consistent trimmed seam measurements.
How to Sew a Flat Felled Seam: A Step-by-Step Tutorial
Let's break down the flat-felled seam technique into manageable steps you'll need to master.
Step 1: Align the Fabric Pieces
Correct fabric alignment is crucial in professionally sewing flat felled seams.
Place your fabric pieces with the wrong sides together, carefully matching the edges. If your sewing pattern specifies a 5/8-inch seam allowance, align the fabric edges accordingly. Check that any pattern notches or markings line up perfectly to verify proper fit.
To secure the edges, insert pins perpendicular to the seam line, placing them about an inch apart.
Step 2: Sew the Initial Seam
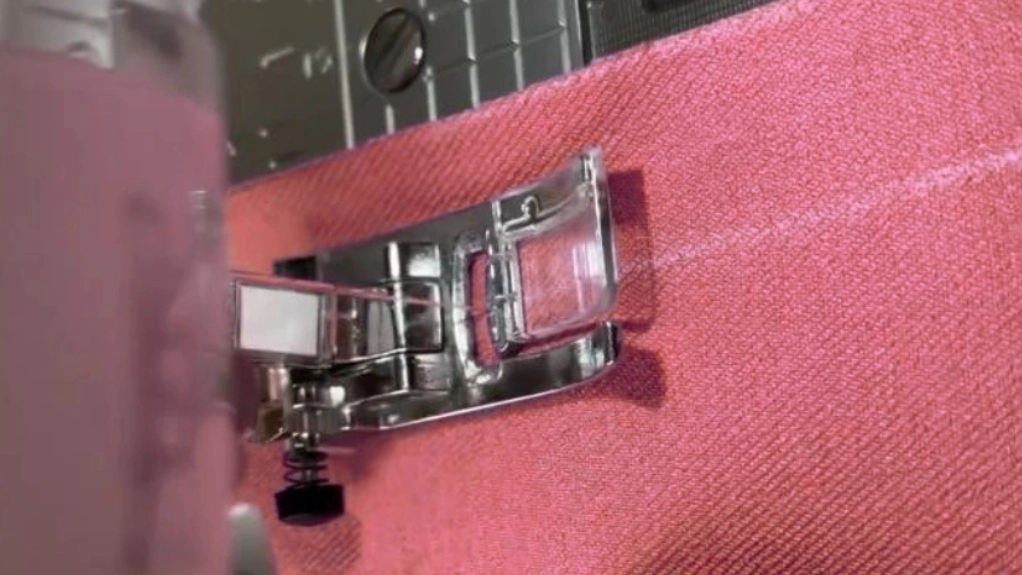
With your fabric pieces properly aligned, you're ready to create the initial seam. It forms the foundation of your flat-felled construction.
Set your machine to a straight stitch and position your fabric at the edge of your presser foot.
Sew along the fabric edge, maintaining a consistent 5/8 inch seam allowance. Use pins if needed to prevent shifting as you work.
Step 3: Trim the Seam Allowance
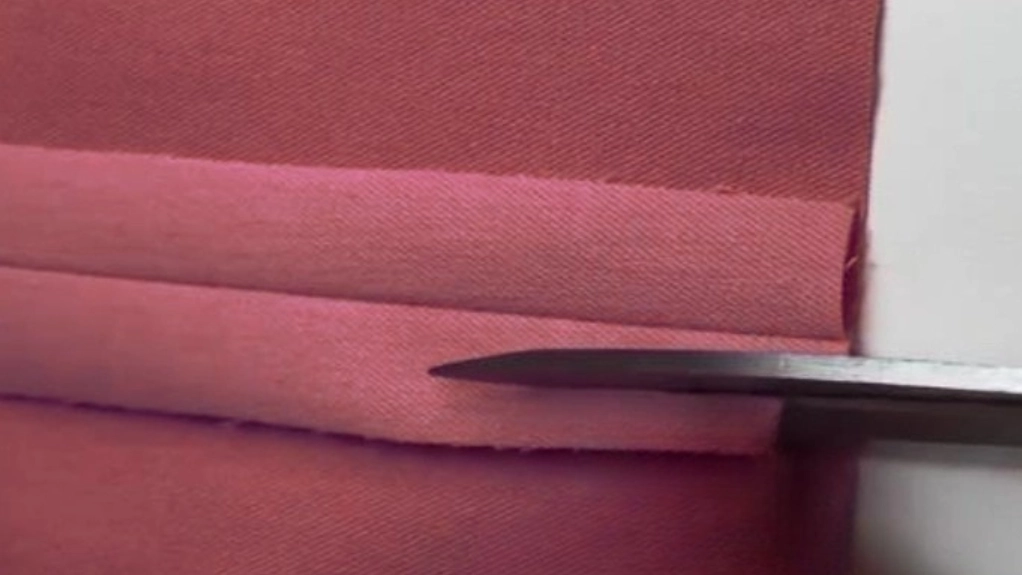
After finishing your initial seam, you need to trim one side of the seam allowance. According to the pattern instructions, determine the direction in which you will press your seam. If you press the seam to the left, you'll reduce the left seam allowance to half of its original width.
Carefully trim the left seam allowance to approximately 3/8 inch while keeping the right side untrimmed. Confirm you don't cut into the stitching line as you trim the seam.
Now, unfold the fabric and press the seam allowance to the side of the trimmed seam allowance.
Step 4: Sew the Second Seam
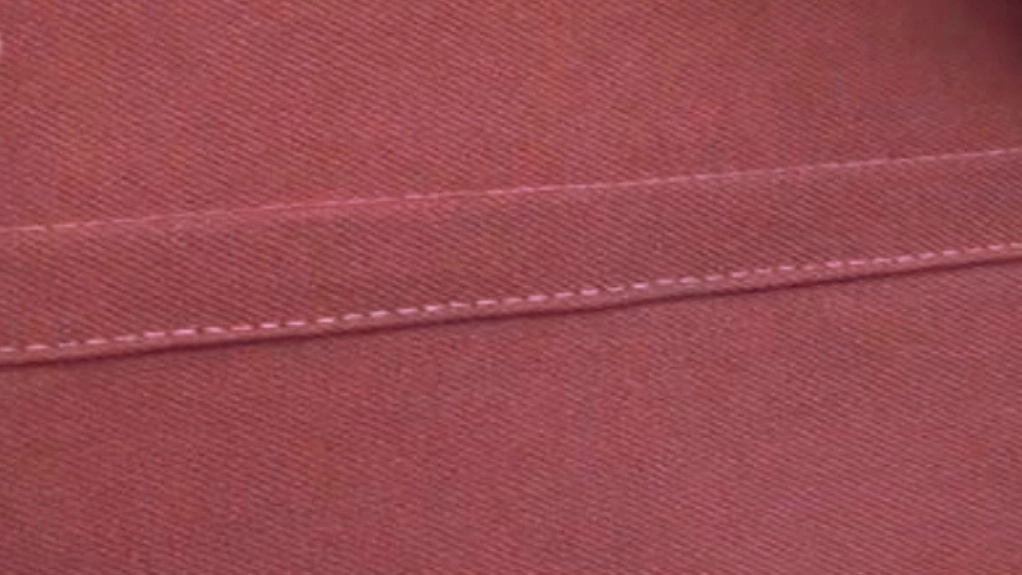
Take the untrimmed seam allowance and fold it over the trimmed portion. Here, make sure the raw edge is enclosed completely within the fold.
Press the folded seam firmly with your iron, working slowly to set a sharp crease. Pin the folded edge in place as you go to maintain even tension.
Then, sew carefully near the fold to finish the seam.
What Are Flat-Felled Seams Used for?
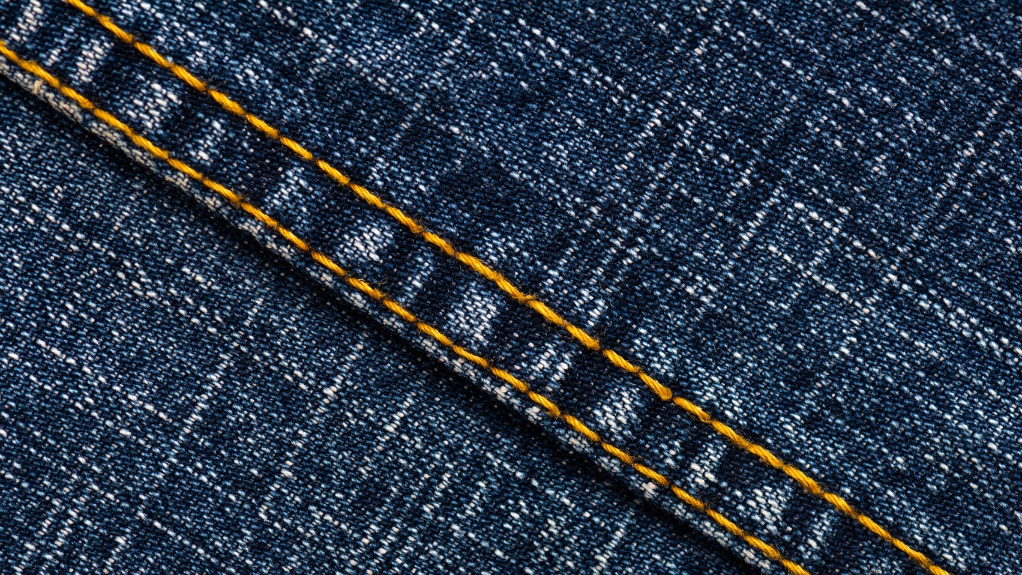
Flat-felled seams are used as the backbone of durable garment construction. They offer both strength and professional finishing.
You'll find these enclosed seams most commonly in jeans, activewear, and children's clothing where durability is essential. The strong seam structure prevents fraying and can withstand frequent washing.
The neat seam finish looks polished on both sides of your garment. This makes it ideal for unlined pieces where the interior is visible.
You can use flat-felled seams on both straight and curved seams. This gives you versatility in your sewing projects. They're particularly valuable for sportswear and workwear where strength and comfort are paramount.
Conclusion
You've now mastered the flat-felled seam technique that's essential for durable, professional-looking garments. With practice, you'll create strong, polished seams perfect for activewear, denim, and other hardworking fabrics.
Remember to maintain precise measurements and careful pressing throughout the process. If you're looking to strengthen your sewing skills, try incorporating flat-felled seams into your next shirt, jacket, or pair of pants.
Learn more sewing tips on the Longan Craft Blog, and dive into the fabric world with Longan Craft!
FAQs
How to Do a Flat Felled Seam Step by Step?
Place the wrong sides together, sew a 5/8" seam, press open, and trim one edge shorter. Fold the wider edge over the narrow one and press flat. Pin and stitch along the fold to secure your flat-felled seam.
Why Would Someone Use a Flat Felled Seam Rather Than Simply Overlock the Seam?
You'll get a stronger, more durable seam that's flat on both sides and won't fray. It's smoother against your skin and looks more professional than overlocking, making it perfect for high-quality garments.
What Is the Difference Between Flat Felled and French Seam?
Flat-felled seams create strong, visible seams by enclosing raw edges on the outside. French seams hide edges between two seams inside the garment, offering a delicate, clean finish.
How to Sew a Hidden Seam by Hand?
Place the right sides together and make small backstitches along the seam line. Press open, fold seam allowance over raw edge, and use slip stitches to secure it. You'll want to catch just a few threads for invisibility.
0 comments