

Do you have a pair of pants that's too long? Are you ready to fix that with your sewing machine? Learning how to hem pants might seem intimidating at first. But it's actually a straightforward process that'll save you money and extend your wardrobe's life.
With the right tools and precise measurements, you can achieve professional-looking results at home. Before cutting and stitching, let's ensure you've got everything you need for a successful hemming project.
Key Takeaways
- Measure and mark the desired hem length while wearing pants with the intended shoes. Use straight pins to secure even measurements.
- Turn pants inside out, trim extra fabric, fold at marked hemline, and pin in place before sewing.
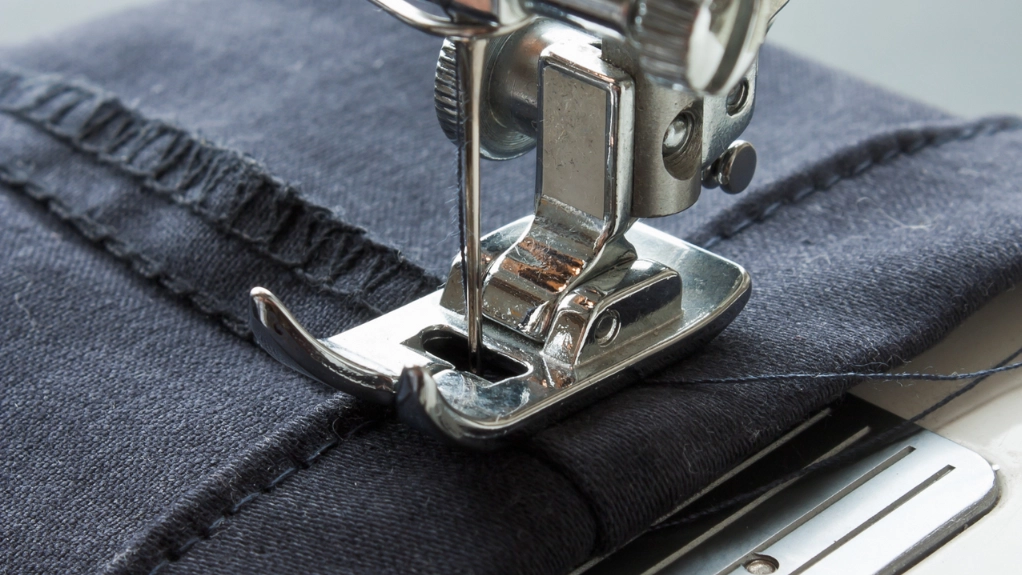
- Install blind hem foot on your machine, select blind hem stitch, and position pant leg around machine's free arm.
- Start sewing at the inside leg seam, using locking stitches at the beginning and end for secure hold.
- Press completed hem with appropriate iron temperature. Allow it to cool completely for best shape retention.
Tools and Materials for Hemming Pants

Success in hemming pants begins with gathering the right tools and materials before you start.
You'll need a sewing machine equipped with a blind hem foot. Collect a seam ripper to remove the original hem, straight pins to secure your fabric, and matching thread that blends with your pants' color.
Don't forget your measuring tools: a ruler or hot hem ruler for accurate measurements and tailor's chalk or a fabric marker for marking.
You'll also need a reliable iron and pressing mat to create crisp folds, plus sharp scissors or a rotary cutter for clean fabric cuts.
How to Hem Pants With a Sewing Machine: Step-by-Step Guide
Once you have everything ready, it's time to prepare your pants for hemming. Here's a step-by-step tutorial.
Step 1: Measure the Desired Hem Length
Accurate measurement marks the essential first step in achieving a professional-looking hem. To measure the new length, put on your pants with the shoes you'll typically wear with them. Stand straight in front of a full-length mirror to guarantee proper positioning.
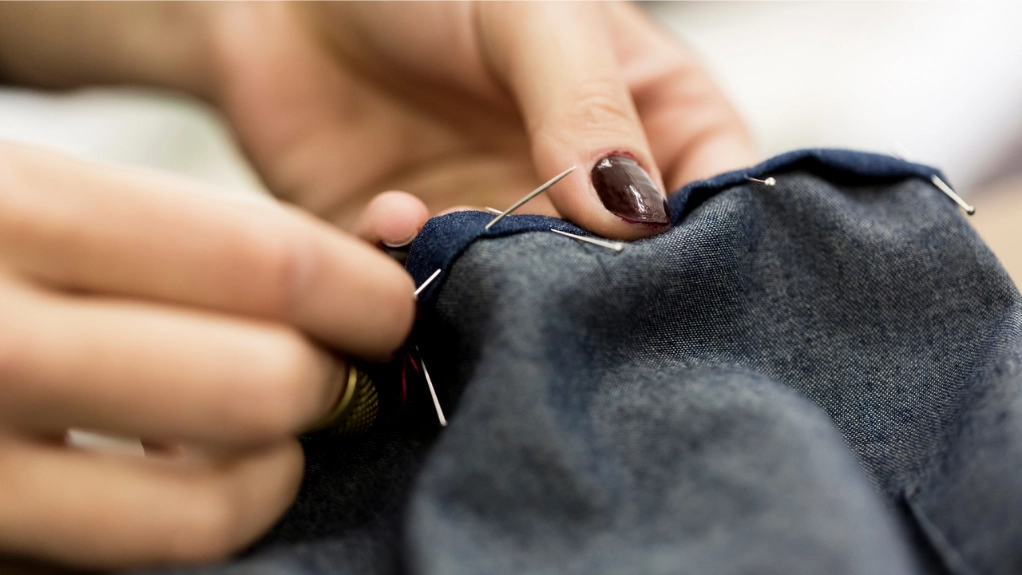
Have someone help you pin around each pant leg at your desired length, or carefully do it yourself. Turn and check the placement from all angles to confirm evenness.
Use a measuring tape to verify consistent length around both legs, marking your hem allowance with tailor's chalk. Remember to add a 1-inch seam allowance for dress pants and a 1/2-inch seam allowance for jeans when marking your cutting line.
Step 2: Cut Excess Fabric
Carefully cut away excess fabric to create a clean foundation for your new hem.
Turn the pants inside out. Using sharp fabric scissors, cut off the extra fabric along your marked line. Work slowly and precisely, cutting through only one layer at a time to avoid mistakes.
For fabrics prone to fraying, leave a slightly larger allowance at the raw edge. Then, repeat the same cutting process on the second pant leg for perfect symmetry.
Step 3: Fold and Pin the Hem
With your freshly cut pants ready, it's time to create clean, professional folds that will form the foundation of your new hem.
Turn the raw edge under by ¾ inch and press it firmly with your iron to prevent fraying.
Next, fold up the hem by 2 inches and press the new hem again to create a crisp crease.
Measure from the top to verify the fold is even all around the pant leg. Place pins every few inches to secure the hem in position.
Before moving to your sewing machine, double-check that the fold aligns perfectly throughout.
Step 4: Set Up the Sewing Machine
Once your hem is pressed and pinned, proper machine setup guarantees smooth, professional results.
Select the blind hem stitch on your sewing machine and attach the blind hem foot. Make sure the guide aligns perfectly with the folded edge of your fabric.
Remove the extension and accessory box to access the free arm; you'll need to maneuver the pant leg easily.
Place your prepared pant leg around the free arm, ensuring it's properly positioned for sewing.
Double-check that you've selected the right stitch before starting. This specialized stitch will create an almost invisible finish on your folded hem.
Step 5: Sew the Hem
Secure the pant leg around the free arm of your sewing machine. Align the folded edge with your blind hem foot's guide for precise stitching. Select a straight stitch that matches your pants' fabric and thread color.
Start at the inside leg seam with a locking stitch to prevent unraveling. Maintain steady pressure as you guide the fabric, ensuring the hem stays even.
Continue sewing around the entire pant leg at a consistent pace. When you reach the starting point, secure the stitching with a few reverse stitches. Trim excess threads and inspect both sides for a clean, professional finish.
Step 6: Finish the Hem Edges (If Necessary)
If your fabric tends to fray, you'll need to finish the hem edges using one of these methods:
- Use a serger to create a clean, professional finish that prevents unraveling
- Apply a zigzag stitch with your sewing machine at medium width
- Create a double fold to enclose the raw edges completely
Before proceeding, test your chosen method on a fabric scrap to verify compatibility.
Step 7: Press the Finished Hem
Proper pressing transforms your newly hemmed pants from homemade-looking to professionally finished.
- Set your iron to the appropriate temperature for your fabric type to avoid damage.
- Place the pants on your ironing board with the hem facing up.
- Carefully press the hem without dragging the iron across the fabric. Instead, lift and press down firmly.
- Add light steam to remove any creases and help shape the fabric.
- Once you've pressed the entire hem, let it cool completely to maintain its shape.
This cooling period is essential for a professional finish that will effectively hold the new length.
Troubleshooting Common Issues
Hemming pants can be a straightforward task, but sometimes challenges arise that can complicate the process.
Uneven Hems
Uneven hems can quickly turn a professional-looking alteration into a visible mistake. When you hem your pants with a machine, accuracy in measurement is essential.
Measure from the top of both pant legs to guarantee they're identical before making any cuts.
Check the alignment carefully by pinning the hem while the pants are worn. Then, verify measurements again before sewing. If you notice unevenness during the process, stop and reassess your measurements.
Keep the fabric taut while sewing and monitor your machine's tension settings. If the finished hem is uneven, you'll need to remove the stitches and start fresh with precise measurements.
Puckering Fabric
Puckering fabric stands out as one of the most frustrating issues you'll encounter.
First, check your machine's tension settings to guarantee they're balanced. Switch to a lightweight needle that matches your fabric type. Adjust the stitch length to slightly longer settings.
If puckering persists, install a walking foot attachment to feed layers evenly through the machine.
Remember to press and pin your hem carefully before sewing. Proper preparation prevents most puckering issues during the hemming process.
Thread Breaking
Threading issues can quickly derail your pants-hemming project, especially if you're dealing with constant thread breakage.
When hemming pants with a sewing machine using a straight stitch, verify you've selected thread that matches both your fabric weight and color.
Adjust the tension settings carefully. Too tight or too loose can cause snapping.
Before starting, check the needle for damage or dullness. Replace it if you spot any imperfections.
Remember to clean the sewing machine regularly to prevent lint buildup. Pay special attention to the threading mechanism. Incorrect threading is often the main culprit behind breakage issues.
How to Hem Pants Without a Sewing Machine
Using a sewing machine provides quick results. But you can also hem pants by hand sewing with just a few basic tools and techniques.
Start by folding the fabric to your desired length and marking it with tailor's chalk.
Choose a needle and thread that match your fabric.
Create a blind hem stitch by catching just a few threads from the pant fabric for an invisible finish.
If you're short on time, consider using hem tape. Simply press it between fabric layers with a hot iron for a quick, secure hold.
Creative Hemming Techniques for Pants

You'll discover many creative hemming techniques for elevating your pants. Here are some methods you can try:
- Blind Hem Stitch: Use a blind hem foot for an almost invisible finish on the outside.
- Frayed Hem: Cut to the desired length and pull threads from the edge for a trendy frayed look.
- Cuffed Hem: Fold the hem up 2-3 inches and sew it in place for added structure and style.
- Bias Tape Hem: Sew bias tape around the hem's edge for a decorative and neat finish.
- Decorative Stitching: Use a decorative stitch pattern on your sewing machine along the hemline for flair.
- Ladder Stitch Hem: Hand-sew a ladder stitch to create an invisible finish at the hem.
- Elastic Hem: Sew a casing at the hem and insert elastic for comfort and a modern look.
- Patchwork Hem: Sew patches of different fabrics along the hemline for a unique, personalized appearance.
- Zippered Hem: Insert a zipper into the hem for adjustable length options.
- Hemming Tape: Use fabric hemming tape with an iron for a quick, no-sew solution.
Conclusion
Learning to hem your own pants with a sewing machine isn't as intimidating as you might think. With the right tools, proper measurements, and careful attention to detail, you'll master this essential tailoring skill.
Whether you're shortening dress slacks or adjusting casual wear, you can now hem pants at home easily. Remember to practice on scrap fabric first; you'll be hemming like a pro in no time.
Learn more sewing tips on the Longan Craft Blog, and dive into the fabric world with Longan Craft!
FAQs
What Is the Best Stitch to Hem Pants With a Sewing Machine?
Use a blind hem stitch for a nearly invisible finish on dress pants. If you're working with casual pants, a straight stitch works well, while knits need a zigzag stitch for flexibility.
How to Do an Invisible Hem on a Sewing Machine?
First, fold and press your hem, tucking the raw edge under. Use your machine's blind hem stitch with a blind hem foot. Align the folded edge with the guide, letting the needle catch minimally as you sew.
How to Hem Pants Without a Stitch Showing?
Use your sewing machine's blind hem stitch, carefully fold and press the fabric, then sew with matching thread. Keep the guide aligned with the fold while stitching. Press again after sewing for a nearly invisible finish.
How Do You Hem Pants for Beginners?
First, try on the pants with shoes and pin the desired length. Turn them inside out, mark and cut excess fabric. Fold and press the hem, then sew along the edge with your machine's straight stitch.
0 comments