

If you're seeking a practical solution for organizing small items, a diy pocket organizer is your answer. You'll find this DIY project both rewarding and functional, transforming simple fabric pieces into a versatile organizer for your home. Whether you're storing craft supplies, jewelry accessories, or office materials, this project requires basic sewing skills and just a few hours of your time. Let's explore how you can create this handy storage solution step by step.
Key Takeaways
- Prepare 3 base fabrics of 22x22 cm and 3 pocket pieces each for creating storage compartments.
- Sew the edges of the diy hanging organizer.
- Attach binding strips along all edges to prevent fraying and provide a professional finish.
- Create hanging loops using ribbon strips, securing them to the top corners with multiple stitch lines.
Materials Needed
You'll need several pieces of cotton fabric, including fabric and lining for the base and cloth for individual pockets, along with binding strips to create a clean finish on all edges.
Essential tools for this project include sharp scissors for precise cutting and a pen for marking your measurements and guidelines.
A basic sewing needle and sturdy thread will allow you to join the pieces together and create durable seams that withstand regular use.
- Fabric (cotton fabric in various sizes): Cotton fabric serves as the foundation for creating a functional storage hanging pocket. You'll need to cut your fabric into specific dimensions: 2 pieces of cotton fabric (22x22cm) and 1 piece of lining for the base, 3 pieces of cotton fabric (22x30cm, 22x20cm, 22x12cm) for the pocket. Remember to iron and finish all edges carefully before assembly to ensure your pockets look professional and last longer.
- Binding strips: Once you've selected your cotton fabric, binding strips represent the next key material for your storage pocket project. You'll need to cut these strips accurately to create clean, professional edges for your organizer with pockets. For a polished finish, carefully pin your binding strips in place before sewing them securely to the pocket edges.
- Scissors: Sharp, reliable scissors stand as essential tools for creating your storage hanging pocket.
- Pen: A reliable marking pen serves as a crucial tool for creating your storage hanging pocket project. When making your hanging pocket organizer, use a fabric marker or disappearing ink pen to ensure precise measurements and clean lines.
- Needle and thread: Selecting the right needle and thread combination forms the foundation of your storage hanging pocket project. Test your needle and thread combination on a scrap piece of your chosen fabric before starting the main project.
- Clips (for holding fabric in place): You'll need clips in various sizes to hold multiple layers of thick materials. These tools are incredibly user-friendly - just squeeze to open and release to secure your fabric.
DIY Storage Hanging Pocket: Step-by-Step Instructions
Now I will guide you through the steps to create a heart-shaped storage hanging pocket that you can use to hold various items.
Step 1: Prepare the Bottom Fabric
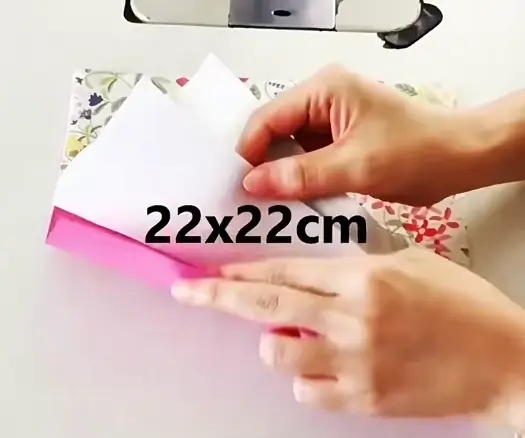
Before diving into the pockets, you'll need to properly prepare your base fabric.
Start by cutting 2 pieces of cotton fabric and a lining fabric to a size of 22x22cm. Stack the cotton fabric, interfacing, and cotton fabric in that order, with the size of 22x22 cm.
When selecting your fabric, consider a pattern or color that will complement your space.
Step 2: Create the Layered Fabric Structure
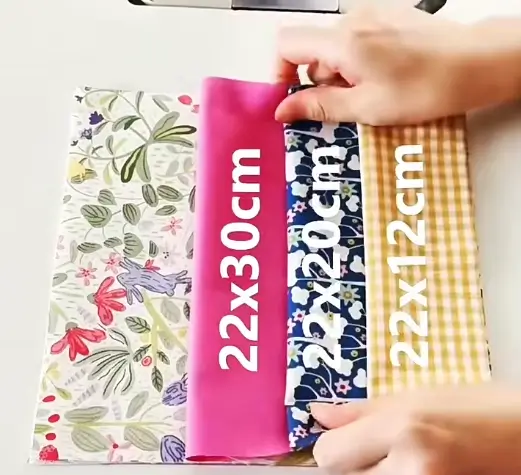
Next, take the larger piece of fabric (22x30cm) and fold it in half. This will be one layer of your heart-shaped pocket.
Then, take the 22x20cm piece, fold it in half, and place it on top of the larger piece.
Finally, fold the 22x12cm piece and add it on top of the previous layers. The folded edges should align, creating a layered structure.
Step 3: Sew the Layers Together
Carefully position your three pocket pieces side by side on the base fabric. Use clips or pins around the sides to hold everything in place.
Sew around the edges of the stacked layers to secure them to the base fabric. A straight stitch works perfectly for this step. Make sure to sew around the sides and bottom, leaving the top open to create your pocket.
Step 4: Create the Heart Template
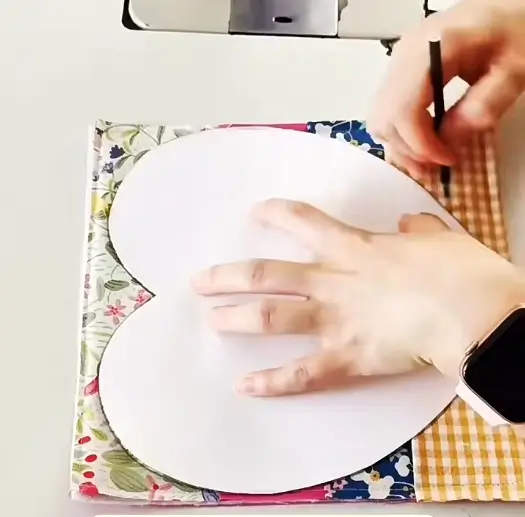
After securing all layers, you’ll need to create a heart shape for your pocket.
Take a piece of white paper and fold it in half. Draw a half-heart shape along the fold and cut it out. This will be your heart template.
Once you have the template, place it on the fabric layers and trace around it using a pen. This heart shape will define the outline of your hanging pocket.
Step 5: Trace and Sew the Heart Shape
After tracing the heart shape onto your fabric, it’s time to sew it.
Start sewing along the traced chalk lines, keeping a consistent seam allowance and remember to backstitch at both ends for durability. This will create the main pocket shape.
Take your time to ensure that the sewing is even and neat, as this will contribute to the overall look of your hanging pocket organizer.
Step 6: Trim Excess Fabric
Once you’ve sewn the heart shape, carefully trim any excess fabric along the edges. Ensure that you leave a small margin of fabric to prevent fraying. Trimming will give your pocket a clean and polished appearance.
Step 7: Mark the Center Line and Attach the Fabric Strap
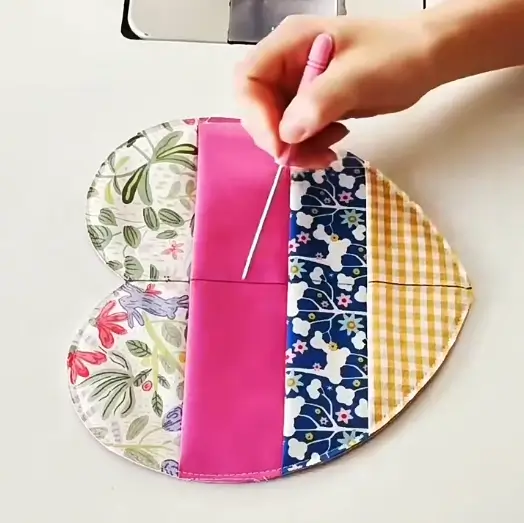
Next, use your pen to draw a straight line down the center of the heart. This line is essential for adding detail to your pocket.
Now, sew along this line to create two separate sections within the heart pocket. This design will help organize the items you choose to store inside.
Then create a loop for hanging, cut a piece of fabric measuring 25x1.5cm.
Fold it in half and sew the long side to secure it. Attach this strap to the top center of the heart pocket by sewing it securely in place. This will allow you to easily hang your organizer on a wall, door, or peg.
Step 8: Add Binding to the Edges
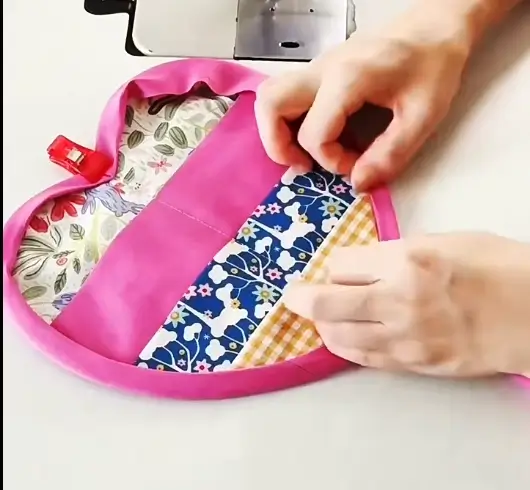
To finish your heart pocket and give it a professional look, take the binding strips (4cm wide) and wrap them around the edges of the heart.
Sew the binding in place all around, ensuring that the raw edges are tucked in neatly. This step not only adds a decorative element but also reinforces the edges for durability.
Once all the sewing is done, take a moment to press the seams with an iron. This will help the fabric lay flat and give your hanging pocket a crisp finish. Now your heart-shaped storage hanging pocket is ready to use!
Frequently Asked Questions
How to Make a Hanging Pocket Organizer Out of Fabric?
You'll need to cut fabric pieces, sew pockets onto a base fabric, fold under seams, attach hanging loops, and add grommets. Pin everything carefully, then stitch securely using your sewing machine for durability.
How to Make a DIY Pocket Square?
Cut a 16-inch fabric square, fold edges inward 1/4 inch, and press. Sew the folded edges for a clean finish. You'll want to iron it flat and consider adding decorative stitching for a personal touch.
How to Make a Hanging Closet Organizer?
Cut your canvas and pocket fabric to size, sew pockets onto the base, fold top edges, add grommets for hanging. Install a dowel rod through the top, and you'll have a functional closet organizer.
Conclusion
You've now created a practical storage hanging pocket that's perfect for organizing small items. Each of the six pockets provides ample space, while the heart decorations add a personal touch. The secure binding and sturdy hanging strap ensure long-lasting durability. Your new organizer maximizes vertical space and keeps essentials within easy reach. Remember to check all seams and reinforce stitching where needed for best results.
0 comments